Program Design
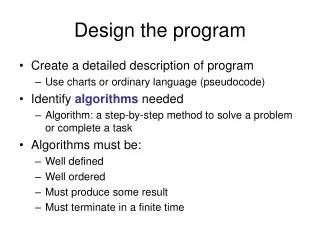
9. Program Design. Simple Program Design Third Edition A Step-by-Step Approach. 9. Objectives. To further develop modularization using a more complex problem To introduce cohesion as a measure of the internal strength of a module


Program Design
E N D
Presentation Transcript
9 Program Design Simple Program Design Third Edition A Step-by-Step Approach
9 Objectives • To further develop modularization using a more complex problem • To introduce cohesion as a measure of the internal strength of a module • To introduce coupling as a measure of the extent of information interchange between modules
9 Steps in Modularization • Refer to the list of six steps in Chapter 8 to be followed when using top-down modular design, also shown on page 127 of the textbook • Example 9.1 Calculate vehicle registration costs • A program is required to calculate and print the registration cost of a new vehicle that a customer has ordered • The program is to be interactive
9 Example 9.1 Calculate vehicle registration costs • The input details required are: • Owner’s name • Vehicle make • Vehicle model • Weight (in kg) • Body type (sedan or wagon) • Private or business code (‘P’’ or ‘B’) • Wholesale price of vehicle • A federal tax is to be paid
9 Example 9.1 Calculate vehicle registration costs • A) Define the problem (see figure at the bottom of page 128 of the textbook) • B) Group the activities into modules 1. Get input details 2. Display details to screen 3. The following activites in the processing section of the algorithm all contribute to the performance of a single task: to calculate the total amount payable. The name of this module will be Calculate_total_amount_payable
9 Example 9.1 Calculate vehicle registration costs • calculate tax_levy • calculate weight_tax • calculate insurance_premium • calculate total_registration_charges • calculate federal_tax • calculate total_amount_payable • C) Constructs hierarchy chart (see figure at the bottom of page 129 of the textbook)
9 Example 9.1 Calculate vehicle registration costs • D) Establish the logic of the mainline of the algorithm using pseudocode • Refer to the code shown on page 130 of the textbook • The mainline appears to be very simple • It consists of a Read before the loop, calls to its three subordinate modules within the loop, and a Read just before the end of the loop
9 Example 9.1 Calculate vehicle registration costs • E) Develop the pseudocode for each successive module in the hierarchy chart 1. Get_vehicle_details is a module that prompts for and reads the required fields as shown on page 130 of the textbook 2. Calculate_total_amount_payable is a module which calls two other modules as shown on page 130 of the textbook 3. Calculate_federal_tax contains the steps required to calculate the federal tax as shown on page 131 of the textbook 4. Calculate_total_registration contains all the processing required to calculate the total registration costs as shown on page 131 of the textbook
9 Example 9.1 Calculate vehicle registration costs 5. Display_registration_details is a module which displays the required output onto the screen as listed on page 131 of the textbook • F) Desk check the solution algorithm (i) Input data: (see figure at the top of page 132 of the textbook) (ii) Expected results (as shown on page 132 of the textbook) (iii) Desk check table (see figure at bottom of page 132 of the textbook)
9 Module Cohesion • Programmers often need guidance in determining what makes a good module • Common queries are ‘How big should a module be?’, ‘Is this module too small?’, or ‘Should I put all the read statements in one module?’ • Edward Yourdon and Larry Constantine established seven levels of cohesion and placed them in a scale from the weakest to the strongest
9 Coincidental Cohesion • The weakest form of cohesion a module can have is coincidental cohesion • It occurs when elements are collected into a module simply because they happen to fall together • These type of modules are rare in today’s programming practice • There is an example of the pseudocode of a module which has coincidental cohesion on page 134 of the textbook
9 Coincidental Cohesion • Coincidental cohesion typically occurs as a result of one of the following conditions: • an existing program may have been arbitrarily segmented into smaller modules because of hardware constrictions on the operation of the program • existing modules may have been arbitrarily subdivided to conform to a badly considered programming standard • a number of existing modules have been combined into one module either to reduce the number of modules in a program or to increase the number of statements in a module
9 Logical Cohesion • Logical cohesion occurs when the elements of a module are grouped together according to a certain class of activity • An example might be a module that performs all the read statements for three different files: a sort of ‘Read_all_files’ module • A pseudocode example for a ‘Read_all_files’ module is shown on page 134 of the textbook
9 Temporal Cohesion • Temporal cohesion occurs when the elements of a module are grouped together because they are related by time • Typical examples are initialization and finalization modules • A temporally cohesive module can be considered a logically cohesive module, where time is the related activity • An example of the pseudocode for a temporally cohesive module is depicted on page 135 of the textbook
9 Procedural Cohesion • Procedural cohesion occurs when the elements of a module are related because they operate according to a particular procedure • The modules contain elements related more to program procedure than to program function • A typical example of a procedurally cohesive module is the mainline of a program
9 Communicational Cohesion • Communicational cohesion occurs when the elements of a module are grouped together because they all operate on the same (central) piece of data • Communicationally cohesive modules are commonly found in business applications • Communicational cohesion is acceptable because it is data related • The weakness of a communicationally cohesive module lies in the fact that usually a combination of processing for a particular piece of data is performed
9 Sequential Cohesion • Sequential cohesion occurs when a module contains elements that depend on the processing of previous elements • Sequential cohesion is stronger than communicational cohesion because it is more problem oriented • Its weakness lies only in the fact that the module may perform multiple functions or fragments of functions
9 Functional Cohesion • Functional cohesion occurs when all the elements of a module contribute to the performance of a single specific task • Mathematically oriented modules are a good example of functional cohesion, as the elements making up the module form an integral part of the calculation
9 Summary of Cohesion Levels • When designing a program’s structure, you should try to form modules that have a single problem-related function • In some cases it is not easy to construct a program where every module has functional cohesion • Some modules may contain lower levels of cohesion, or even a combination of types of cohesion • It is important that you can recognize the various cohesion levels and justify a module with a lower cohesion in a particular set of circumstances
9 Module Coupling • When designing a solution algorithm, look not only at the cohesion of modules, but also at the flow of information between modules • You should aim to achieve module independence • These connections are called interfaces or couples • Coupling is a measure of the extent of information interchange between modules • Refer students to the figure at the bottom of page 138 of the textbook
9 Common Coupling • Common coupling occurs when modules reference the same global data structure • Refer to the figure on page 139 of the textbook to help demonstrate this concept
9 External Coupling • External coupling occurs when two or more modules access the same global data variable • It is similar to common coupling except that the global data is an elementary data item, rather than a data structure • The figure at the top of page 140 helps to illustrate this concept
9 Control Coupling • Control coupling occurs when a module passes another module a control variable that is intended to control the other module’s logic • The weakness of control coupled modules is that the passing of the control field between modules implies that one module is aware of the internal logic of the other • Illustrate this concept using the figure on the bottom of page 140
9 Stamp Coupling • Stamp coupling occurs when one module passes a non-global data structure to another module • Stamp-coupled modules demonstrate loose coupling and offer good module design quality • Refer to the figure on page 141 of the textbook to better understand this concept
9 Data Coupling • Data coupling occurs when a module passes a non-global data variable to another module • The figure on page 142 of the textbook is a good depiction of this type of coupling • Modules that are data coupled demonstrate the loosest coupling and offer the best module design qualities
9 A Summary of Coupling Levels • When designing solution algorithms, you should aim towards module independence and a minimum of information interchange between modules • If the programming language allows it, try to uncouple each module from its surroundings using the two steps on page 143 of the textbook • Your prime consideration must be to produce modules and programs that are easily understood and modified
9 Summary • This chapter revised the six steps to be followed when using top-down modular design to develop a solution to a typical programming problem • Cohesion and coupling were introduced and must be considered when designing modular programs • Cohesion is a measure of the internal strength of a module • Coupling is a measure of the extent of information interchange between modules