Download
1 / 13
130 likes | 341 Vues

E N D
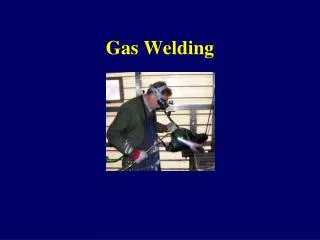
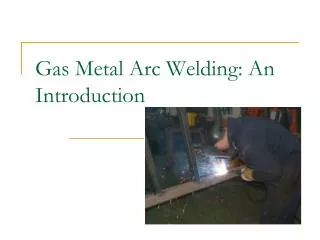
2. Introduction to Gas Welding Weld: to join by fusion
Fusion: to melt together
Gas: any fluid substance that can expand without limit.
Compress: to apply pressure to reduce volume.
Flammable: to burn easily
3. Compressed Gas Safety A compressed gas is dangerous simply because it is under pressure and is always trying to get free.
Store flammable gas cylinders away from oxygen cylinders.
Cylinders should always remain upright and secured
Do not bump or put pressure on cylinder valves or gauges
Do not expose cylinders to oil or grease
Be sure work area is well ventilated
Cylinders not attached to welding equipment must have safety cap installed
Use your eyes, ears, and nose to detect safety hazards.
4. Oxyacetylene Equipment Major Parts
Torch - an assembly that mixes gases and discharges them to support a controlled flame.
Cylinder � a long round tank with very thick walls built to hold gasses under great pressure.
Valves & Regulators � control the flow of gasses
Gauges � indicate the pressure in the hose, tank, or manifold.
Hoses � flexible lines that carry the gasses.
5. Oxyacetylene Set-Up When in use the cylinder valve must be accessible in case of emergency
Acetylene equipment is colored red and threaded left hand
Oxygen equipment is colored green and threaded right hand
All connections must be gas tight
6. Procedure for turning on cylinder Close acetylene valve on torch
Close oxygen valve on torch
Turn acetylene regulator handle until no spring tension is felt
Turn oxygen regulator handle until no spring tension is felt
Open oxygen cylinder slowly until pressure gauge responds. Open valve completely
Open acetylene valve half turn
Turn the oxygen regulator handle until the pressure gauge reads 10psi.
Turn the acetylene regulator handle until the pressure gauge reads 5psi
7. Testing for leaks A leak test should be performed when equipment is first set-up, cylinders changed, or smell of acetylene is present.
Use soapy water to test for leaks.
If a leak is found tighten fitting or disassemble and fix problem
8. Lighting and Adjusting Torches Put on leather gloves and goggles with a No. 5 lens
Open acetylene valve 1/8th turn
Use a spark lighter to ignite flame
Open acetylene valve until flame is �� off the torch tip.
Turn on oxygen valve slowly and watch inner flame shorten. Continue to add oxygen until the long inner flame just fits the cone.
9. Shutting down torches and bleeding the system Turn off the acetylene torch first then turn off the oxygen torch next
Turn off the acetylene at the cylinder
Turn off the oxygen at the cylinder
Open the acetylene valve at the torch, bleed lines, and retighten valve.
Open the oxygen valve at the torch, bleed the lines, close the valve at the torch.
Turn all regulator handles until no spring pressure is felt.
10. Welding with Oxyacetylene Factors affecting the weld
The tip � tip selection will depend on the thickness of material and desired penetration. The larger the tip the more heat available.
The rod � the rod should be made of the same material as the base metal. Filler metal adds volume to the joint.
11. Pushing the puddle The first step in gas welding is to control the molten puddle.
Adjust your flame to an neutral flame
Place tip at one end of the base metal with the tip facing in the direction of travel and about 1/8� space between cone and metal and at a 45� angle.
When metal begins to melt start to move torch down the plate in a small circular motion
When finished move flame slowly away from puddle.
12. Using filler rod Using filler rod is much like pushing a puddle.
Start procedure just as pushing a puddle
Just as molten pool starts to form place filler metal an leading edge of the pool.
Move the torch and filler rod together keeping filler rod at leading edge of the molten pool
Be sure the filler rod is being melted by the molten pool and not the torch flame itself.
13. Practice, Practice, Practice