Download
1 / 66
660 likes | 682 Vues
This presentation demonstrates various methods for training technicians in graft placement for hair transplantation, including non-patient training using styrofoam heads and preserved grafts, as well as patient training with live tissue. It covers techniques, angles, and directions for proper graft placement.

E N D
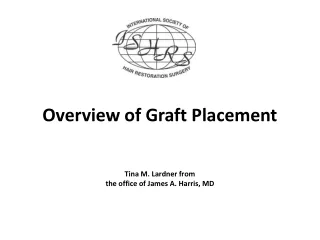
Overview of Graft Placement Tina M. Lardner from the office of James A. Harris, MD
Graft Placement • This presentation contains several videos. • When you see this flashing icon, go to the video page to view the video.
Introduction Graft placement is a critical part of hair transplantation. Each patient is different and the process requires someone who can think critically about many different factors.
Demonstration and Instruction • Methods for training technicians • Non-patient training: Allows you to give verbal and manual cues to trainee. • Pros: Corrections can be made immediately. • Cons: Not working with “real” tissue; surgery conditions are somewhat different. Using styrofoam head and preserved grafts
Demonstration and Instruction • Trainer Placer Board (Non-patient training) • Demonstrates how to implant effectively to eliminate inappropriate movements • Standardizes, simplifies and systematizes the training procedure • Increases the percentage of trainable applicants • Decreases time to competency and clinic expenses • Enhances dexterity, eye/hand coordination, teaches a gentle 2-touch placement technique • Learn to differentiate between sagittal and coronal placement using either bent or straight forceps Go to video page: Play “Placing Board 1”, “Placing Board 2” and View Power Point Presentation “Different Methods for Training Technicians” Hard texture: Discourages forceps deep penetration and encourages gentle feeding of graft Clear nature: Allows the trainer to check on placement & observe poorly placed grafts
Demonstration and Instruction • “Dummy head” (Non-patient training): Familiarize the technician with the overall procedure, instrument and tissue handling without the pressure of making costly mistakes • Develop manual dexterity • Skills • Stamina • Technique • Mental aptitude for tedious work • Gain knowledge • Develop critical thinking • Learn correct techniques • Instrument holding • Tissue handling • Body positioning Go to video page: Play “Training Placement” “Dummy” head made out of Styrofoam, molding clay, and a swim cap and placed on O.R. chair
Demonstration and Instruction • Methods for training technicians • Patient training: This allows trainee to work with live tissue and exposes them to conditions they normally would experience during surgery. • Pros: Exposes them to live surgery conditions and how to deal with them. It’s best to place them in an area of the head of least importance. • Cons: Making corrections is difficult without the patient worrying about the outcome of their surgery. There’s a chance of damage to the grafts and potentially poor growth.
Angles and Direction Frontal Area Frontal Temporal Triangles • Frontal area • Usually directed forward at a 10 to 15 degree angle • Frontal Temporal Triangles • Along the frontal temporal angle, a gradual transition in direction from pointing forward to pointing down • Change in angle from the frontal area (10-15 degrees) to almost parallel to the skin in the temporal areas
Angles and Direction Temporal Points Vertex/Crown • Temporal Points • Very acute angle • Point down and back • Vertex/Crown • Whorl pattern: direction pointing forward in the upper crown, transitioning out towards the sides, and down towards the lower crown
Angles and Direction More examples of angles and direction
Making Sites • Incision Width • Too wide: graft will float out • Too tight: attempting to “stuff” graft in can cause damage to graft and popping of surrounding grafts • Incision Depth • Too deep: chance of “piggybacking” while placing; could also cause pitting • Too shallow: can cause popping
Making Sites • Proper Fit • Width: Snug fit around graft; no gaps • Depth: Epidermis 1mm above skin • Perform a test session before all sites are made • Pick several average-sized grafts and measure width and depth • Place grafts in head for fit • Often two different sized blades/needles are needed for 1’s/2’s and 3’s/4’s
Types of Slits • Perpendicular (Coronal Angled Grafting or CAG) • Oriented at right angles to hair growth direction • Narrower than sagittal angled grafting (SAG) sites if made with the same sized instrument • When placing grafts, hand movements are side-to-side • Parallel (Sagittal Angled Grafting or SAG) • Sites are perpendicular to hair growth direction • Acute parallel sites are wider than less acute parallel sites • Deeper than perpendicular sites if made with the same sized instrument • Linear surface trauma for the same sized instrument is greater • When placing grafts, hand movements are flexion/extension
Types of Slits Viewed from front of patient: CAG site rectangular; SAG a slit CAG SAG SKIN
Types of Slits Viewed from side of patient: CAG site a slit; SAG is asymmetric CAG SAG SKIN
Types of Slits Viewed from top of patient SAG CAG Viewed from side
Preparation • Magnification • Able to see tiny sites in existing hair and possibly a bloody field • Essential for learning how to place grafts
Preparation • 3x Magnification • Field of view is broader • Not as detailed • Working distance: distance an area can be seen clearly 3X Magnification Field of View Working Distance 5-11 Inches
Preparation • 5x Magnification • Field of view is smaller • More detailed • Working distance is closer • Ideal for new assistants learning how to place grafts 5x Magnification Field of View Working Distance: 6 inches
Preparation • 45 Degree Angled Forceps • Ideal for both sides of the head and crown • Can do the “push” or “pull” technique • Can get up to 3 placers on a head • Straight Forceps • Ideal for placing on the right side of the head and temple area where angles are almost parallel to skin • Limited to two people placing at a time 45 Degree, Angled Forceps (Style #5/45, 6mm tip) Straight Forceps (Style #5)
Preparation • Personal Protective Equipment • Gown and mask are worn to protect from spraying while cleaning head • Loupes should have covered sides
Placing Strategy • Placing plan may vary from patient to patient • 1’s:For refinement of the hairline • 2’s: For areas of transition • 3’s and 4’s: For areas of density 1 3 & 4 2 2 3 3 2 2 2
Placing Strategy • Fine Hair versus Coarse Hair • Not all hair is created equal • Place fine, 1-haired grafts in hairline • Pick coarser 3 and 4-haired grafts for areas of density (such as the forelock) Finer 1’s Coarser 1’s Use finer 1’s in peaks, coarser 1’s behind peaks
Placing Strategy • Multi-unit Grafts (MUGS) • MUGS contain more than one follicular units • Comparing MUGS to FU grafts: a double follicular unit (DFU) MUG has two follicular units in a 1.5mm site, compared to two FU in two 1.0mm site (less trauma for the same amount of grafts) • Hair orientation is very important • If graft is placed incorrectly the epidermis will not be level with the skin and the hair curl will face the wrong direction Go to video page: Play “MUG Placement”
Basic Placing Principles • Find the angle • Incisions are made at a certain angle • Proper Insertion • Forceps should slide in easily; no resistance • Perform test insertions without a graft
Basic Placing Principles • Loading Finger/Hand • 3 Minute Rule: Load only what can be placed within 3 minutes • Beginners: Load 4 grafts at a time • Experienced: Up to 20 grafts • Load grafts in a pile rather than spread out • Spreading out could cause grafts to dry out quicker • Keep grafts hydrated throughout the placing process
Basic Placing Principles • Graft Holders • Holders designed to keep grafts hydrated • Ring cups designed to fit on finger • Custom-made holders • Foam tape taped to finger to create a basin for grafts * No matter what method you use, make sure grafts are hydrated at all times
Basic Placing Principles Pull Technique: Left Side Push Technique: Right Side • Grasping graft • Hair orientation • Hair has a natural curl; keep hair on graft no shorter than 1cm to see curl • Curl should point down towards the skin • Grasp at the fat as proximally as possible
Basic Placing Principles Grasping a splayed graft gently at the bulbs Splayed bulbs: Bulbs spread apart • Grasping bulbs is sometimes necessary • Minimal fat surrounding bulbs • Bulbs are splayed • Grasp bulbs gently!
Basic Placing Principles Courtesy of Dr. William Parsley
Basic Placing Principles • Incorrect placement • Grasped too high • Hair pointing in the wrong direction • Grafts with bent ends; potentially poor growth
Basic Placing Principles • Alignment and stability • Position hand so the pinky rests on the head for stability • Match the angle of the forceps with the angle of the site Match the angle of forceps with the angle of site Hand rests on head for stability
Basic Placing Principles Curl pointed in the wrong direction Curl pointed in the correct direction Hair curl must point down towards the skin Enlarged to show detail
Basic Placing Principles • Parting hair • Move existing hair out of the way when attempting to place grafts • Hold hair down with non-placing hand • Part an area to expose as many sites as possible and move to the next area • Throughout the case comb hair (above the skin) to check for hairs tucked underneath a graft (Grafts will come out if hair is tucked underneath) Exposes several sites at one time Using left hand, part hair and hold out of the way
Basic Placing Principles • Insertion • Insert graft half way • If graft sticks to forceps, use damp gauze in non-placing hand to hold graft in place as forceps is retracted • Sliding graft too far in the site can cause popping of surrounding grafts Hold graft with gauze if graft sticks to forceps
Basic Placing Principles • Grasp graft again at the point where the graft exits the skin • Release • Place graft down to the point where the epidermis is slightly above the skin and release • Limit graft adjustments with forceps Grasp graft again here
Basic Placing Principles Epidermis 1mm above the skin Courtesy of Patrick Tafoya Ideal Placement
Basic Placing Principles • Improper Placement Depth • Too High • Sebaceous glands are visible • Graft can desiccate Sebaceous Glands
Basic Placing Principles • Too deep • Chance of “piggybacking”: placing a graft on top of another • Cysts can form and develop ingrown hairs • Pitted look can occur when hairs are grown out Pitting
Basic Placing Principles • Develop a pattern • Start by placing 1’s in rows first, then 2’s, etc. • Decreases chances of losing your place 1 1 1 1 1 1 1 2 1 1 1 1 2 2 1 1 1 1 2 2 2 1 1 2 1 2 1 2 1 1 1 2 2 1 1 2 2 1 1 2 1 1 1 2 2 1 1 1 1 1 2 2 2 2 2 1 1 1 2 1 2 1 2 1 2 2 1 2 1 2 1 2 2 1 1 1 2 2 2 1 1 2 2 1 1 1 2 1 1 2 1 2 1 2 2 1 2 2 1 1 1 1 2 2 1 1 2 1 1 2 1 1 2 2 2 1 1
Basic Placing Principles • Limit your working field • Keep loaded grafts close to the area to be placed • Won’t lose your place • More efficient
Basic Placing Principles • Communication and Teamwork • Work together • Space is tight
Basic Placing Principles Working in sync: Starting with the first row work left to right, then on to the next row (going front to back). • Communication and Teamwork • Eliminates confusion and congestion • Technicians on the right side, left side, and back should work in sync • Too many placers in one area can cause popping • Easier to see area to be planted • Towards the end of the surgery, use two technicians • More efficient: With three technicians, it takes more time to try to maneuver around each other Left side assistant Right side assistant 1 3 & 4 2 2 3 3 2 2 2 Back assistant
Basic Placing Principles • Re-assess planted area throughout case • Check for missed sites • Make sure grafts are at proper depth • Prioritize areas to be planted • If the yield of grafts produced is lower than expected, make sure areas of importance are covered
Placing Techniques • Push Technique • Ideal for right side, temples, and crown • Can use straight or 45 degree, angled forceps • Grasp graft so the curl is pointed down, towards the skin Notice where graft is in relation to the forceps Pushing graft into site Go to video page: Play “Push Technique”
Placing Techniques • Pull Technique • Use 45 degree, angled forceps • Can be done on the left side and crown Notice where the graft is in relation to forceps Pulling graft into site Go to video page: Play “Pull Technique”
Placing Techniques • Stick and Place • Sites aren’t pre-made • Physician or assistant makes a site and places graft in one at a time • Coronal or Sagittal placement • Can be done for the entire surgery or at the end of the case with remaining few grafts • Requires someone who can plan density in a given area with a certain number of grafts Go to video page: Play “Stick and Place”
Placing Techniques • Perpendicular or Coronal Placement • Hand movement is side to side • Insert graft 1mm into skin, grasp again half way along the shaft and continue rocking graft into slit
Placing Techniques • Parallel or Sagittal Placement • Hand movement is front to back • Insert graft half way in site, grasp again where graft exits site and place epidermis 1mm above skin