Download
1 / 29
290 likes | 541 Vues
Genesys Ensemble. Dealer Product Training Guidebook. Introduction to the Genesys System [Part 1]. What is a Sound Preset?. A Preset consists of up to 6 Single Sounds layered across the keyboard. In many of the Preset Families the Presets on the left are solo instruments

E N D
Genesys Ensemble Dealer Product Training Guidebook Introduction to the Genesys System [Part 1]
What is a Sound Preset? A Preset consists of up to 6 Single Sounds layered across the keyboard. In many of the Preset Families the Presets on the left are solo instruments while the Presets on the right are layered instruments. Presets remember what sounds are active, the volume levels of those sounds, the effects settings, stereo panning, pedal and mod wheel assignments and audio output assignments. There are a total of 256 factory Presets and another 256 locations to store your own custom User Presets.
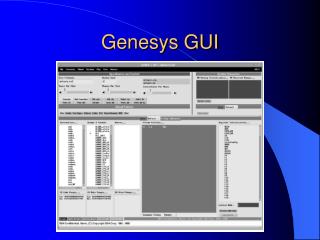
Main Screen explained (Home Page) By pressing the ESCAPE button one or more times (depending on the current mode of the Genesys) you will arrive at the Main Screen or “Home Page”. The Home Page shows you important information regarding the currently selected Style, Tempo, Keyboard Mode, Transpose and the current Preset. The Home Page also gives you access to the individual Parts that make up the currently selected Style and Preset. This is also where you can change the keyboard Split Point.
Layering your own sounds By pressing soft button F6 from the Home Page, you will gain access to the Keyboard Parts page. This is where you can decide what sound(s) will be used when creating your own User Presets. In the example, we know that Parts 7 and 8 are active because they show a keyboard icon to the left of the Single Sound name. The other Parts are muted as indicated by the X’ed out speaker icons. To mute or un-mute specific Parts, press the associated Soft Button to the left of the desired Part. Notice that the first time you select an un-selected Part, the cursor is moved to that Part. You must then press the Soft Button again to make a change to the status of that Part. NOTE: Parts 1 and 2 are dedicated to left-hand keyboard parts and are not available on the right side of the keyboard.
Single Sound Mode By pressing the SINGLE button within the PRESET FAMILIES section, you can view and select Single sounds to use in your own User Presets. Notice at the top right of the screen is a Bank indicator. Each sound group in SINGLE sound mode contains a total of 16 banks of sounds. NOTE: Some of the locations are left blank in order to load new sounds from disk or when creating and saving your own sounds. Be sure that you are editing the correct PART by pressing the ENTER button to view the Keyboard Parts screen. The PART you are editing must be highlighted.
Press the up cursor button to highlight the Preset Name and use the keyboard to name your new Preset. Then cursor down to Family and choose a Family, i.e. Piano, Organ, Brass, etc. Cursor down once more to select a User Preset location 1-16. Store your own User Preset The Genesys has 256 User Preset locations in which to store you own custom Presets. Press the STORE button to the right of the MEMORIES section to gain access to the Store screen. Here you have the option of storing Memories, Presets and Style Presets. Use the right cursor button to highlight Presets. Make note of where you stored your new Preset so you can find it when You press the USER button within the PRESET FAMILIES section. When you are happy with your selections, press the ENTER button to store your new User Preset.
Key Mode explained The Keyboard Mode buttons allow you to tell the Genesys how you would like to play the instrument. Notice the label beneath the first 2 buttons named FULL and BASS SPLIT. These keyboard modes are to be used when playing the instrument without using Styles or when playing along with pre-recorded songs. The remaining 4 buttons are used when playing along with STYLES. Refer to the Genesys User’s Manual for details on these various Keyboard Mode buttons. NOTE: When the S.T. PLAY (Single Touch Play) button is activated, the Genesys automatically selects ACCOMP. SPLIT Mode.
However, several of the buttons may be new to you. One is the STYLE PRESETS button. When a Style is selected, pressing this button will display up to 8 Sound Presets that are unique to the selected Style. These Presets are in addition to the regular Sound Presets found in the PRESET FAMILIES section. Because the tempo of a style can be stored in various sections of the Genesys, activating the Tempo Lock allows you to select select new sounds via Sound Presets and Memories without the tempo being adjusted to the saved value. Using Styles The Genesys has 256 internal Styles and 64 User Style locations. If you have ever used an arranger keyboard, you should be very familiar with most of the Style Controls. Two other buttons found in the STYLE TOOLS section are very handy as well. These are TEMPO and STYLE LOCK. Style Lock enables you to select a new Memory (which stores Style selection, Sound Preset and more) but retains the currently selected Style.
Creating and Storing Style Presets After selecting a Style, choose a sound Preset that you would like to play. Press the STORE button, cursor over to Style Presets, and down to Style Preset, Rotate the Tempo/Data Dial to choose a blank Location and press ENTER. You can now press the Style Presets button to View your Style Preset.
Proper Level Gain set too high Vocal Genius Mic Set-up Before using the microphone, you must adjust the Input gain on the back panel of the Genesys. After plugging the mic cable into the MIC input, set both sliders to the minimum position and activate The ON/OFF button in the Vocal Genius section. Then Press the EFFECTS button. While talking into the mic, slowly turn the center Gain knob to the right until a proper level is indicated On the MIC VU meter.
What is a Memory The Genesys can store 1024 Memories. These can be instantly recalled by pressing one of the 8 Memory buttons. 8 Memories are available at a time from the MEMORIES section. Pressing the BANK- or BANK+ buttons will gain access to any of the 128 Memory Banks in the Genesys. Each Bank holds 16 Memories. Memories are similar to Sound Presets and Style Presets although they are much more powerful in that they can store more information than standard Presets. Memories can store the following information; • Sound Preset (with edits) • Style selection • Style Preset (with edits) • Style Tempo • Style Variation • Keyboard Mode • Vocal Genius settings • Mixer Settings • Master Transpose
Storing a Memory Once you have selected a Sound Preset, Style and Variation and set-up other parameters like effects, pedals, Vocal Genius, etc. press the Store button to the right of the MEMORIES section. Notice that the word Memories is highlighted as is the field to the right of the Memory Name. Use the keyboard to create a name for your Memory. Then cursor down to User Bank and choose a Bank between 1 and 128. Cursor down again to the Memory number and choose a position between 1 and 8. Press the ENTER button and your new Memory will be stored. To view and select different Memory Banks, press the BANK-and BANK+ buttons simultaneously. The screen will display 16 Banks at a time. Use the PREV/NEXT Page buttons to move between all 128 Banks.
Disk Button functions – page 1 Pressing the DISK button will display the Disk Drives screen. On the very left of the screen is a vertical list of Resources. These are simply the various places data can be stored and retrieved. • F.D. is Floppy Disk • H.D. is Hard Drive • CD is Compact Disk • RAM is the Genesys internal memory • SCSI is for an optional external hard drive Soft Buttons A – D selects the desired Resource. Use the cursor buttons to move down the list of folders that appear in the left column. Notice that when you stop on a folder, the contents of that folder appear in the right column. In this example, the folder named ‘15JUNE04’ has been selected showing the contents of that folder.
Disk Button functions – page 2 A main folder from the first column can contain one or more folder types. In the example, we can see that folder ’15JUNE04’ contains 5 sub-folders. In this example, the right cursor has been pressed to move into the second column, and then the down cursor was pressed several times to highlight the sub-folder named ‘MEMORIES’. Pressing the right cursor again will open the sub-folder revealing its contents. In this example, the MEMORIES sub-folder contains 5 files. We know these files are individual Memories since they are located inside the MEMORIES sub-folder. NOTE: Sub-folders are created automatically when saving a specific type of data to a disk. If you are saving a song to a main folder that does not yet contain any songs, a SONGS sub-folder will be created.
Genesys Ensemble Dealer Product Training Guidebook Introduction to the Genesys System [Part 2]
Quick Sound Edit To make simple changes to a sound when making a Sound or Style Preset, press the PRESET button within SECTION EDIT. The screen that appears gives access to several different editing tools. In this case, using the cursor buttons to highlight Sound Edit (Quick) and pressing ENTER will display the Quick Sound Editing screen. Use the cursor buttons and the Tempo/Data dial to adjust the parameters. Once the sound is to your liking, save the changes to a new Sound Preset, Style Preset or Memory location.
Editing Parts To make adjustments to individual Parts, i.e. Transpose, Touch Sensitivity, Velocity, Delay, etc., press the PRESET button within SECTION EDIT. Using the Cursor buttons, highlight Edit Parts and press ENTER. The Soft Buttons to the left of the Sound names are used to select the Part to be edited. Use the Soft Buttons to the right of the display to select the parameter you wish to edit. Once you are happy with your adjustments, the edited Part(s) can be stored as a new User Preset, Style Preset or Memory.
Editing Style and Song Tracks Editing Style and Song tracks (sounds) uses the same screens that are used when making edits to Sound Presets and Style Presets. As a reference, review the Editing Parts, Editing Effects and Mixer Page functions sections of this guidebook. NOTE: In order to edit tracks of a Song (SMF or GEM Song) the song must be in RAM Memory. Load the desired song from disk and then select that song by pressing the SONG SELECT button within the Song Player/Recording Studio, choose RAM and use the cursor buttons to highlight the song. Press ESCAPE to view the Song Player screen. Press Soft Button F2 to view the Parts (tracks) of the song. Use the PART button to alternate between parts 1-8 and 9-16.
Editing Effects To make changes to the Effects used by sounds, press the EFFECT button within SECTION EDIT. There are 3 main screens that you will use to edit the Effects for sounds; • Effect Type • Send Level • Effects program
Mixer Page functions Pressing the MIXER button within SECTION EDIT gains access to the Mixer Settings. Notice that when this button is pressed, the lower LED is illuminated indicating that Mixer Mode is active. When Mixer Mode is active Pan adjust the stereo imaging of a Part’s Sound. 3D Effect is a Stereo Field Enhancer. The Bass (low freq) can also be set on this page.
Programmable Pads Each Programmable Pad can be used to play a single pitched note of a sound or you can choose to assign one or more Pads to various functions of the Genesys. In the example to the right Pad 1 will play an Applause sound. Pad 2 will set the Vocal Genius to Full Choir. Pad 3 is assigned to control the Rotary speed in the Effects section. Pad 4 is set to Tap Tempo in order to set the tempo of a style of song by tapping in the desired tempo on the pad.
[New SONG] [New EASY SONG] [New Stereo WAVE] Recording All Recording in the Genesys is initiated by pressing the REC button within the Song Player/Rec Studio. You will now be presented with the Recording Studio screen options.
Burning a CD You can create both music and data CD’s with the Genesys. Press the MAKE CD button to open the CD Studio screen. Select CD Data to burn a CD of MIDI files, RAM Files, MP3’s and WAVE Files. Select CD Audio to burn a standard audio CD playable in any CD player. Locate the file(s) you wish to burn by navigating through the Hard Drive folders and then press Soft Button F2 to Add the file to the CD Layout. Press Soft Button F4 to Create the CD. Press ENTER at the Prompts.
Genesys Ensemble Dealer Product Training Guidebook Genesys Power User Session