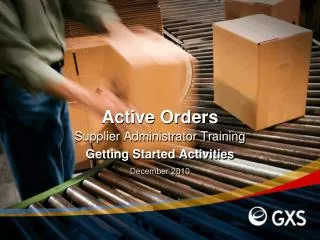
Supplier Administrator Training: Getting Started Activities for Active Orders
550 likes | 633 Vues
This presentation reviews configuration activities for Supplier Administrator in Active Orders system, including setting up service contacts, message center links, email alerts, and user accounts. Understand the setup process and key tasks.

Supplier Administrator Training: Getting Started Activities for Active Orders
E N D
Presentation Transcript
December 2010 Active OrdersSupplier Administrator TrainingGetting Started Activities
Training Objectives This presentation reviews the configuration activities that the Supplier’s primary administrative user should perform after completing the Trading Grid Company Registration process, including: Setting up Trading Grid Service Contacts Setting up Active Orders message center links and email alerts. Configuring additional supplier rules. This presentation also describes the process to create additional Trading Grid user accounts.
After completing the registration process, there are several important tasks to perform to set up your Active Orders system. These tasks must be performed by a user who is assigned the Account Manager1role, and may also require the OLV Company Administrator2role. This is usually the individual at your company that completed the Trading Grid company registration process. Setting up Trading Grid Service Contacts for individuals that need to receive email notifications from the system(1). Configuring the system to display dynamic message links and send email alerts when new or changed orders arrive(1,2). Enabling optional Supplier configuration settings(1,2). Creating and managing your company’s Trading Grid user accounts(1). Understanding Getting Started Activities
Setting Up Your System • Setting Up Trading Grid Service Contacts
Setting Up Trading Grid Service Contacts The system can send an email notification when a new or changed order arrives, or when other activities are pending or overdue. You must set up a Trading Grid “Service Contact” for each individual that should receive the notification email.NOTE: A Trading Grid service contact is automatically set up for the primary contact established during the registration process. If the primary contact set up during Trading Grid company registration is the only contact that needs to receive emails, you do not need to create any additional Trading Grid service contacts.
Adding a New Service Contact • To manage your Service Contact list: • Click on the Account Manager tab. • Choose the Service Configuration button. • Choose the Service Contacts button. • The primary (default) contact already appears in the Service Contacts list.
Adding a New Service Contact (continued) • Toadd a new Service Contact: • Open the Actions list, and select Add New Contact.
Adding a New Service Contact (continued) • Complete the required information for the contact. Asterisks (*) indicate required fields.
Adding a New Service Contact (continued) • Leave the Community Manager – Company Invitationcheck box blank. It does not apply to most suppliers.
Adding a New Service Contact (continued) • After completing the information for the contact, choose Submit. The system will confirm that the Service Contact was successfully created.
Setting Up Your System • Setting Up Email Alerts and Active Orders Message Center Links
Active Orders can provide two types of notifications for actions that need to be taken: The Active Orders Message Center can display dynamic links for new documents, and for actions that are pending or overdue. The system can send email notifications when new documents arrive, and when actions are pending and/or overdue. You use the Supplier Alert Management function to set up Active Orders Message Center links and email notifications. The Supplier Alert Management settings that you establish apply to all users in your company. Setting Up Message Center Links and Email Alerts
Active Orders Message Center Page – Before Configuration • An important configuration task is to set up the AO Message Center links. • This is how the Active Orders Message Center looks before it is configured. • Order Lifecycle Visibility (OLV) is the previous name of the Active Orders system. Until the renaming process is complete, you may see the old name in the system.
Active Orders Message Center Page – After Configuration • This is how the Active Orders Message Center might look when the Message Center links are enabled. Your community may use different links. • Your company’s Active Orders administrator must set up the system to display these important Message Center links.
Setting Up AO Message Center Links and Email Alerts • To set up Active Orders Message Center links and automatic email alerts: • Click on the Account Managertab. • Choose the Service Configurationbutton. • Choose the Supplier Alert Managementbutton.
Setting Up AO Message Center Links and Email Alerts (continued) • You must provide a “From” address for the email notifications. Typically, you should use the email address of the primary Active Orders contact at your company as the “From” address.
Setting Up AO Message Center Links and Email Alerts (continued) • The default (primary) contact established during the company registration process is automatically set up to receive email alerts. If this individual should not receive email notifications, turn the Default Contact check box off.
Setting Up AO Message Center Links and Email Alerts (continued) • If you want to add additional recipients to the email notification list, enable the Other Contacts check box, and then choose the Modify List button.
Setting Up AO Message Center Links and Email Alerts (continued) • The system displays a list of the Service Contacts you have established. Choose the email recipients you want to add to the Notify list, and then choose Submit.
Setting Up AO Message Center Links and Email Alerts (continued) 0 day(s) = Immediate 1 day(s = Once per day 2 day(s) = Twice per day • The Frequency setting determines whether the system sends all notifications immediately, or waits and sends multiple notifications together at the same time.
Setting Up AO Message Center Links and Email Alerts (continued) • Enable alerts for New Orders, Remittance Advices, and Order Forecasts. We recommend enabling both E-Mail and Message Center delivery methods.
Setting Up AO Message Center Links and Email Alerts (continued) • These are the suggested settings for Shipment alerts.
Setting Up AO Message Center Links and Email Alerts (continued) • The remaining settings on the Supplier Settings page are not required.
Setting Up AO Message Center Links and Email Alerts (continued) • When your settings are complete, return to the top of the page and choosePreview Supplier Settingsfrom the Actions list.
Setting Up AO Message Center Links and Email Alerts (continued) • After reviewing your new settings, choose Submitfrom the Actions list.The system will confirm that the settings were successfully updated.
Setting Up Your System • Configuring Additional Supplier Rules
Settings on the Supplier Rules page let you choose your configuration options, and establish specific identification information sometimes used on Invoice and Ship Notice forms. Enable a Supplier name column on Order search results lists. You can choose to automatically collapse line item details on Order details page. You can choose to display a “changed order” icon in Order search results lists. Establish your VAT/Registration number , if used. Establish your Ship Notice “company prefix,” if used. Supplier rules must be set up by your company’s Account Manager/AO Company Administrator. Understanding Supplier Rules
Setting Up Supplier Rules • To set up additional Supplier Rules: • Click on the Account Managertab. • Choose the Service Configurationbutton. • Choose the Supplier Rules button.
Setting Up Supplier Rules (continued) • The “Supplier Column” setting would not be used by most Suppliers. It may apply to Suppliers who have a multi-company organization structure set up in AO.
Setting Up Supplier Rules (continued) • The first order configuration option determines whether line items displayed in the Order form display in expanded mode (default) or collapsed mode.
Understanding Supplier Rules (continued) • By default, the system displays expanded line item details. You can configure the system to automatically collapse line items, and expand them when you need to view item details. Expanded (default) Collapsed (configurable rule) • Enabling this setting affects the line item display for all of your company’s users.
Setting Up Supplier Rules (continued) • The second Order option determines whether a “changed Order” symbol is available in the status column of the Order Search results page.
Understanding Supplier Rules (continued) • You can have the system display a special symbol ( ) to specifically identify orders that have changed. The symbol appears on Order search results pages. No Changed Order symbol (default) Changed Order symbol (configurable rule) • Enabling this setting affects the status symbol display for all of your company’s users.
Understanding Supplier Rules (continued) • If you plan to use the “Ship Notice with Labels” option, you must enter a company Prefix. The number becomes the company identification prefix in the serial numbers created for your labels. • . UCCEAN Prefix Code entry Example of prefix used in serialization • If your company already has a GS1 UCCEAN Company Prefix, enter it in the UCCEAN Prefix Code field. If not, use your Vendor Code. • More information on GS1 / Company Prefixes can be found at http://www.gs1.org/barcodes/technical/company_prefix.)
Setting Up Supplier Rules (continued) 1 2 3 4 If you plan to use the Ship Notice with Labels option, you must assign a company prefix number. • Choose the Manage Prefixes button. • On the UCCEAN Prefix Codes window, choose the Add button. • Enter the prefix in the Code text box. The Description text box is optional • Choose Save from the Actions list.
Setting Up Supplier Rules (continued) • The VAT Registration Number is used in invoicing. If you have a VAT Registration number, click the Add button and create an entry for your VAT number.
Setting Up Supplier Rules (continued) • After establishing the settings that you want to use, open the Actions list and choose Preview Supplier Rules.
Setting Up Supplier Rules (continued) • Open the Actions list again, and choose Submit.
The individual completing the registration process is automatically assigned the Account Manager role. Users with the Account Manager privilege can set up additional Trading Grid users accounts for other users in your company that need to access Active Orders. Adding New User Accounts
Setting up User Accounts (continued) • To set up new Trading Grid user accounts: • Click on the Account Managertab. • Choose the User Managementbutton. The system displays the current User List.
Setting up User Accounts (continued) • To create a new Trading Grid user account for another user at your company, open the Actions List and choose Create New User.
Setting up User Accounts (continued) • In Step 1, set up the contact and login information for the new user. • Complete the required fields for the contact information on the left side.
Setting up User Accounts (continued) The password is case-sensitive. • Complete the Trading Grid login information on the right. Be sure to record the login information exactly as you enter it here.
Setting up User Accounts (continued) • After completing the contact and login information, choose the Next Step button.
Setting up User Accounts (continued) • In Step 2, choose the roles that determine what functions this user can perform.Check the Order Lifecycle Visibility check box, and then choose the user’s roles.
Setting up User Accounts (continued) • In Step 3, review the contact information and service privileges you established. • Scroll down to the bottom of the page to continue.
Setting up User Accounts (continued) • To make changes to the settings shown on the review page, choose Previous Step. • To accept the current settings and create the user account, choose Submit.
Setting up User Accounts (continued) • After the user account is created, you will need to provide the user with the Trading Grid URL and the login credentials you created on their behalf.