DIY Plastering: A Step-by-Step Tutorial for Beginners
Plastering can strengthen the appearance and toughness of inside partitions and ceilings, along with provide insulation and soundproofing

DIY Plastering: A Step-by-Step Tutorial for Beginners
E N D
Presentation Transcript
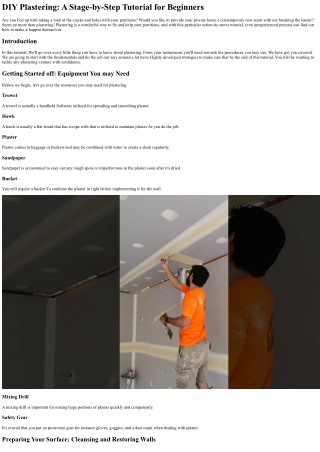
DIY Plastering: A Stage-by-Step Tutorial for Beginners Are you Fed up with taking a look at the cracks and holes with your partitions? Would you like to provide your private home a contemporary new seem with out breaking the lender? Seem no more than plastering! Plastering is a wonderful way to fix and help your partitions, and with this particular action-by-move tutorial, even inexperienced persons can find out how to make it happen themselves. Introduction In this tutorial, We'll go over every little thing you have to know about plastering. From your instruments you'll need towards the procedures you may use, We have got you covered. We are going to start with the fundamentals and do the job our way around a lot more Highly developed strategies to make sure that by the end of this tutorial, You will be wanting to tackle any plastering venture with confidence. Getting Started off: Equipment You may Need Before we begin, let's go over the resources you may need for plastering: Trowel A trowel is actually a handheld Software utilized for spreading and smoothing plaster. Hawk A hawk is usually a flat board that has a cope with that is utilized to maintain plaster As you do the job. Plaster Plaster comes in baggage or buckets and may be combined with water to create a sleek regularity. Sandpaper Sandpaper is accustomed to easy out any rough spots or imperfections in the plaster soon after it's dried. Bucket You will require a bucket To combine the plaster in right before implementing it for the wall. Mixing Drill A mixing drill is important for mixing huge portions of plaster quickly and competently. Safety Gear It's crucial that you put on protection gear for instance gloves, goggles, and a dust mask when dealing with plaster. Preparing Your Surface: Cleansing and Restoring Walls
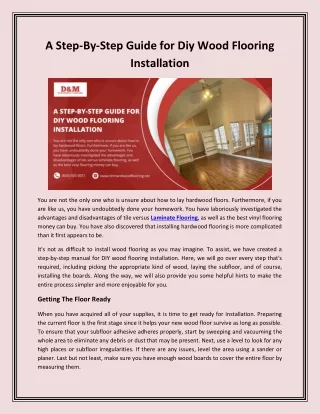
spray rendering southampton Before implementing plaster, It truly is important to prepare your floor properly. This features cleansing any Filth or debris from your walls and restoring any cracks or holes: Cleaning the Walls Start by cleansing the partitions by using a moist fabric to remove any Dust or debris. Should you be Operating in a very filthy spot, you might need to employ a delicate detergent. Repairing Cracks and Holes Use spackling paste or joint compound to fill in any cracks or holes within the wall. Sleek out the surface area and Permit it dry fully prior to moving on to the subsequent move. Mixing and Making use of Plaster Now that the surface is ready, it is time to blend and utilize the plaster: Mixing Plaster Follow the Guidelines in your plaster bag or bucket To combine the plaster with drinking water. Make use of your mixing drill for big portions of plaster and ensure it can be carefully mixed. Applying Plaster Apply the plaster on to your wall using your hawk and trowel. Commence at the bottom of your wall and get the job done your way up, ensuring to distribute the plaster evenly when you go. Skimming Once you have applied the first layer of plaster, wait around until eventually it's began to set just before skimming over it with A further layer. This will assist sleek out any imperfections inside the surface area. Sanding Once the plaster has dried absolutely, use sandpaper to easy out any tough spots or imperfections. Advanced Tactics: Texturing and Painting Your Surface If you're feeling self-assured in the plastering skills, you will take issues one phase further by texturing or painting your surface: Texturing Your Surface You can create different textures on your surface area by making use of distinct applications like a sponge, a brush, or maybe a trowel. Experiment with different tactics until eventually you find one that you like. Painting Your Surface Once your area is textured or smooth, It is really Prepared for portray. Select a paint colour that complements your home's decor and utilize it using a roller or brush.
FAQs Can I plaster around wallpaper? No, it isn't really proposed to plaster above wallpaper since the plaster will never adhere effectively and could result in the wallpaper to peel. How very long does plaster acquire to dry? Plaster normally takes between 24 hrs to a number of times to dry dependant upon the thickness from the layer applied and also the humidity inside the area. Can I plaster around current plaster? Yes, you can plaster over present plaster provided that it really is in good condition. Can I paint right onto fresh new plaster? No, you ought to wait at least every week in advance of portray onto clean plaster making sure that it has dried absolutely. Can I exploit common sandpaper for smoothing out my plaster? No, you'll want to use great-grit sandpaper precisely suitable for smoothing out plaster. Do I want to apply a sealant prior to portray my surface area? It's not required to implement a sealant in advance of painting your surface area, but it really may also help protect against dampness from seeping in the plaster and causing damage. Conclusion Plastering is a superb strategy to fix and boost your partitions, and using this type of stage-by-move tutorial, even newcomers can find out how to do it on their own. Remember to prepare your surface appropriately, combine and use your plaster evenly, and experiment with unique textures or colours after you are feeling self-assured in the skills. Content DIY- ing!


![[PDF] DOWNLOAD FREE DIY NEEDLE TATTING FOR BEGINNERS: A step-by-step guide](https://cdn7.slideserve.com/12465377/diy-needle-tatting-for-beginners-a-step-by-step-dt.jpg)