Learn Android App Development: Follow Detailed Steps
This tutorial guides you through creating an Android Virtual Device (AVD) and a new Android project. Start the AVD, run on emulator or device, and adjust font size. Learn to add a button, display a message when pressed, and create a new activity for your app development journey.

Learn Android App Development: Follow Detailed Steps
E N D
Presentation Transcript
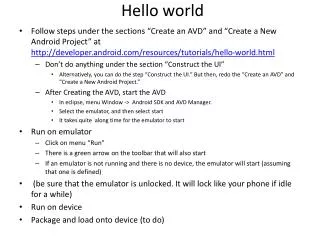
Hello world • Follow steps under the sections “Create an AVD” and “Create a New Android Project” at http://developer.android.com/resources/tutorials/hello-world.html • Don’t do anything under the section “Construct the UI” • Alternatively, you can do the step “Construct the UI.” But then, redo the “Create an AVD” and “Create a New Android Project.” • After Creating the AVD, start the AVD • In eclipse, menu Window -> Android SDK and AVD Manager. • Select the emulator, and then select start • It takes quite along time for the emulator to start • Run on emulator • Click on menu “Run” • There is a green arrow on the toolbar that will also start • If an emulator is not running and there is no device, the emulator will start (assuming that one is defined) • (be sure that the emulator is unlocked. It will lock like your phone if idle for a while) • Run on device • Package and load onto device (to do)
Adjust font size • open res/layout/main.xml • See xml and layout (select toward the bottom) • Note the outline view at the far right • Expand linear layout • Click on textview • See properties (on of the tabs along the bottom) • Scroll in properties to text size. Make text size 18pt • Save and rerun • If the emulator is idle, it will lock. Unlock to run app
Add button • In layout/main.xml • Outline • Select LinearLayout • Click green + to add something • Find button and select • Change id • Select button in outline • Go to properties • Find Id and set it to @id/ChangeActivityButton • Find text: change to Press Here • Run
Display short message when button is pressed • Open src/com.example.helloandroid.java • Let’s understand what is already there • HelloAndroid extends Activity: We’ll learn more about activities later. But all activities must be extend Android.app.Activity • setContentView(R.layout.main); will make the view. Note that R.layout.main refers to the main.xml layout where we changed the font size and added the button. But R is a class that the android plugin automatically creates when anything under /res is saved (so you might need to save before r is valid). So R is a provides an interface between the resources (e.g., xml files) and your program • After “setContentView(…);”, add • final Button button = (Button) findViewById(R.id.ChangeActivityButton); • Note that Button is red underlined (an error). Click on button. Import Button. Expand import .. To see that button has been included • Add • button.setOnClickListener(new View.OnClickListener() { public void onClick(View v) { // Perform action on click Toast.makeText(HelloAndroid.this, "clicked", Toast.LENGTH_SHORT).show(); } }); • Run • Instead of Toast…, put Log.e(“DebugInfo”,”button pressed”);
Activities • An app is composed of tasks each with its own screen. These tasks referred to as activities. • Activity is composed to some actions (code), and a view • The code is defined by a java class, while the view is defined by an xml file. • The java code controls the screen, and hence which xml file is used • The system and your activity • How does an activity become active? • The OS can start it • Another activity can start it • How does the activity end • The OS can end it • It can end itself • The first activity (the one that is active when the app starts) is the one that is given in the app’s manifest as follows <activity android:name=".HelloAndroid" android:label="@string/app_name"> <intent-filter> <action android:name="android.intent.action.MAIN" /> <category android:name="android.intent.category.LAUNCHER" /> </intent-filter> </activity> This is a class name in the package These say that this class is the entry point into the app. That is, the OS can call this activity by using the name and category. This particular name and category means it is the entry point
Make a new activity • Add layout of activity • On the left right click on /res/layout. • Select new -> android xml file • Call file view2 • Leave it as Layout resource • Leave LinearLayout as root element • Why is “finish” not enabled? See error message. Add .xml to view2.xml
add a new string to /res/strings.xml • Open strings.xml • View the resources veiw (as oppose to the xml view) • Select Add • Select String • Set name otherString • Set Value This is the second view
Edit view2 • Open /res/layout/view2.xml (if it is not already open) • Go to layout view (not xml) • On far right, select LinearLayout • Click green + • Select TextView, ok • Highlight TextView on far right • Open properties (tab toward the bottom) • Scroll through textView to Text. • Select browse and select otherString (the one we just added)
Add a class to show this view • Right click on /res/com.example.helloandroid • Select new -> classs • Set Name to SecondView • Set superclass to.. • Check what helloAndroid is extended from • android.app.Activity • Set super class to android.app.Activity • Finish
Add text to SecondView • First open HelloAndroid • Copy @Override…. • Paste in to the same place on SecondView • Delete the button stuff • Change • setContentView(R.layout.main); • To • setContentView(R.layout.???); • Go back to /res/layout. What is the name of the xml file we just added? view2 • setContentView(R.layout.view2); • Recall that the layout is an xml file. But R is a class that is automatically generated from the resources (including xml files) • R.layout.mmmm “uses” res/layout/mmmm.xml • R.id.joe is the id of resource with id called joe. • The xml file has … android:id=“@+id/joe” …. • Note that we used the for getting the button object
Make View2 into an activity that can be called • The OS will call (e.g., start) activities • The app must advertise the activities that can be called and must detail how they are referenced (what name to use to call them) • This is done in the Manifest (the manifest does many other things as well) • Edit manifest to allow View2 to be started • Open androidManifest.xml • Explore all the things • Check out Permission tab. This is where an app can request permission to use various resources, like GPS or the network. • Select the Application tab • Go to Application Nodes (lower left area) • Select add • Select radio button “Create a new element at the top level, in Application” • Select Activity • Highlight the newly added activity • On the right, change name to OtherView. Leave other fields empty • Now, under application nodes it says OtherView (Activity) • Under application nodes click add • Select radio button “Create new element in the selected element, Application > OtherView(Activity) • Select Intent Filter • Now Intent Filter has been added. Leave the fields on the right empty • Under the application ndeds highlight the newly added Intent Filter • Click Add • Select Action • In the attributes for Action (on the right), set name to com.example.helloandroid.ShowOtherView. • This is the name that we made up. This app (and other) can call the activity by this name • Under Application Nodes select newly added Intent • Click Add • Select Category • In drop down list, select android.intent.category.DEFAULT • Save
Call View2 when button in main view is clicked • Open HelloAndroid.java under src/com.example.helloandroid • Recall that Toast is executed on the button press. Now let’s add something to run the other view. Just below Toast.makeText(…); add String actionName = "com.example.helloandroid.ShowOtherView"; Intent intent = new Intent(actionName); startActivity(intent); • Now save and run