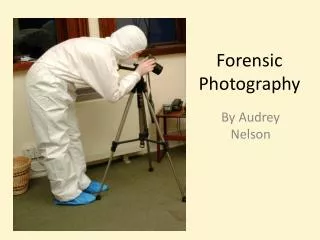
Forensic Photography
Forensic Photography . Workshop I [Your Name Here] Complete this presentation by filling in each table and answering all of the questions. You need to load in your pictures. Aperture Priority.

Forensic Photography
E N D
Presentation Transcript
Forensic Photography Workshop I [Your Name Here] Complete this presentation by filling in each table and answering all of the questions. You need to load in your pictures.
Aperture Priority Backlit Situations: Set the aperture @ f/2.8 and have someone stand in front of a window in which the sun is shining. Using the 18-55mm zoom lens, take photographs and complete the next 8 slides. Insert Picture
Aperture Priority Insert Picture
Aperture Priority Insert Picture
Aperture Priority Insert Picture
Aperture Priority Insert Picture
Aperture Priority Insert Picture
Aperture Priority Insert Picture
Aperture Priority Insert Picture
Depth of Field • Using the 18-55mm zoom lens, isolate a single object and position the camera so that the object is as close to the camera as possible. Be sure that there is considerable space between the isolated object and the background. • Photo No. 1: Set the f/stop to as small a number as the camera will allow. Take the photo, ensuring that the isolated object is in focus. • Photo No. 2: Using the same lens and object, set the aperture to the largest number the camera will allow and take the same photograph. Insert Photo 1 Insert Photo 2
Questions: The first exercise was a backlit situation. Why did the photo appear “better” when you used spot metering? In the second exercise, tow different extremes of f/stop gave different perspectives of the same object. Explain what is happening.
Shutter Priority Set the camera to “S” on the Mode Selector. Set the Shutter speed according to the table below. Record your observations and answer the questions below. Insert Picture
Shutter Priority Set the camera to “S” on the Mode Selector. Set the Shutter speed according to the table below. Record your observations and answer the questions below. Insert Picture
Shutter Priority Set the camera to “S” on the Mode Selector. Set the Shutter speed according to the table below. Record your observations and answer the questions below. Insert Picture
Shutter Priority Set the camera to “S” on the Mode Selector. Set the Shutter speed according to the table below. Record your observations and answer the questions below. Insert Picture
Shutter Priority Set the camera to “S” on the Mode Selector. Set the Shutter speed according to the table below. Record your observations and answer the questions below. Insert Picture
Questions: Which of the above settings is closest to the correct exposure? Why? What does the term “correct exposure” mean to you?
Manual Priority • Using the 18-55mm zoom lens, isolate a single object and position the camera so that the object is as close to the camera as possible. Be sure that there is considerable space between the isolated object and the background. • Photo No. 1: Use the 18-55mm zoom lens. Set the camera on “M” mode and the shutter speed to 1/15. Set the aperture so that the exposure is correct. • Photo No. 2: Set the f/stop to f/8 and find the shutter peed that gives the correct exposure for this photograph.. Insert Photo 1 Insert Photo 2
Questions: Each photo has a different f/stop. Are the exposures the same? Why? What is the difference in the photos with respect to what is in focus? Why?
Close-Up and Fluorescence Photography Note: All close-up photography requires a tripod. A special lens is required for close-up photography when using the D40.
Close-Up and Fluorescence Photography • Open the aperture to the maximum the camera will allow. • Fit the camera with a close-up lens and set the camera on Manual “M” Priority setting. • Attach the camera to a tripod. • Position the camera as close to the print as possible (in focus). • Ensure that the camera body is level. • Focus the camera (do not use a zoom lens). • Using the shutter speed, select the correct exposure. • For black powder dusted prints, take photograph using available light. • For a fluorescent powder dusted print, use an alternative light source (ALS) to visualize the print-wear orange goggles-and fit the camera with an orange filter on the lens. • Focus the camera and take the photo as above.
Close-up and Fluorescence Photography • Using the 18-55mm zoom lens, isolate a single object and position the camera so that the object is as close to the camera as possible. Be sure that there is considerable space between the isolated object and the background. • Photo No. 1: Use the 18-55mm zoom lens. Set the camera on “M” mode and the shutter speed to 1/15. Set the aperture so that the exposure is correct. • Photo No. 2: Set the f/stop to f/8 and find the shutter peed that gives the correct exposure for this photograph.. Insert Photo 1 Insert Photo 2
Questions: What is the close-up lens? What do the numbers on the lens mean? What is the purpose of the orange goggles? Why does the camera need an orange filter over the lens?