The Provider Gateway Self-teach tutorial Introduction
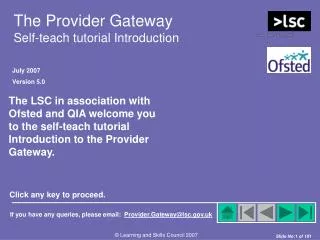
The Provider Gateway Self-teach tutorial Introduction. July 2007 Version 5.0. The LSC in association with Ofsted and QIA welcome you to the self-teach tutorial Introduction to the Provider Gateway. Click any key to proceed. If you have any queries, please email: Provider.Gateway@lsc.gov.uk.

The Provider Gateway Self-teach tutorial Introduction
E N D
Presentation Transcript
The Provider GatewaySelf-teach tutorial Introduction July 2007 Version 5.0 The LSC in association with Ofsted and QIA welcome you to the self-teach tutorial Introduction to the Provider Gateway. Click any key to proceed. If you have any queries, please email: Provider.Gateway@lsc.gov.uk
HOME – Will always take you to ‘Tutorial Contents’ Navigation How to Use the Buttons You can navigate your way through this tutorial by using the forward and backward buttons below or by clicking the mouse. Buttons which are coloured grey are inactive on the current slide, like the SECTION BACK button below. SECTION BACK – Will take you to the ‘Section Contents’ of the current section BACK – Will take you back one screen FORWARD – Will take you forward one screen SECTION FORWARD – Will take you to the ‘Section Contents’ of the next section
Aims and Objectives The aims of this tutorial are: • To introduce you to the Provider Gateway, including: • An overview of the facilities and features it provides. • What information it holds. • Who can use the Gateway and for what purpose. • How to log on. • How to change your password. • How to navigate around the Gateway using the menu and links. • To explain the role of the User-Approver and how to carry out user administration. • To direct you to further training tutorials covering the Document Exchange and Learner Achievement Tracker facilities in greater detail.
Section 2 How to log on and log Out Section 1 Overview of the Provider Gateway Section 7 User Administration (for User-Approvers and LSC Helpdesk users) Section 4 How to use the Notice Board Section 6 Useful Links Section 3 How to change your password 2 1 7 4 6 3 Tutorial Contents The tutorial is divided into seven sections. You can click on a section title from the list opposite to go directly to the start of the section. Each section starts with a Section Contents slide, from which you can link to specific topics. Section 5 Web Statistics Reports 5
Section 1Overview of the Provider Gateway • This section explains: • The purpose and benefits of the Provider Gateway to partnership organisations, including increasing the size of text on the Web pages for the visually impaired user. • Who can use the Gateway. • The services provided by the Gateway. • The benefits of the Gateway. • How the security of information is ensured. • Guidance on the LSC’s policy towards access to information. • The home screen and the main menu for navigating the Gateway. You can work through the section sequentially, or use the links in the panel to the left to go to specific topics. Links to topics • Partnership approach • Who can use Provider Gateway? • Provider Gateway services • Benefits of Provider Gateway • What documents are held on the Gateway • Security of Information • Freedom of Information • Archiving • Increasing Size of Text
Overview of the Provider Gateway 1 Partnership Approach Provider Gateway is a web-based portal, hosted by the LSC, working in partnership with schools, colleges, work-based learning providers, local authorities and the Inspectorates. It provides partnership organisations with access to the information they need to achieve the goal of continuous improvement in the provision of learning and skills.
Overview of the Provider Gateway 1 Who can use Provider Gateway? Provider Gateway can be used by: • Schools and colleges. • Work-based learning and further education providers. • Train to Gain-funded and IAG-funded providers. • Local Authorities (to support school improvement and in their city capacity as work-based learning providers). • Ofsted and QIA. • Regional LSC staff. • National LSC Help Desk staff.
Overview of the Provider Gateway 1 Provider Gateway services Provider Gateway currently provides two key services to partnership organisations: • Document Exchange is a service to facilitate the processes of annual assessment and inspection. It provides a central location, accessible by all partnership organisations, for the exchange and storage of information. • Learner Achievement Tracker (LAT) is a service that generates Value Added and Distance Travelled (VA/DT) reports for the learners at a provider, including: • Summary Charts. • National Comparison Graphs. • National Chances Charts.
Overview of the Provider Gateway 1 Benefits of Provider Gateway • Reduced bureaucracy. Providers, the Inspectorates and the LSC will upload documents relating to the processes of inspection and continuous improvement to the Document Exchange area on the Gateway, where all partnership organisations can access them. • Consistency. The same version of a document or report is available to all partnership organisations. • Security. Only authenticated users of the service can access the services on the Gateway. Documents can only be viewed and downloaded and reports can only be generated by authorised users. • Simplicity. The Gateway is easy to use and provides a uniform interface for all users. • Flexibility. The Gateway can be expanded in the future to provide services to other organisations.
Overview of the Provider Gateway 1 What documents are heldon the Gateway? The Gateway holds the following documents: • Self Assessment Reports (SARs). The SAR is prepared by the college and uploaded by the college to the Gateway. • The Gateway can hold one Draft and one Final Status version of a SAR for any academic year. • College Performance Reports (CPRs). The CPR is prepared annually by Ofsted. • Provider Performance Reports (PPRs). The PPR is prepared annually by Ofsted. • School 6th Form Performance And Data Analysis (PANDA) reports.
Overview of the Provider Gateway 1 What documents are held on the Gateway? (continued) • FE Stats Update Workbook. The FE Stats Update Workbook is prepared and uploaded by the college and analysed by Ofsted. • Other Learner Types (OLT) Workbook. The OLT Workbook is prepared and uploaded by the college and analysed by Ofsted. • Templates for the FE Stats Update and OLT Workbooks (uploaded by Ofsted), which the college can download from the Gateway, complete and upload back to the Gateway. • Documents can consist of multiple files. All files compromising a SAR, CPR, PPR or other type of document are grouped together on the Gateway. • Post-Annual Assessment Visit (AAV) report.. • New Measures of Success (NMOS) LAT data.
Overview of the Provider Gateway 1 What documents are held on the Gateway? (continued) • 3 Year Development Plan. • Academic Calendar. • Qualification Success Rate FE report. • Provider Financial Management reports (x4): • Provider Financial Assurance (PFA) - Financial Management & Governance (FMG), Self-Assessment Report Questionnaire (SARQ) • College Annual Financial Statement • College Finance Record • Regulatory Audit Self-Assessment Document. • Health & Safety reports. • LSC users are also able to upload documents e.g. Briefing Reports about colleges.
Overview of the Provider Gateway 1 Security of information • All information relating to a provider is held in strict confidence on the Gateway. • No provider can view any other document or report relating to another provider. • Authorised staff, including (home-based) inspectors in Ofsted and the ALI, can search on all providers on the Gateway and view and download the documents pertaining to any provider. • In the LSC, authorised staff in the National Office and local LSCs can view and download the documents pertaining to any provider. • The Council shall not be liable for the provision or use of data outside of the arrangements set out above.
Overview of the Provider Gateway 1 Freedom of Information GUIDANCE ON THE LEARNING AND SKILLS COUNCIL’S POLICY FOR ACCESS TO INFORMATION You should be aware that the LSC is subject to the requirements of the Freedom of Information Act 2000 (FOIA), which gives the public a legal right of access to information held by public authorities. A person making a FOIA request is entitled to two things, unless an exemption applies. These are: To be informed whether the LSC holds information of the description requested; and if so, to have that information communicated to him or her. All information the LSC holds is covered by FOIA including information the LSC holds about third parties. This means the LSC will be obliged by law to disclose such information unless an exemption applies. The legal obligation to respond to request from the public under FOIA rests with the LSC. The LSC must therefore respond to requests as it sees fit at its sole discretion. If the LSC receives a request that it considers appropriate to meet, we will use reasonable efforts to notify you and we will consider any representations you make that information is exempt provided that we receive them within 5 days of our notification.
Overview of the Provider Gateway 1 Archiving • Documents that have been uploaded for the previous three academic years are easily available on the Gateway to authorised staff in colleges, the Inspectorates and the LSC to read and download. • The same security applied to current documents is applied to archived documents; archived documents relating to colleges are confidential, and only authorised staff in colleges, Ofsted, QIA and the LSC can read or download them.
Overview of the Provider Gateway 1 Increasing Size of Text The Provider Gateway Site allows users to increase the size of the text on the screen. This can improve the ease of reading for the visually impaired user. Instructions for doing this can be found on the following pages.
Overview of the Provider Gateway 1 Increasing Size of Text (continued) • How to increase the text size on a web page • Assuming Internet Explorer is the web browser: • From the menu bar: • Select Tools > Internet Options. • Click on Accessibility • Check box “Ignore font sizes specified on web pages”. • Click on the OK button. • Click on the OK button on the Internet Options window to save your changes.
Overview of the Provider Gateway 1 Increasing Size of Text (continued) • How to increase the text size on a web page (continued) • Assuming Internet Explorer is your Web Browser: • From the menu on the Gateway Page: • Click on View. • Click on Text Size. • Click on the size of text required from the menu options. • The size of text on the screen will change to the selected size.
Overview of the Provider Gateway 1 End of Section 1 Overview of the Provider Gateway
Section 2How to logon and logout How to Logon and Logout This module explains how to logon and logout of the Gateway. You can work through the module sequentially, or use the links in the panel to the left to go to specific topics. Links to topics • Logging On • Logging Out
How to log on and log off 2 Logging on Logging on The Provider Gateway is an Internet based system and therefore Internet access is required to access the application. • Assuming you have launched your web browser e.g. Internet Explorer: • Enter the Address of the Gateway as supplied to you by the LSC. • Press Return on your keyboard. The Provider Gateway Welcome Screen is displayed as shown.
How to log on and log off 2 Logging on (continued) Logging on (cont.) To log on to the Gateway: • Click the Login option on the menu on the left of the screen.
How to log on and log off 2 Logging on (continued) Logging on (cont.) When the Log In screen is displayed. • Enter your User Name and Password (as supplied) . • Click on the Login button.
How to log on and log off 2 Logging on (continued) Logging on (cont.) Forgotten your password? • Click on the Forgotten Password? link. • A message is displayed on the screen: • “The password has been reset and an email will be sent to the address registered against the entered username…” • Check your e-mail for the message and logon with your new password. Unless this is done the password will not be reset. • NB The email notification for password reset is only valid for 24 hrs after which it will expire.
How to log on and log off 2 Logging out Logging Out • After login, the Provider Gateway home page is displayed, offering a number of options on the menu. Depending on the user’s access rights, differing menu options will be displayed. • The Notice Board, also displayed, will be discussed in detail within topic 4. • To select an option from the menu: • Click on that service. • In the example here, to return to the Provider Gateway Welcome screen: • Click on Logout.
How to log on and log off 2 End of Section 2 How to log in and log out
Section 3How to change your password Overview This section explains how to change your password. You can work through the section sequentially, or use the links in the panel to the left to go to specific topics. Links to topics • Password rules • How to change your password
How to change your password 3 Password rules • When you are first set up as a Gateway user a password will be assigned to you. • When you log on to the Gateway for the first time you will be required to change your password. • Thereafter you can change your password at any time. • A password must meet the following requirements: • It must be between 8 and 11 characters in length. • It must contain at least one number. • It must contain a mixture of upper case and lower case characters.
How to change your password 3 How to change your password How to change your password From the Provider Gateway Home Page: • Click on the User Admin / Change Password option on the main menu. • NB. Please refer to Slide 24 for details on how to use the Forgotten Password function.
How to change your password 3 How to change your password (continued) How to change your password (continued) The Change Password screen is displayed. • Your username is displayed in the User Name field. (For security reasons, actual names have been distorted to avoid recognition) • Type your old password in the Old Password field (the characters will appear as Bullets). • Type your new password in the New Password field. • Retype your new password in the New Password field. • Click Save Changes.
How to change your password 3 How to change your password (continued) How to change your password (continued) Processing your new password may take a few seconds. • When processing is complete, a message confirming that your password has been changed successfully will appear briefly. • Either: • Click on the OK button. • or: • After a few seconds, the system will automatically return to the Change Password screen.
How to change your password 3 End of Section 3 How to change your password
Section 4How to use the Notice Board Overview This section explains: • How to select and view messages posted on the Provider Gateway. • How to create and manage messages (only applicable if you are an LSC, Ofsted or ALI user). You can work through the section sequentially, or use the links on the left to go straight to a specific topic. Links to topics • The Notice Board • How to view messages • How to create messages • How to delete messages
How to use the Notice Board 4 The Notice Board The Provider Gateway provides a Notice Board where messages for the attention of users can be posted. • Messages can be posted by LSC and Inspectorate users. • They can be posted for a wide variety of reasons. • They can be targeted at specific users (for example, a notice could be seen only by providers in a particular region). • Notices are time-limited. Typically they will remain on the Notice Board for 28 days, but other time intervals can be selected.
How to use the Notice Board 4 How to View Messages Viewing messages • The Notice Board is displayed on the Gateway’s HomePage. • The top 10 most recent messages are displayed here. • To display the full contents of a message: • Click on the message title.
How to use the Notice Board 4 How to View Messages (continued) Viewing messages (continued) • The full content of the message is displayed. • Click the Back button to return to the Home screen.
How to use the Notice Board 4 How to View Messages (continued) Viewing Messages (continued) • To view the total contents of the Notice Board, either: • Click on the Notice Board option on the menu on the Home screen. • or • Click on the View Full Notice Board link at the bottom of the screen.
How to use the Notice Board 4 How to View Messages (continued) Viewing Messages (continued) • The full contents of the Notice Board will be displayed. • You may need to the use the vertical scroll bar to view messages further down the screen. • Click on any message title to display and view it. • Click the Back button to return to the Home screen.
How to use the Notice Board 4 How to Create Messages Creating Messages • LSC, Ofsted and QIA users can place messages on the Notice Board, and delete them. • Messages can be targeted at specific groups of users. For example, a message can be posted for School Sixth Form providers only, and only they would see it. • Messages are given a date range during which they will be visible. • Click on Manage Notices on the menu..
How to use the Notice Board 4 How to Create Messages (continued) Creating Messages (Continued) • The Manage Messages screen is displayed, listing all current messages. • To create a new message. • Click on the Create button.
How to use the Notice Board 4 How to Create Messages (continued) Creating Messages (continued) The Create Messages screen is displayed. • Enter a title and a description for the message in the Title and Description fields. • Enter the text of your message in the Message field. • Format the text of your message by using the drop-down lists along side the Font, Size, Formatting, Style and Insert options together with the standard formatting icons on the toolbar.
How to use the Notice Board 4 How to Create Messages (continued) Creating Messages (continued) • Scroll down to the bottom of the screen. • Select an Effective Date (date when the message will first appear) and an Expiry Date (date when it will no longer appear). • Click on one or more Targeted Roles to highlight them. • Click on the -> icon toselect the Role or Roles. • To select all Roles Click on the ->> icon. • To de-select a Role or Roles highlight the Role(s) and click on the <- icon.
How to use the Notice Board 4 How to Create Messages (continued) Creating messages (continued) • Provider Types can only be selected if the Targeted Role/s is or are a Provider. • Selected targeted roles and selected Providers will be able to see the message. • To save the message: • Click the Save button.The message will appear on the Notice Board starting on the effective date. • To create another message: • Click the Reset button to clear the previous message.
How to use the Notice Board 4 How to Delete Messages Deleting Messages • LSC, Ofsted and QIA users can delete messages that they have posted on the Notice Board. • From the Manage Notices screen tick the box to the left of each message that is to be deleted. • Click on the Delete button to delete the selected messages.
How to use the Notice Board 4 End of Section 4 How to use the Notice Board
Section 5Web Statistics Reports Overview This section explains about the Web Statistics Reports link on the menu. You can work through the section sequentially, or use the links in the panel to the left to go to specific topics. Note: This section is only applicable to LSC, Ofsted and QIA users. Links to topics • About Web Statistics Reports • The Page Visits Report • The Document Uploads and Downloads Report
Web Statistics Reports 5 About Web Statistics Reports • The Web Statistics Reports link on the menu provides reports on daily usage of the Document Exchange service on the Provider Gateway. • There are two reports: • Page Visits. This shows the number of times each day that each page in the Provider Gateway is visited. • Document Uploads and Downloads. This shows the number of times each day that each type of document is uploaded or downloaded. • When a report has been run you can opt to export the report to an Excel spreadsheet.
Web Statistics Reports 5 The Page Visits report The Page Visits Report • Click on Web Statistics Reports on the main menu. • The Web Statistics page is displayed. • On the menu, the Web Statistics Reports option is expanded to provide links to: • Page Visits • Document Uploads and Downloads • To open the Page Visits report: • Click on the Page Visits link.
Web Statistics Reports 5 The Page Visits report (continued) The Page Visits Report (continued) • The Page Visits screen is opened. • Use the Month drop-down list to select the required month for the report. • Click on the GetReport button.
Web Statistics Reports 5 The Page Visits report (continued) The Page Visits Report (continued) • The Page Visits report for the selected month is opened. • Each entry shows: • The date, visited page, location of page and the number of times that page has been visited. • To export the report as an Excel spreadsheet: • Click the Export To Excel button at the bottom of the report.