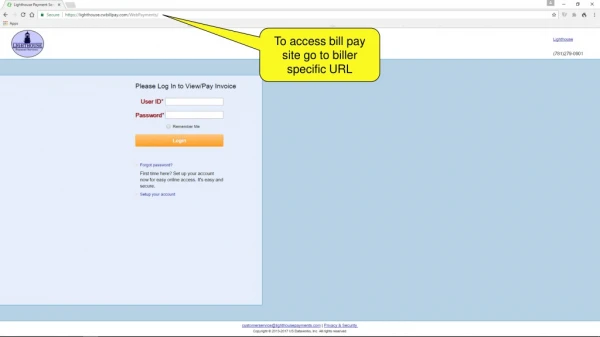
To access bill pay site go to biller specific URL
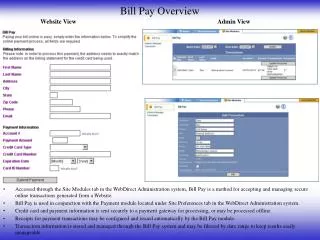
To access bill pay site go to biller specific URL. Bill Pay Site will be branded with biller’s name and logo. First time bill pay users will click here to establish their account to view and pay invoices.

To access bill pay site go to biller specific URL
E N D
Presentation Transcript
First time bill pay users will click here to establish their account to view and pay invoices
First three lines are taken from a historical invoice. They must be input exactly as invoice has them depicted. Copy / paste is recommended.
Bill payer will enter an email address and create a password. This email address will serve as the login ID.
Bill payer can select a challenge question from a predetermined list or they can create their own challenge question.
This text is biller-specific, so billers can tailor text appropriate for their use
Fill out the required fields. This will populate the bill payer’s customer profile.
When everything is filled in, clicking Create Account will send a verification email to the email address indicated during registration
When the verification email is received, clicking through the link will confirm the email address and activate the account
If everything was done correctly this is what they will see. The bill payer is now set up to view and pay invoices.
At login screen. Input User ID and Password selected during account registration and click Login
This is the main screen. From here the bill payer can pay or view their current invoice.
The amount due presented to the bill payer will be uploaded by the biller via data file
Account Activity will enable the bill payer to access historical invoices and posted payments
Clicking View Current Invoice will generate a summary invoice as PDF, so it can be saved externally, printed or emailed.
Additionally, billers can opt to upload PDF versions of actual invoices, which can itemize services and present bills in a detailed format familiar to the bill payer
Clicking Pay Invoice will enable the bill payer to pay their current invoice via eCheck, presented against a checking account of their choosing.
Bill payer will now see a copy of the instrument which will be presented for payment against their checking account. Once the eCheck has been validated, click Make Payment
Billers can tailor specific terms, conditions and qualifications associated with paying by eCheck here
Bill payer email address associated with the bill pay account will also get a confirmation email once bill is paid