Create a Motif Vessel with Smoothed Coil Construction
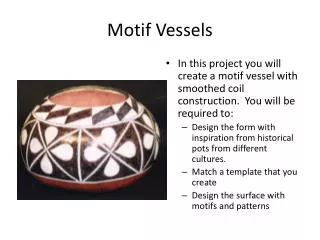
In this project, you will design and create a motif vessel using smoothed coil construction techniques. Start by drawing inspiration from historical pots across various cultures, then match and develop a template for your design. Consider the vessel's function based on its details, such as the opening, neck, container space, and base. Create diverse sketches, select your favorite, and prepare a tagboard template. As you build your pot, focus on rolling coils, blending them carefully, and ensuring your creation aligns with your initial design.

Create a Motif Vessel with Smoothed Coil Construction
E N D
Presentation Transcript
Motif Vessels • In this project you will create a motif vessel with smoothed coil construction. You will be required to: • Design the form with inspiration from historical pots from different cultures. • Match a template that you create • Design the surface with motifs and patterns
Practical Indian pottery was used for water and food storage, cooking pots and eating and drinking utensils. Some pieces were used only for ceremonial purposes and others were perhaps used to hold beads or to store other things. The size of the opening, the neck, the container space, whether or not it had a lid or handles and how the bottom was formed related to how the pottery was going to be used…its FUNCTION. What do you think this pot was used for? Which specific part of the pot makes you think that?
What do you think this pot was used for? Could we see into the bottom easily? Will contents spill out easily?
What do you think this pot was used for? Which specific part of the pot makes you think that? Look carefully at the parts: Opening/lip Neck Container space Base or foot Are there handles or a lid?
What will your pot look like? Draw 4 ideas/sketches in your packet. Make them all different. Consider: lip/opening, neck, container space, base/foot, lid or handle.
Choose your favorite idea/sketch and cut a tagboard template. Make the drawing BIG to take up all (or most of the space) in at least one direction. Then cut it out. PUT YOUR NAME ON IT. Store it on top of your bagged up pot every day. You will match this as you build your pot.
Practice rolling good coils. stand up to roll fist-sized chunk of clay 3. squeeze a chunk of clay into a snake the length of your 2 fists together 4. O-P-E-N fingers even pressure roll BIG…fingers to back of hand 5. thickness between index and pinkie
Begin to Build!! Begin with coils by stacking 3 rows high…then blend on the outside…the inside is optional. Roll a slab with #3 slats for the base..check it with the size of your template…the size should match. Every 3 rows…blend. Be sure to hold the template behind your work to see if you are building your plan. If not, take off the coils and try again!
Just keep Building!! Paddle the form to help make it smooth and even. Score and slip the first coil on each new day of building. Blend all coils carefully.