Bridge Project Summary
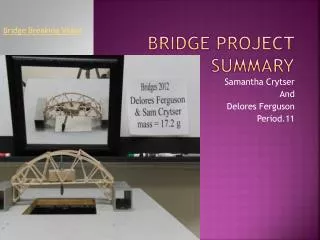
Bridge Project Summary. By : Kourtni Ball & Teara Welsh. Final Video. The part of our bridge that broke was the left side gussets that was holding the two arches together.

Bridge Project Summary
E N D
Presentation Transcript
Bridge Project Summary By : Kourtni Ball & Teara Welsh
The part of our bridge that broke was the left side gussets that was holding the two arches together. • We think it broke there because of all the pressure that was being forced onto it, and the gussets could not hold that much weight. • This could have been reinforced by adding addition gussets or just making sure they were more secure than we did. I don’t believe we strengthened the gussets as much as we could have. What part broke?
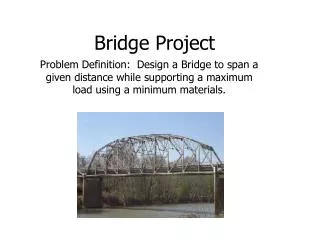
The main stresses enforced onto our bridge was compression and tension and twisting. • The arch design we had helped to support all of the compression. As the weight pulled down it forced the arch to compress and push against the diagonal supports. • Tension was forced onto our bridge whenever the diagonal supports pushed against the testing blocks. • When our bridge finally broke, the bridge twisted forward. What were the stresses?
Our original design was a simple, sleek arch. As we started building we realized that we may want to add some additional supports. We added bottom support braces stretching from the bridge to the side testing blocks. • We added extra gussets to the bridge in many places to try to create a more solid structure. • Also, we added a few diagonal supports to the bottom of the bridge between the arches to try and prevent twisting of the bridge. Transformation of the design
After watching each group test their bridges, it seemed that the main weakness was located in the center of their bridges. This probably happened because the bridges weren't designed to transfer the weight equally and a lot of the weight rested right in the middle. Observations
The bridge with the highest efficiency in our class had an arch bridge design. Their bridge was a light weighted bridge and that helped their efficiency tremendously. The bridge Teara and I designed had the same concept as the bridge with the highest efficiency, but our bridge was heavier. Because our bridge was heaver and a bit more sturdy, it held more weight. In the end, the weight was a major factor considering efficiency and Ty and Kyle’s bridge won. This is Ty and Kyle's bridge, it had the highest efficiency. What made it better?
There is a few things that would have been really helpful to know before building our bridge…. • We learned quickly that setting the first pieces of wood for the arches is very important. Be sure to brace them EXACTLY where they need to be. • Cutting the wood to fit the testing blocks is another important aspect of the bridge building process. Make sure you do not cut the bridge too short, because it wont go back. Cut and sand away the wood slowly, that way you are sure it will fit in the end. • MAKE AN ARCH. We learned during our practice bridge that arches seemed to be the strongest. We made an arch bridge for our final one, and it was successful compared to the bridges that were not an arch. They hold the weight the best, I highly recommend it. Tips and Tricks!