0 likes | 1 Vues
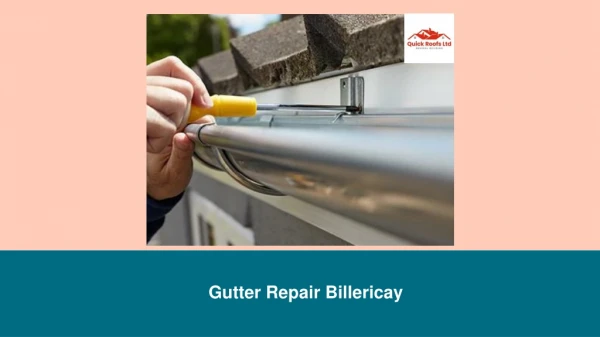
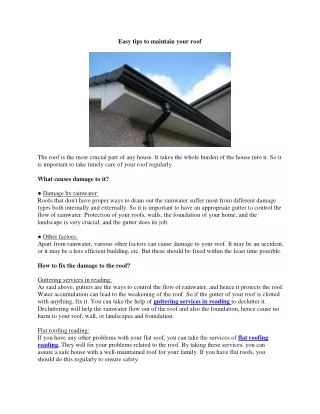
Prevent water damage with gutters installed to handle heavy storms, featuring reinforced corners and secure downspouts for steady flow.
E N D
Water rarely announces the spot where it will do the most damage. It follows the path of least resistance, then quietly undermines soil, weeps behind siding, or seeps into a basement corner. When I get called to look at a damp crawlspace or a frost-heaved walkway, nine times out of ten I trace the issue back to gutters and, more specifically, to downspouts that aren’t doing their job. The good news is that downspout problems are solvable with a mix of practical know-how and disciplined gutter maintenance. The tough news is they usually don’t look catastrophic until the damage has already started. This guide walks through the failure points I see most often, what to check, and how to decide between gutter repair and gutter replacement. If you understand the water, you’ll understand the fixes. What a Downspout Is Supposed to Do A downspout is the pressure relief valve for your roof. Gutters catch the runoff from shingles or metal panels, then gravity carries that water to outlets. From there, downspouts move it down the wall and away from the foundation. The details matter. A standard residential roof can shed hundreds of gallons in a single thunderstorm. On a 1,600-square-foot roof pitched toward two gutters, each downspout might see 400 to 600 gallons per hour in a heavy summer cell. If the pipe kinks, the elbow clogs with leaf litter, or the discharge ends near the foundation, the system fails, often quietly at first. If you notice streaking on fascia, peeling paint on soffits, or a washed-out stripe in your landscaping, that is water telling you the downspout plan is flawed. Good gutter services use those clues to find the weak link.
Common Failure Modes, From Roof Edge to Soil Start at the top, then follow the water. At the gutter, blockages start with organic matter, seeds, and granules from asphalt shingles. Over time, those granules accumulate at outlets like sand in a drain trap. Screen covers help, but poorly chosen guards can trap debris at the outlet and worsen overflows. I often see gutters pitched flat or even back toward the house. A gutter should fall about 1/16 to 1/8 inch per foot toward the downspout. Too little slope and water lingers, which breeds sludge and ice. Too much and you collect splash noise and look at an uneven fascia line. At the outlet, undersized or mislocated openings choke the flow. An outlet shoe set too high above a deck or walkway will splash water back. Some installers skip an outlet strainer to keep flow high, but that leaves you at the mercy of the first oak catkin string- drop or cedar needle storm. Moving down the wall, the most frequent issues are dented sections from ladders, crimped seams at elbows, and loose straps. Every dent is a turbulence point. Turbulence traps leaves, then ice forms around that blockage in winter. In windy corridors, straps set too far apart let the downspout oscillate and wear a groove in the siding. Near the ground, splash blocks and extensions tend to go missing after a lawn project or someone trips over them. Buried extensions clog with silt and acorns. Corrugated black pipe is inexpensive and flexible, but it traps debris in its ribs and collapses under a vehicle tire. Smooth-wall PVC, pitched and cleanout-accessible, performs better but needs proper design to avoid freezing and backup. At the discharge, too many systems simply dump water 6 to 12 inches from the foundation. On clay soils, that might be survivable for a while. On sandy or loamy soils, that is a direct line to a wet basement or frost movement. Proper gutter repair accounts for soil type, slope, and the number of roof planes feeding each downspout. Diagnosing the Real Problem You can learn a lot in five minutes during a rain. Walk around with a hat and look, listen, and feel. I start by watching the gutter edge for overtopping. If water sheets over the front lip, that suggests a blockage downstream or an undersized system for the roof area. If it spills behind the gutter, check for a missing or short drip edge, or a gutter that has pulled away from fascia. Sometimes the gutter is straight but the fascia is bowed. Hidden hangers installed into rotted wood won’t hold, which is how gutters pitch wrong, then clogs become inevitable. Next, I look at the downspout elbows. Elbows are clog magnets. If you tap one and it sounds dull, it is likely packed with leaf mulch. If you tap and hear ice in cold weather, you may have a frozen plug at an elbow from poor drainage. Feel for loose straps and look for rubbed paint on siding, a sign the spout moves in the wind. At the bottom, check for standing water at the end of the extension, discoloration on the foundation, or a trench that shows where water has been carving a path. Inside the house, efflorescence on foundation walls, musty smells near corners, or a sump pump that runs more often than your neighbors’ are clues that your downspouts aren’t sending water far enough away. Repair Tactics That Actually Work Let’s walk through fixes that have held up over time. Clearing blockages is usually step one. I prefer to start at the bottom to avoid forcing a clog tighter. Disconnect the lowest elbow, flush with a garden hose upward, and let gravity work. If you can’t remove an elbow without damage, a flexible drain brush or a leaf blower set to blow from the bottom up can dislodge a plug. Work patiently, because aggressive reaming can deform thin aluminum. Address pitch and support. If the gutter holds water after a storm, loosen hangers and reestablish slope. Old spike-and-ferrule systems often loosen after a decade. Upgrading to hidden hangers with long screws into rafter tails gives you a thicker bite. On
houses with fascia made of composite or PVC, predrill to avoid splitting. Replacing a few rotted fascia sections while you are there saves future headaches. Upgrade outlets and strainers. A large, tapered outlet increases capacity at the bottleneck. I like “outlet boxes” that transition smoothly from gutter to downspout rather than just a punched hole. Install a domed strainer that stands proud of the gutter bottom so debris can wash around it instead of forming a flat mat. Rethink elbows and bends. Long-radius elbows flow better than tight ones and trap less debris. If architecture forces a jog, try to spread the turns across multiple elbows with gentler angles. Fewer bends mean better performance, especially in autumn when leaf and twig load peaks. Replace dented sections. Aluminum downspouts are not worth un-denting. Any ridge becomes a debris hook. Swapping a section is quick and cheap, provided you match color and profile. Keep joints staggered rather than aligned to avoid weak points in the same vertical line. Secure the run. Add straps every 6 to 8 feet, and closer in windy areas. On masonry, use tapcon screws with sleeves, and on siding, hit studs whenever possible. If you cannot, use a backer behind the siding panel to keep fasteners from crushing the panel. Extend the discharge. Water should exit at least 4 to 6 feet away from the foundation, more on flat lots or soft soils. Hinged extensions help with mowing and reduce the chance someone removes them. Where aesthetics matter, a buried smooth-wall PVC line with a pop-up emitter is a tidy solution. Include a cleanout riser near the house for maintenance. Mind the grade. Extensions only do so much if the soil slopes back toward the house. Regrade mulch beds and lawn edges so water runs away. Two percent fall for the first 6 to 10 feet is a practical target. When we correct downspouts and grade together, basement humidity drops quickly. When Repairs Aren’t Enough Sometimes it is not a bandage problem. It is a design problem. I see homes with one downspout trying to empty a 50-foot gutter. In a typical cloudburst, the inlet can keep up, but the outlet cannot. The result is chronic overtopping right in the middle. Adding a second downspout midway or at the far end dramatically improves performance. On long gutters, plan spacing based on roof area and pitch. Steeper roofs shed water faster, so volume over time is higher. As a rule of thumb, a standard 2-by-3 inch downspout handles roughly 600 square feet of roof area in moderate rain. A 3-by-4 inch spout nearly doubles that. These are starting points. Local rainfall intensity matters, and a good contractor will size for your storms, not an average that fits a different climate. Material and profile are part of the equation. Five-inch K-style gutters with 2-by-3 downspouts are common, but six-inch gutters and 3-by-4 downspouts offer a significant capacity bump with minimal visual difference on larger homes. If you find yourself clearing clogs every windstorm, a switch to the larger profile with smoother transitions may be the real fix. If your gutters are pulling away due to rotted fascia or chronic ice loads, consider a more thorough gutter replacement. Tearing off, repairing fascia, adding a proper drip edge and underlayment, and reinstalling new gutters with correct hangers puts the system back on a solid foundation. It costs more up front, but you stop chasing symptoms. The Guard Debate People ask about guards as if they are a silver bullet. They help, but they are not maintenance-free. Mesh micro-screens keep out shingle grit and small needles, but they can skin over with pollen, and some models trap snow that turns into ice sheets. Perforated covers are more forgiving, but small seeds still enter and settle at outlets. Reverse-curve covers shed most leaves, yet in heavy rain the water can overshoot if the angle is wrong or the fascia is set back. I recommend guards where the trees drop leaves and twigs in seasonal bursts and homeowners are unlikely to clean gutters twice a year. Pair guards with adequate downspout sizing, proper outlet design, and clear maintenance expectations. For heavily wooded lots that load gutters every storm, an accessible design without guards can be faster to service, especially if you plan a regular gutter maintenance program with a local company.
Cold Climate Realities Ice changes the playbook. In freeze-thaw cycles, even small amounts of trapped water build into hard plugs in elbows and extensions. Corrugated extensions become ice molds. If you live where winter holds below freezing for stretches, use smooth elbows and smooth extensions. Keep outlets free of burrs that catch slush. Consider a removable winter extension that you can pop off before deep freeze, then redirect discharge onto a wide, sloped splash surface away from walkways. If downspouts discharge near steps, reroute them to avoid sheet ice where people walk. Heat cables are a tool, not a cure. Installed inside gutters and downspouts, they open a channel through ice dams and keep outlets flowing. They require GFCI circuits and thoughtful routing. I use them mainly under valleys that dump heavy snowmelt onto one short gutter run. If you depend on heat cables across large sections to avoid backups, you have a design or insulation problem to solve. Details That Separate a Quick Fix From a Durable One A few craft choices pay off for years. Use butyl or high-quality gutter sealant at seams and outlets, not generic silicone. It adheres to aluminum and stays flexible. Wipe and dry the surface first. Bridge joints with slip couplings rather than butt joints wherever the profile allows, so thermal expansion has room without splitting the seam. Fasten with color-matched, stainless or coated screws, not rivets, when you expect to reopen a joint for cleaning. Rivets are tidy but less serviceable. On painted aluminum, avoid over-torquing screws that crush the profile. Slight deformation here becomes a spot where water eddies, and you will see dirt stripes there later. On copper systems, use compatible fasteners to avoid galvanic corrosion. Mixed metals corrode quietly behind the paint. For buried extensions, add a leaf filter or cleanout at the transition before the line enters the ground. Install the pipe with a consistent fall and bed it in sand, not large crushed stone, to prevent voids and dips. Mark the route on a site plan or take photos before backfilling. You will thank yourself when you need to find it. A Practical Maintenance Rhythm Most houses do fine with two cleanings per year, spring and late fall. More trees or wind exposure means more often. The goal is not spotless gutters, it is reliably clear outlets. Focus efforts there. During the check, look for hanger pullout, sealant cracks at miters, and paint wear under downspouts. Run a hose from the highest point and time how long it takes to see water at the discharge. A slowing trend means buildup inside elbows or the buried line. If you hire gutter services, ask what they actually do. The best crews will clear and flush, adjust pitch where needed, check fastening, reseal failing seams, and photograph issues. If they only scoop leaves, you are buying half the job. Cost and Value Judgments A straightforward downspout repair, such as replacing a dented lower section and two elbows, might cost the price of the parts and an hour or two of labor. A more involved correction, such as adding a new outlet, resizing to 3-by-4 downspouts, and burying extensions 10 to 20 feet, can run into the low four figures depending on soil, obstacles, and finishes. Full gutter replacement for an average single-story house with six-inch K-style aluminum and upgraded downspouts often falls in the mid to upper four figures, varying with region and access. The hidden cost of waiting is the foundation, the driveway, and the basement. I have seen a $400 correction to discharge distance prevent a $7,000 interior waterproofing project. When the evidence points to downspout failure, prioritize that work ahead of cosmetic fixes. Special Cases That Trap Homeowners
Roof valleys that shoot water into short gutter runs create local overload. Water hits the gutter repair back of the gutter and jumps it. A splash guard at the valley entry helps, but it is a bandage. Better is to bring a downspout within a few feet of that valley, or install a conductor head to buffer the flow before it enters the spout. Multi-level roofs where an upper downspout dumps onto a lower roof are common. If that discharge lands near a chimney saddle or wall, the lower gutter gets hammered. Extend or redirect the upper discharge into a lower gutter through a drop outlet and pipe, rather than letting it run across shingles. It is not the prettiest move, but it protects the roof and the lower gutter from concentrated flow. Historic homes with no fascia and half-round gutters need special brackets and careful slope. Over-tightening half-round straps can twist the profile and create low spots. Downspout sizing matters more with half-rounds because capacity is lower for the same nominal width. A 3-by-4 rectangular spout feeding from a half-round looks odd to some purists, but it performs. Choosing Between DIY and Hiring Out Many homeowners can clear elbows, add a hinge extension, or swap a dented lower section. The risk is ladder work and the temptation to keep going into scope you cannot safely handle. Pitch correction on a second story, new outlets, or buried lines near utilities are best handled by pros. A reputable gutter repair company will measure, model the water paths, and size components to local rainfall. Look for teams that talk about outlet sizing, fall, fastener types, and soil slope, not only leaf guards. If you are interviewing gutter services, ask how they approach buried discharges and cleanouts, what they use to seal seams, and whether they will adjust hanger spacing as part of maintenance. The right answers show they think beyond the scoop-and-go. A Short Field Checklist Use this quick pass during a rain to focus your effort. Watch for gutter overtopping, front or back, and note the location relative to outlets. Tap elbows for dull sound indicating clogs, and feel for vibrations or oscillation in wind. Verify downspout straps are secure and spaced appropriately, with no rubbing on siding. Check where water exits, measure distance from foundation, and look for standing water. Follow inside clues like efflorescence or sump activity after storms to correlate problems. Materials and Sizing Choices That Pay Off If you are considering gutter replacement or upgrading sections, step beyond the default package. Six-inch K-style gutters are not only about capacity, they reduce the frequency of small clogs. Pair them with 3-by-4 downspouts and long-radius elbows. Use thicker-gauge aluminum where hail or ladder contact is likely. On coastal or industrial sites, consider aluminum with quality coating or copper to resist corrosion, though copper demands careful fastening. For buried discharges, smooth-wall PVC at 3 or 4 inches with glued joints and accessible cleanouts is my go-to. Keep transitions gentle, and avoid T-junctions that invite clog points. Where you cannot bury lines, use hinged, rigid extensions with a broad splash pad to spread flow and protect soil from erosion. The Payoff You Don’t See When downspouts work, you rarely notice them. That is the point. You notice the dry basement after spring storms. You notice the lack of icicles where they used to form. You notice the landscape mulch staying put and the walkway not heaving after winter. Water management is quiet insurance. If you build a habit around gutter maintenance, treat outlets as sacred, and upgrade weak links with well-sized components, downspout problems stop being a recurring headache. Hire help where the risk outpaces your comfort. Use the right materials, aim water away from the house by real distances, and let gravity do the rest. Power Roofing Repair Address: 201-14 Hillside Ave., Hollis, NY 11423 Phone: (516) 600-0701