Download
1 / 53
530 likes | 562 Vues
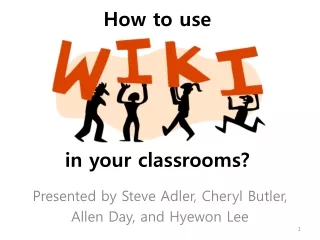
How to use in your classrooms?. Presented by Steve Adler, Cheryl Butler, Allen Day, and Hyewon Lee. Script. Hi, everyone! Welcome to the Wikis’ world presented by Steve Adler, Cheryl Butler, Allen Day, and Hyewon Lee.

E N D
How to use in your classrooms? Presented by Steve Adler, Cheryl Butler, Allen Day, and Hyewon Lee
Script • Hi, everyone! • Welcome to the Wikis’ world presented by Steve Adler, Cheryl Butler, Allen Day, and Hyewon Lee. • Using web 2.0 technologies like Wikis enables learning to be more participative and active. • Have you ever heard of Wikis? • If so, have you ever used Wikis for your courses? • Wiki is a free and easy to use tool that can powerfully facilitate collaboration and communication. It's easy for people to jump in and revise pages that wikis are becoming known as the tool of choice for large, multiple-participant projects.
Script • Wikis effectively provide teachers with a 'web page' that can store files, course notes, movies etc to support classroom learning. Wikis can increase the engagement of students, encourage collaboration, enable students to build connections and stimulate and facilitate discussion. A wiki is also the perfect spaces for displaying assessment information, tasks and projects. • Using Wikis, it is easier than ever to collect data from the information available in the world, conduct interactive collaborative projects, and create rich teaching and learning resources using edit, copy and paste, and drag and drop. You do not need to download or install anything; all your work is stored in the “cloud” in your wiki spaces.
Script (Cont’d) • I know that you are still tilting your head. In a very short time, you will get some ideas on how to use Wikis in your classrooms or courses. • From now on, we are going to review how to use wiki step by step. • Let’s go!
Script • The Wikis can be found at http://www.wikispaces.com.
Script • There are two versions of Wikis: Wikis for organizations and Wikis for individuals and groups. • The latter is free of charge and affordable space for those who want to use Wikis for interactive and collaborative learning. For this presentation, we chose the Wikis for individuals and groups.
Script • You must join if you want to create your Wiki space. All you need to type is your username, e-mail, and password.
Script • You must log in if you want create content. Use the login window to access your account.
Script • After you have logged in, the login window shows that you can create a wiki space, asking its name, option of permission, and wiki type. • If you enter all the required information, click “create” button. • We entered wikisinclassrooms as name, gave permission to public, and chose “other” type.
Script • Your Wiki will be created. • This is the default page of your Wiki. • You can create new pages as you wish.
Script • Clicking edit button on the top right side of the page, you will be taken to the edit screen. • From there, you can add your content to the Wiki. • You can type directly onto the page.
If you do not want to change the content, click cancel button. Toolbar Color & Font Dividing line Italics Numbering Insert table Insert file When finished editing, click save button. Style Bold Embed Media Undo Bulleting Underline Redo Add hyperlink Clicking preview button, you can see the edited page.
Script • The buttons on the toolbar look much simpler, but have similar functions to MS Word. • Formatting your text is just like in MS Word. • You can format your text, using bold, italics, underline, color, and style functions. • You can add hyperlink, insert files, pictures, and table, and embed media. • When you finish editing, you will need to click save button. • If you don’t want to change the content, click cancel button. • If you want to see the edited page before saving, click preview button.
Script • For example, if you want to format your text in any way, you will need to highlight the text to change and then use the buttons on the toolbar.
Script • When you click on the link button, a window will pop up showing Wiki link. • You can type link text and page name from your Wiki. • When you select external link, you can add the designated web address to your Wiki. • You can add anchor name.
Script • For example, let’s add external link, www.wikispaces.com to your Wiki. • Type wikispaces in link text and www.wikispaces.com in address. Then, click add link button. • You will see the link on the page.
Script • If you want to insert files or pictures, use file button on the toolbar. • Clicking the file button, a window will pop up showing pictures and files already uploaded to your Wiki. If you want to upload a new file or picture, use upload files button on the right side. • You can browse to locate a file or image on your computer and then click on upload button. • We uploaded a file named computer-classroom.jpg.
Script • When clicking the file, it will be inserted to the page.
Script • You can upload files, images, or pictures from external sources, using external image button. • Type the external image address, and click load button. • If you double click the image, it will be easily inserted into your Wiki.
Script • Use table button if you want to insert a table. • Define the number of columns and rows. • Click on insert table button. • The table will be inserted into the page. • You can format the table in any way, using style buttons.
Script • If you want a video, slideshow, podcast or any other widget on your page, click on widget button.
Script • For example, you want to embed a video clip named “pb wiki-What Is A Wiki?” from YouTube. Click on YouTube, go to www.youtube.com, and find a video clip. • You will need to look for embed field on the YouTube video page and copy and paste the html code in the box. • Click on save or preview if you want to review the page before publishing.
Script • When you save the edited Wiki page, you can watch the embedded video on your Wiki page.
Script • The history of wikis dates from 1994, when Ward Cunningham invented the concept and gave it its name (he gave the name "WikiWikiWeb" to both the wiki, which ran on his company's website at c2.com, and the wiki software that powered it). c2.com thus became the first wiki, or a website with pages that can be edited via the browser, with a version history for each page. Before 1994, however, there were several historical antecedents to wikis, including Vannevar Bush's proposed "memex" system in 1945, the collaborative hypertext database ZOG in 1972, and the Apple hypertext system HyperCard in 1987; though the creation of true wikis only became possible with the development of the World Wide Web in the early 1990s.
Advantages of Wikis • Good for writing down • Instant collaboration • Easy accessibility • Archive • Active and interactive mode
Script • The Wiki is good for writing down quick ideas or longer ones, giving you more time for formal writing and editing. • The Wiki is instantly collaborative without emailing, keeping the group in synchronous communication. • The Wiki is accessible from anywhere with the Internet connection. • The Wiki is your archive, because every revision is kept. • The Wiki is exciting, interactive, and immediate.
Disadvantages of Wikis • Inconsistent content • Content addition and deletion • Vandalism of content • Spamming • Messy formatting • Unproductive quarrels among users
Script • Several common problems have been identified for wikis, or sites which allow anyone to create or to edit content. • The addition of inapplicable content to a page by individuals in order to increase their websites' page ranking on search engines. • The deletion of text from a page that was entered by another contributor • Deliberately and maliciously deleting, adding and/or changing content on the page. • Some note that such bad behavior is not generally successful in active wikis. • Content is often corrected fairly quickly using the revision history view and the feature to revert content. • Some wikis provide the ability to ban by IP address someone from editing the wiki.
Script • The best known example of wikis is Wikipedia. • It is a free encyclopedia, which every registered user can add, change, and delete information about the target item, place, thing or person.