Heat-Trapping Gases
90 likes | 335 Vues
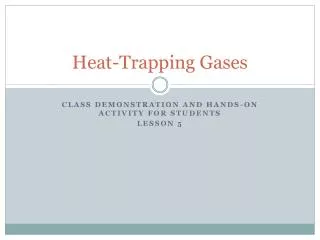
Heat-Trapping Gases . Class Demonstration and Hands-on activity for students Lesson 5. Instructions for Heat-Trapping Gases Demo. Objective: The main goal of this activity is visually demonstrate the infrared blocking power of carbon dioxide gas. Time needed : 15 minutes

Heat-Trapping Gases
E N D
Presentation Transcript
Heat-Trapping Gases Class Demonstration and Hands-on activity for students Lesson 5
Instructions for Heat-Trapping Gases Demo Objective: The main goal of this activity is visually demonstrate the infrared blocking power of carbon dioxide gas. Time needed : 15minutes Materials needed : white vinegar, baking soda, clear glass fish bowl, Vernier Go! Link, Vernier TI Light Probe, 2 ring stands, remote control for electronics (to emit IR), masking tape, computer Procedure: Assemble the IR measuring apparatus as shown in the diagram. Display the IR reading on the computer screen. Have the screen directed so that students can see the output but also so that its emitted light is sent away from the Light Probe. Turn off the lights in the classroom then calibrate the Vernier Light Probe to zero. The light reading on the computer monitor should display a very low reading in lux. Have a student push and hold the power button down on the remote. The light reading should increase significantly due to the IR emitted from the remote. Allow the student to return to his/her seat, turn a light on in the classroom, then add 100 mL of vinegar and 4 heaping teaspoons of baking soda to the fish bowl. Stir with the spoon to start the reaction then leave the fish bowl undisturbed until the bubbling stops. Once the reaction is complete, carbon dioxide should be filling the fish bowl. Since this gas’s density is greater than atmospheric air, it should remain in the bowl as long as the bowl is left in place. Turn off the lights again, and have a student push and hold the power button down on the remote. The light reading should be significantly decreased from the value obtained from the empty fish bowl. (As further proof that the CO2 caused the IR blocking, the CO2 can be poured from the fish bowl then replaced empty to its original position. The reading should return to about the original empty fish bowl reading.) Assessment: None. This is a prelude activity for better understanding of the next day’s hands-on activity.
Instructions for Heat-Trapping Gases Lab Objective: The main goal of this activity is instrumentally demonstrate the heat-trapping power of some gases found in Earth’s atmosphere. Time needed : 55 minute period Materials needed : white vinegar, baking soda, several beakers, access to methane gas (lab gas), large lab thermometers (4 per group), large, clear Solo-style cups (4 per group), package of same color large latex balloons (4 balloons per group), large rubber bands (4 per group), standard light sockets and incandescent bulbs (1 per group), assorted sponges, meter sticks, scissors, data collection sheets, class clock with a second hand Procedure: Each lab group will use the following diagram as a guide to setup their lab. Divide the students into groups of three. Gather several beakers (about 3 per group) and to each, add about ½ teaspoon of baking soda and 30 mL of vinegar. Allow these reactions to proceed without disturbing them. Give materials to each group (4 cups, 4 balloons, 4 rubber bands, 4 lab thermometers, a 3cm square section of sponge, a flat-bottom light socket with an incandescent bulb, meter stick, and a pair of scissors) Have each lab group cut the balloons to make 4 cup covers then secure each one of these covers to the top of a Solo cup with a large rubber band. Each cover should then have a small hole punched in the top with the end of a sharpened pencil for a thermometer to be inserted inside the cup. The balloon should make a tight seal around the thermometer. Each group should then make labels to lay on the table by each cup representing the gas it contains (methane, carbon dioxide, water vapor, and atmospheric air). Have each lab group insert a lab thermometer in the top of one of the balloon covers that is secured to a cup and place it beside the label marked “atmospheric air”. Have each lab group soak then lightly squeeze out water from the 3 cm square of sponge. (It should still be quite damp.) This sponge should be placed in the bottom of cup 2, the balloon cover replaced and a thermometer placed inside as was done for the “atmospheric air “cup. This cup should be placed beside the “water vapor” label. Have a member of each lab group to bring cup 3 to the instructor to be filled with methane. Since the density of methane is less than atmospheric air, the cup should be inverted to hold the gas and the balloon cover/thermometer assembly placed on while in this position. Have the group place this cup beside the “methane” label. Have a member of each lab group take cup 4 to the table containing the beakers of CO2 that have been generated while the other setup was taking place. This final Solo cup can now be filled by carefully pouring the contents of three of the beakers containing CO2 into their cup and carefully sealing the top with the balloon/thermometer assembly. If the beakers or cup are jostled, some of the CO2 will be lost to the floor so students should be asked to move slowly around this table. This final cup should be placed beside the label marked “carbon dioxide”. Each group should now arrange the cups of gases so that each is 30 cm from the center of the light source. The temperatures will be read for 20 minutes and the cups will need to be left in place for this entire time so students should place them so that the thermometers can be read without adjusting the cup positions. Before the bulb is powered, the initial temperature for each gas should be recorded in the Time = 0 min row of the data table. One student can be responsible for recording temperatures and signaling each minute that passes. The other members can each be responsible for reading the temperatures of two different bottles of gas. Power up the bulb and record gas temperatures for each of the gases at one minute intervals until twenty minutes have passed. Assessment: Have each student make their own copy of the temperatures recorded for each time to use as a reference for the homework assignment. Students will generate a graph of time vs. temperature for each of the four gases. Each gas should be represented by a different color line on the same graph for easy comparison. This can be done with Excel or by hand on graph paper.
Lab Setup for Heat-Trapping Gases Activity • CO2 • CH4 • Atmospheric • Air • H2O
Analysis Questions Describe the general trend in temperature over time that was observed. For example, did the temperature of the gases show a consistent increase, did it show a rapid rise and then level off, or did it reach a peak temperature above which it rose no further? Compare and contrast the temperature change of each gas tested. Which one showed the lowest temperature rise? Which one showed the greatest temperature rise? What was the apparent effect on temperature when adding CO2, CH4, or H2O to the cups? This activity is an investigation into thermal properties of several gases found in the atmosphere but it is not meant to be a model for what is occurring in the atmosphere. In what way is Earth’s atmosphere different than what is found in the cup? How does Earth’s atmosphere differ in composition and what processes are occurring in the atmosphere that are not occurring in the cup? The phenomenon that this activity explores is typically called the “greenhouse effect”. Do you think this is a good term to use? Why or why not? adapted from http://education.usgs.gov/lessons/gases.pdf
Expected Results Methane Water Vapor Carbon Dioxide Atmospheric Air Temperature (C) Time (minutes)