Download

1 / 9
0 likes | 1 Vues
One of the most important parts of modern building is getting a smooth and long-lasting finish on the walls. Plastering the old-fashioned way can be hard work, take a long time, and not always be consistent. The game has changed, though, with the development of ready-mix plaster, a pre-mixed, high-quality solution that saves time, guarantees consistency, and produces perfect results. If you know how to use ready-mix wall plaster, you can greatly increase the quality and speed of your work, whether itu2019s for home or business use.

E N D
Step-by-Step Guide to Applying Ready Mix Plaster for Flawless Walls
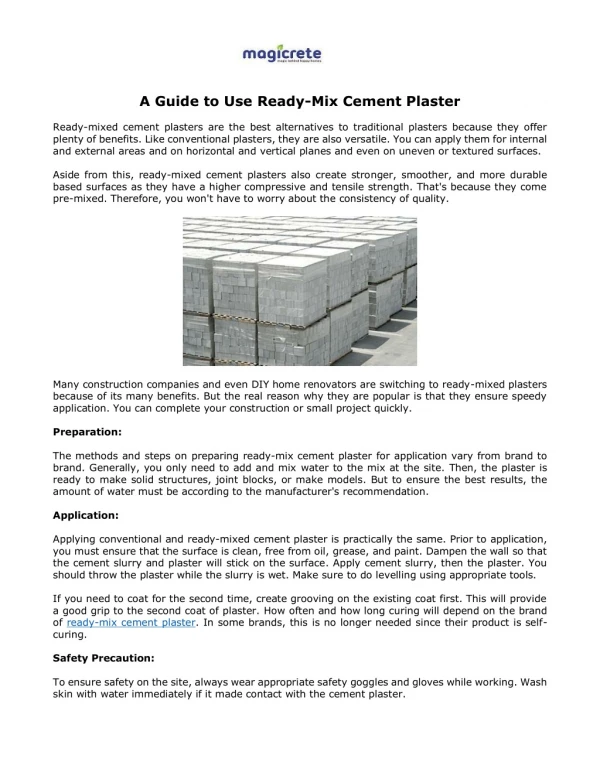
One of the most important parts of modern building is getting a smooth and long-lasting finish on the walls. Plastering the old-fashioned way can be hard work, take a long time, and not always be consistent. The game has changed, though, with the development of ready-mix plaster, a pre-mixed, high-quality solution that saves time, guarantees consistency, and produces perfect results. If you know how to use ready-mix wall plaster, you can greatly increase the quality and speed of your work, whether it’s for home or business use.
Fine sand, cement, and polymers are mixed in precise amounts to make ready-mix plaster. It arrives ready to use, so you don’t have to worry about measuring and mixing on site, which ensures that huge areas are always the same. Contractors and builders who want to work quickly and accurately often use it because it has a stronger bond, is less likely to break, and has a flawless finish. 1. Getting The Surface Ready Before using ready-mix plaster, you need to prepare the surface properly. Make sure the wall is clean, dry, and has enough moisture. It shouldn’t have any dust, oil, or loose particles. Before you start, you should fix any cracks, holes, or uneven patches with a suitable filler or bonding solution.
When surfaces are ready, the ready-mix plaster sticks better to the substrate. Lightly sprinkle water on the wall if it is too dry. This will help the plaster stick evenly and stop it from soaking up too much water. 2. How To Mix Ready-Mix Plaster Most of the time, ready-mix wall plaster comes in dry, bagged form. Adding the right amount of clean water is part of the mixing procedure. This is normally 18–20% of the plaster’s weight, depending on what the manufacturer says. Use a paddle stirrer or a mechanical mixer to get a smooth, lump-free texture.
Don’t add too much water, as this can weaken the mixture and affect how well it bonds after application. Always combine in tiny amounts that can be used within the required working period (usually 1–2 hours) for best results. 3. Putting On the First Coat Use a steel trowel or a mechanical sprayer to put on the first layer of ready-mix plaster after mixing it. Start at the bottom of the wall and work up in a straight line, keeping the thickness the same. Most types of walls should have a primary layer 10 to 12 mm thick.
Right after you apply it, use a straight edge to level the surface and make sure it is evenly spread. The first coat is the base layer. It gives the next coat strength and a smooth surface. 4. Smoothing And Putting on the Second Layer When the first layer starts to dry, use a sponge or wooden float to softly roughen the surface. This will make it easier for the next coat to stick. Before commencing the second coat, which is normally thinner (3–5 mm), give the first coat enough time to dry. This usually takes 24 hours.
This last layer of ready-mixed plaster ensures the finish is smooth and perfect. Using good trowelling skills can make the surface smoother and less bumpy. Adding a latex bonding agent between layers can help them stick together better in some circumstances, especially in regions that are stressed, like outside walls. 5. Curing and Finishing Curing is very important for long-lasting strength and durability. For 3 to 4 days after applying, lightly spritz the plastered surface with water to keep it from cracking and stay hydrated. Don’t let it dry out in the sun or force it to dry out, because this can make it shrink too soon.
You can paint and prime the wall right after it has cured because ready-mix wall plaster works well with paints and decorative coatings. The result is a beautiful, precisely flat surface that will last a long time. Perfect Finish, Easy to Use Following these techniques will help builders and homeowners get walls that seem like they were done by a specialist without the problems with traditional plastering. Ready mix wall plaster not only cuts down on the need for qualified workers but also speeds up projects and keeps the quality the same.
Ready-mix wall plaster is a key part of modern building since it is efficient, long-lasting, and looks great. High-quality plaster and the right techniques will make your walls smooth and long-lasting. This is a new way to finish walls in modern settings.