Jerry Lee
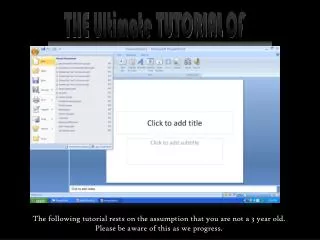
PowerPoint. the prince of. THE TUTORIAL OF. Jerry Lee. JERRY LEE. Please visit my PowerPoint art gallery at: http://prince-of-powerpoint.deviantart.com/. The following tutorial rests on the assumption that you are not a 3 year old. Please be aware of this as we progress.


Jerry Lee
E N D
Presentation Transcript
PowerPoint the prince of THE TUTORIAL OF Jerry Lee JERRY LEE Please visit my PowerPoint art gallery at: http://prince-of-powerpoint.deviantart.com/ The following tutorial rests on the assumption that you are not a 3 year old. Please be aware of this as we progress.
Okay, so the first thing we need to do is set up the stage. Get rid of the Task Pane and the Slide Pane so we have a bigger space to work with. Start with a blank layout, then click the following: shapes | Lines.
Highlighted here is the Curve Tool. It’s going to be your best friend so get used to using it. Connecting the dots is a fun game, so here’s an excuse to play. The Curve Tool re-orients itself after each click you make with it. Double click to end the curve where you want. Try imitating the shapes below. You can also create closed figures (the colored one on the right) by making your way back to where you started the curve. Don’t worry. It’s a bit hard to understand at first. But pretty soon, you should be able to do it intuitively. Holding the Ctrl key makes your next click a straight line, sort of like a stick connected to the curvy wire. This comes in handy when you want to make corners while working with curves:
The easiest way is to start with the biggest part first and go from there. In this case, it’s Ms. Orange’s head. Use the Curve Tool to make an outline shaped just like this. By default, PowerPoint colors it in for you with this color. If not, you’ve probably messed around with the program once or twice. Next thing we need to do is give her a decent skin color. Point to it, Right-click | Format shape. Use the gradient tool Change the color of stop 1 and stop 2.
It’s all a matter of assembling the bits and pieces. If some parts overlap other parts in ways you don’t like, simply Right-click | Order and choose from the options. Make sure the object in question is selected when you do this. So that’s it for the flesh. Now, select all three objects by holding Shift and clicking on each of them once. Right-click | Grouping | Group and set it aside.
I’d say the eyes are the most complicated part. It’s crucial in showing detail for both anime and non-anime art. Take regular eyes for example… Each anime eye is made up of at least 9 different parts. Shall we dissect again?
You can make most of the parts on your own. But one thing you probably won’t be familiar with is this object: But don’t worry. It’s not that hard to reproduce. In fact, you can do it in a couple of seconds. Then follow through by adding these gradient settings in its Fill Effects Box. Note that I have changed the settings for the TransparancyArea. First, use the Curve Tool to draw the basic shape of the object. To make pointy edges, use the Ctrl function. And if you haven’t figured it out yet, you can remove the black line in the Format Object Box by clicking the Color attribute in the Line Area, and selecting No Line.
Proceed to making the other eye in virtually the same way (I sort of cheated here to keep things short, but I won’t teach you this shortcut for the sake if simplicity). Now, Group them together like you did with her head earlier. Keep it selected. For the first time, we’re going to use those white and green dots that appear around the object: Dragging the green dot around will allow you to rotate the entire object. Dragging the white dots will stretch or scale your object depending on which one you drag. Practice them a little to get a hang of them. Also, try using them while holding Ctrl, Shift, or both.
Now drag the eyes so that you may give sight to the currently blind Ms. Orange. Resize if necessary. How big you want to make the eyes is entirely up to you. Assuming you’ve been reading all the instructions so far, you should be able to make the following on your own by now. Then stick ‘em in her face the same way you did with her eyes.
You already know everything you need to make the rest of Ms. Orange. Review my tips, follow your instincts, use The Force. These are the last five objects you need, all courtesy of the Curve Tool:
Fix the arrangement of stacking objects that overlap the wrong way by Right-click | Order. Put them all together, Group them and take a good look… “Congratulations! You have created your first PowerPoint Anime Girl!” Remember the tools you’ve used throughout the program? I dare you to name ONE that you didn’t underestimate before going through this tutorial… See, that’s the best part about drawing in PowerPoint. Virtually everyone has used it, therefore they assume that something like this can’t be done by just pure PowerPoint. Ah, but you my friend, have just stepped into the realm of a different level of PowerPoint art!
There is still much to learn at this point. There are different styles and techniques that PowerPoint can imitate. It often just depends on how creative you are with the simple tools it offers. Take Saffron here for example. What would you say if I told you I only added ONE other tool to the tools mentioned in this tutorial to make her? What would you say if I told you that tool was THIS? I’ll leave you to figure that out on your own for now… “It’s got the Power. You just need to Point it in the right direction.” Have a nice day! E-mail: ako_si_prinsipe_jerry@yahoo.com