Mastering PowerPoint Art: The Ultimate Tutorial by Jerry Lee
Dive into the revolutionary PowerPoint tutorial by Jerry Lee, designed for those looking to elevate their digital art skills. This comprehensive guide assumes you're ready to learn and covers everything from setting up a new presentation to creating captivating anime characters. You'll master the Curve Tool, learn how to “build” artwork piece by piece, and discover tips for shading and detailing. Whether you’re a beginner or just looking to refine your skills, this tutorial is your gateway to unleashing creativity like never before. Let’s embark on this artistic journey together!

Mastering PowerPoint Art: The Ultimate Tutorial by Jerry Lee
E N D
Presentation Transcript
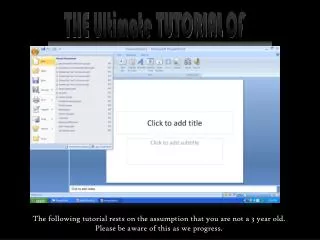
THE Ultimate TUTORIAL OF Jerry Lee The following tutorial rests on the assumption that you are not a 3 year old. Please be aware of this as we progress.
Welcome to the single most original PowerPoint Tutorial in the planet! Provided entirely by yours truly, the Supreme Class Commander himself. Take your time for you are about to embark on some serious learning! Rush through it and you will have no clue on future projects. Okay, so the first thing we need to do is set up the stage. Open up a New Presentation by going to File|New. Start with a blank layout, then click the following: Insert | Shapes| Curve. (Note that if you hold the mouse over your shapes long enough text will pop up to show you “curves)
Highlighted here is the Curve Tool. It’s going to be your best friend so get used to using it. Connecting the dots is a fun game, so here’s an excuse to play. The Curve Tool re-orients itself after each click you make with it. Double click to end the curve where you want. Try imitating the shapes below. You can also create closed figures (the colored one on the right) by making your way back to where you started the curve. Don’t worry. It’s a bit hard to understand at first. But pretty soon, you should be able to do it intuitively. Holding the Ctrl key makes your next click a straight line, sort of like a stick connected to the curvy wire. This comes in handy when you want to make corners while working with curves:
Okay, let’s move on to the good part…let’s create anime! I’ll start you off with something quite simple: Let’s call her Ms. Orange. I know you’re thinking this is a rather ugly thing to start with. Baby steps my friend, baby steps. We’ll move on to the nicer-looking stuff later. For now, Ms. Orange should give you a good idea of the basics. PowerPoint has no direct drawing procedure, which makes it more systematic to correct mistakes. You’re not exactly drawing anything per se, but “building” & “stacking” objects together. You draw parts of her one after the other, and arrange those parts to make up the image. The best way to understand this process is to dissect Ms. Orange here. Don’t worry, she won’t feel a thing…
The first thing to know about this procedure is that you can “build” your artwork however you want. But the easiest way is to start with the biggest part first and go from there. In this case, it’s Ms. Orange’s head. Use the Curve Tool to make an outline shaped just like this. By default, PowerPoint colors it in for you with this color. If not, you’ve probably messed around with the program once or twice. There’s no problem in doing that, I actually encourage you to mess around all you want. Next thing we need to do is give her a decent skin color. Point to it, Right-click | Format Shape.
This little bugger pops up. This is the Format Shape Box. As you can see by the tabs, you can format an object’s color, line, size, position, and other useless whatnot. What you’re going to use most here is the Fill Area. This means the object’s color. Click the drop-down arrow and select the option Fill. The next thing you’ll see is the Gradients button click on it and click the down arrow on your Preset Colors. This is the part where you need to play with the settings till you get something close to Ms. Orange’s skin tone that you’re happy with! Get to know the tools in this section!
And voila! You’ve got yourself a sheet of skin! I tossed the ear and neck on as separate objects. As you can see, they’re just more of the same thing. It’s all a matter of assembling the bits and pieces. If some parts overlap other parts in ways you don’t like, simply Right-click | Bring to Front and choose from the options. Make sure the object in question is selected when you do this. So that’s it for the flesh. Now, select all three objects by holding Shift and clicking on each of them once. Right-click | Group and set it aside.
I’d say the eyes are the most complicated part. It’s crucial in showing detail for both anime and non-anime art. Take regular eyes for example… Each anime eye is made up of at least 9 different parts. Shall we dissect again?
You can make most of the parts on your own. But one thing you probably won’t be familiar with is this object: But don’t worry. It’s not that hard to reproduce. In fact, you can do it in a couple of seconds. Then follow through by adding gradient settings in itsGradient formats. Again this will require some experimentation on your part. Also change the settings for the TransperancyArea. First, use the Curve Tool to draw the basic shape of the object. To make pointy edges, use the Ctrl function. And if you haven’t figured it out yet, you can remove the black outline by choosing No Line when the object is outlined.
Proceed to making the other eye in virtually the same way (I sort of cheated here to keep things short, but I won’t teach you this shortcut for the sake of simplicity). Now, Group them together like you did with her head earlier. Keep it selected. For the first time, we’re going to use those white and green dots that appear around the object: Dragging the green dot around will allow you to rotate the entire object. Dragging the white dots will stretch or scale your object depending on which one you drag. Practice them a little to get a hang of them. Also, try using them while holding Ctrl, Shift, or both.
Now drag the eyes so that you may give sight to the currently blind Ms. Orange. Resize if necessary. How big you want to make the eyes is entirely up to you. Assuming you’ve been reading all the instructions so far, you should be able to make the following on your own. Then stick ‘em in her face the same way you did with her eyes.
You already know everything you need to make the rest of Ms. Orange. Review my tips, follow your instincts, use The Force. These are the last five objects you need, all courtesy of the Curve Tool:
Fix the arrangement of stacking objects that overlap the wrong way by Right-click | Bring to Front. Put them all together, Group them and take a good look… “Congratulations! You have created your first PowerPoint Anime Girl!” Remember the tools you’ve used throughout the program? I dare you to name ONE that you didn’t underestimate before going through this tutorial… See, that’s the best part about PowerPoint. Virtually everyone has used it, therefore they assume that something like this can’t be done by just pure PowerPoint. Ah, but you my friend, have just stepped into the realm of a different level of PowerPoint art!
There is still much to learn at this point. There are different styles and techniques that PowerPoint can imitate. It often just depends on how creative you are with the simple tools it offers. • Take Saffron here for example. She was created in less time than it takes for you to eat a regular sized candy bar! Once the first one is created it becomes a piece of cake to produce a crowd! • Now your mission (should you choose to accept…oops you really don’t have a choice), is to create an anime film strip with the following guidelines: • Must include no fewer than 4 characters • Must include no fewer than 4 “scenes” • Have a storyline…does not have to be beginning to end • Now take a break and write your “story” and we will work on sound next! • Be realistic!! • GOOD LUCK AND HAVE FUN!!