Download
1 / 109
1.09k likes | 1.27k Vues
Spirometry Study Day 23 rd September 2010 Robert Daw Clinical Lead Nurse for COPD BACHS. Anatomy and Physiology of COPD. COPD Definition.

E N D
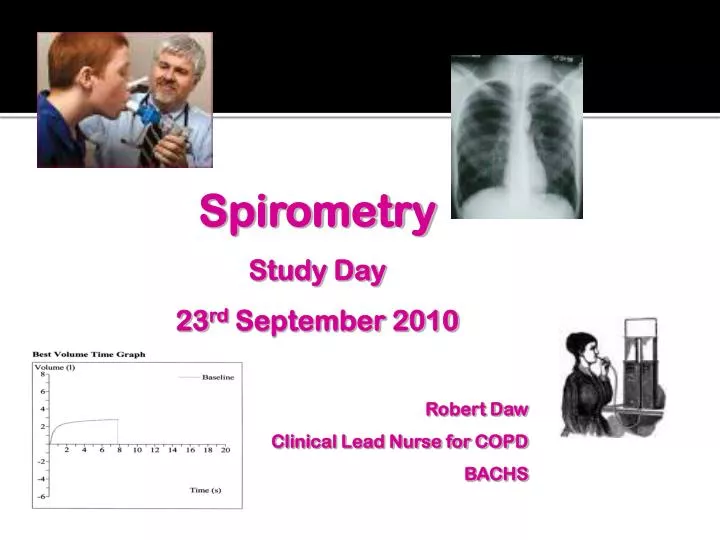
Spirometry Study Day 23rd September 2010 Robert Daw Clinical Lead Nurse for COPD BACHS
COPD Definition ‘….airflow obstruction is usually progressive, not fully reversible and does not change markedly over several months. The disease is predominantly caused by smoking.’ NICE 2004
Asthma Definition ‘….in susceptible individuals, inflammatory symptoms are usually associated with widespread but variable airflow obstruction and an increase in airway response to a variety of stimuli. Obstruction is often reversible, either spontaneously or with treatment.’ BTS and SIGN 2003
Spirometry • Spirometry is a method of assessing lung function by measuring the volume of air the patient is able to expel out from the lungs after maximal inspiration
Spirometry is a reliable method of identifying • Obstructive illness i.e. chronic obstructive pulmonary disease • Reversible disease I.e. Asthma • Restrictive disease i.e. Pulmonary fibrosis • It can be used to grade the severity of COPD
Diagnosing COPD • At the time of their initial diagnostic evaluation in addition to spirometry all patients should have: • CXR • FBC • BMI
Additional Investigations • CT Scan • ECG • Echo • Pulse Oximetry • Sputum Culture • Transfer factor for carbon monoxide (TLCO) • Serial Domiciliary Peak Flows • Alpha-1-antitrypsin
Spirometry gives us 3 important measurements • FEV1 The volume of air that the patient is able to breathe out in the first second of forced expiration • FVC The total volume of air that the patient can exhale forcibly in one breathe • FEV1 / FVC The ratio is expressed as a percentage ALSO • Peak Flow The volume of air that the patient is able to breathe out in the first 1000th of a second of forced expiration
Spirometry Surveys Cooper B, 2005 • Performing spirometry with no training were of poor standard when compared to labs • Machines not being compared cared for or calibrated • Minimum standards of acceptance • Poor Interpretation
Calibration or Verification? Verification • This is to check that the spirometer is reading correctly using a known standard. Calibration • Calibration is the process in which the signal from a spirometer is adjusted to produce a known output.
Why is calibration / verification important • If equipment is not properly calibrated it can lead to false results – i.e. the patient may appear better or worse than they really are.
How often should I calibrate? • This depends on the equipment. Most pneumotach based equipment needs calibrating every day. Some equipment can only be calibrated by a trained engineer. In this case it is necessary to perform regular quality control / verification.
Verification Syringe • This can be performed using a 3 litre syringe or 1 litre syringe depending on spirometer model. • Results should be within 3% of calibration syringe Biological Control • The person performing the quality control should have normal lung function. • Results should not vary by more than 10% from the last time. • Equipment should be calibrated if this is not the case.
Infection control • Spirometers are a potential source of cross infection for patients. • As a minimum one way cardboard mouthpieces should be used. • Ideally (especially in high TB areas) bacterial filters are the mouthpiece of choice.
Cleaning • Ease of cleaning the equipment should be considered when purchasing • Always use manufacturer guidelines. FLOW HEADS SHOULD BE CLEANED USING MANUFACTUROURS GUIDELINES AFTER EVERY SESSION IF NOT USING BACTERIAL FILTERS
Pre-test procedures • The patient, ideally, should – - Avoid alcohol for at least 4 hours - Avoid eating a substantial meal - Wear loose fitting clothing • If Reversibility is to be performed - - Avoid taking short acting bronchodilators for at least 4 hours prior to testing - Avoid smoking for 1 hour prior to testing -Be Well!!
Contraindications • Haemoptysis of unknown origin • Pneumothorax (Need confirmation of resolution) • Unstable cardiovascular status • Myocardial Infarction (Last 3 months) • Thoracic, abdominal or cerebral aneurysms
Contraindications • Recent Eye surgery (3 months) • Recent thoracic or abdominal surgery (3 months) • Pregnancy (1st Trimester contraindicated but in 2nd and 3rd Trimester results may be effected by uterus size)
Prior to Spirometry • Gain verbal consent • Check for contraindications and that the patient has been properly prepared for the test • Gain an accurate height • Make note of Ethnic Origin and Age • The room should be a comfortable temperature • The patient should be sat in a hard backed chair with their feet able to touch the floor • The patient should sit upright with their legs uncrossed • A drink of water should be made available • The technique and purpose of spirometry should be explained in full prior to the test • Spirometry should be performed in the patients own time and they should not feel hurried Reinforce and Reassure
Expiratory Relaxed Vital Capacity • Performed due to collapsing alveoli in some patients during Forced Vital Capacity technique • This technique would usually be performed before the Forced Vital Capacity readings • The reading is sometimes referred to as VC, EVC or RVC • Minimum of three readings taken • Two best results should be within 150mls of each other • Maximum of 4 tests
Expiratory Relaxed Vital Capacity • Take as large a breath of air in as possible • Pinch your nose or attach a nose clip to prevent air leakage • Put the filter into your mouth ensuring that there are no leaks at the sides of your mouth • Breathe out for as long as possible. This breath should be in your own time and should not be forced
Forced Vital Capacity (FVC) • A minimum of three readings should be taken • There should be less than 5% or 150mls variance between the best two results • The technique should be repeated until this is achieved or the patient is exhausted and can no longer perform the technique • Time should be given to the patient to recover between readings
Forced Vital Capacity (FVC) • Take as large a breath of air in as possible • Put the filter into your mouth ensuring there are no leaks at the side of your mouth • Pinch your nose or attach a nose clip to prevent air leakage • ‘Blast’ as quickly as possible and for as long as possible
Demonstration Could we have a volunteer please ?
The Normal Curve Volume Time • The vertical scale indicates total volume (l) the patient has blown out • The horizontal scale indicates the total time (s) the patient has been blowing out for • Note the initial part of the curve which is steep followed by a gradual flattening of the curve
The Normal Curve Flow Volume Loop • The vertical scale indicates litres of air breathed out per second (L/s) at that moment in time • The horizontal scale indicates total volume expired (L) • Note the sharp peak at the beginning of the curve followed by an initially sharp trough that gradually flattens out
Technique Problems Cough • This curve suggests the patient has coughed during a FVC reading • Note the peaks and troughs that occur throughout the curve • This will effect the FVC reading
Technique Problems Poor Effort • This curve suggests the patient has not blown as hard as they can during the FVC technique • Note the rounded top to the peak at the beginning of the curve • This will effect the FEV1 reading
Technique Problems Slow Start • This curve suggests the patient has started off blowing slowly during a FVC technique • Note the peak in L/s comes in the middle of the curve rather than at the beginning • This will effect the FEV1 reading
Technique Problems Inspiration • This curve indicates the patient has breathed in at the beginning of the technique • This usually occurs when the patient puts the filter in their mouth before they have finished breathing in • Note the negative L/s reading at the beginning of the curve • This could effect all readings
Technique Problems Inspiration • This curve suggests the patient has breathed in at the end of the FVC technique • This usually occurs when the patient attempts to take an extra breath in to prolong expiration • Note the negative L/s at the end of the curve • This could effect the FVC reading
References • SPIROMETRY IN PRACTICE A PRACTICAL GUIDE TO USING SPIROMETRY IN PRIMARY CARE 2ND Edition BTS 2005 http://www.brit-thoracic.org.uk/Portals/0/Clinical%20Information/COPD/COPD%20Consortium/spirometry_in_practice051.pdf • GENERAL CONSIDERATIONS FOR LUNG FUNCTION TESTING ATS/ERS TASK FORCE: STANDARDISATION OF LUNG FUNCTION TESTING European Respiratory Journal 2005 http://erj.ersjournals.com/cgi/reprint/26/1/153.pdf • STANDARDISATION OF SPIROMETRY ATS/ERS TASK FORCE: STANDARDISATION OF LUNG FUNCTION TESTING European Respiratory Journal 2005 http://www.thoracic.org/sections/publications/statements/pages/pfet/pft2.html
Accurate Interpretation • Use Best Test (Less than 5% Variance from next best) • Best Test – FVC, FEV1 or FVC & FEV1 • If spirometer selects best test, CHECK • Minimum number of tests <3 • Is Interpretation correct?
Accurate Interpretation • Curve shape – effort, cough, extra breath etc • Relaxed Expiratory Vital Capacity (EVC) recorded and used when better than FVC • Accurate height • Correction Factors
Recap • FEV1 The volume of air that the patient is able to breathe out in the first second of forced expiration • FVC The total volume of air that the patient can exhale forcibly in one breathe • FEV1 / FVC The ratio is expressed as a percentage • Peak Flow The volume of air that the patient is able to breathe out in the first 1000th of a second of forced expiration
ABREVIATIONS • VITAL CAPACITY VC, RVC, EVC • FORCED VITAL CAPACITY Forced vital capacity describes the technique FVC • RATIO Ratio, FER, FEV1%, FEV1/VC, FEV1/FVC
Predicted Values • Done in 70’s • Need modernising • Use age, height and sex to make prediction of ability • Need to use correction factors for different ethnic origins • Accurate height essential • These can be reported as • Percentage of Predicted • Ranges • Standard Residuals