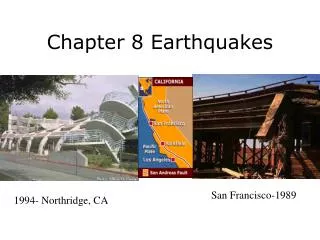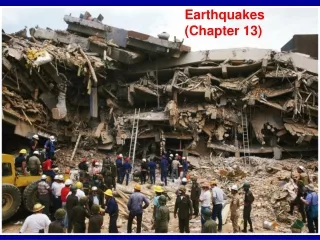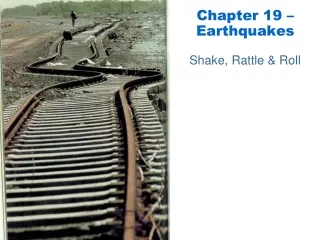
Chapter 19 - Earthquakes
Chapter 19 - Earthquakes. 2013. 19.1 – Forces within earth. Faults form when the forces acting on rock exceed the rock’s strength. Stress and Strain. Along the boundaries between two tectonic plates, rocks in the crust often resist movement. Over time, stress builds up.

Chapter 19 - Earthquakes
E N D
Presentation Transcript
19.1 – Forces within earth Faults form when the forces acting on rock exceed the rock’s strength.
Stress and Strain • Along the boundaries between two tectonic plates, rocks in the crust often resist movement. • Over time, stress builds up. • Stress is the total force acting on crustal rocks per unit of area. • Three kinds of stress that act on Earth’s rocks: • Compression • Tension • Shear
Stress and Strain • Compression causes a material to shorten. • Tensioncauses a material to lengthen. • Shearcauses distortion of a material. • The deformation of materials in response to stress is called strain.
Stress and Strain • Even though rocks can be twisted, squeezed, and stretched, they fracture when stress and strain reach a critical point. • At these breaks, rocks can move, releasing the energy built up as a result of stress. • Earthquakes are the result of this movement and release of energy.
Elastic Deformation • Elastic deformation is caused under conditions of low stress when a material is compressed, bent, or stretched. • When the stress is removed, material returns to its original shape.
Plastic Deformation • When stress builds up past a certain point, called the elastic limit, rocks undergo plastic deformation. • This type of strain produces permanent deformation. • Most materials exhibit both elastic and plastic behavior. • As pressure increases, rocks require greater stress to reach the elastic limit. • At high enough temperatures, solid rock can also deform, causing it to flow in a fluid-like manner. • Reduces stress.
Faults • Crustal rocks fail when stresses exceed the strength of the rocks. • The resulting movement occurs along a weak region in the crustal rock called a fault, which is any fracture or system of fractures along which Earth moves.
Reverse Fault • Reverse faults form as a result of horizontal and vertical compression that squeezes rock and creates a shortening of the crust. This causes rock on one side of a reverse fault to be pushed up relative to the other side.
Normal Fault • Movement along a normal fault is partly horizontal and partly vertical. • The horizontal movement pulls rock apart and stretches the crust. • Vertical movement occurs as the stretching causes rock on one side of the fault to move down relative to the other side.
Strike-Slip Faults • Strike-slip faults are caused by horizontal shear. • The movement at a strike-slip fault is mainly horizontal and in opposite directions, similar to the way cars move in opposite directions on either side of a freeway.
Earthquake Waves • Irregular surfaces in rocks can snag and lock along faults when movement occurs. • As stress continues to build in these rocks, they undergo elastic deformation. • Beyond the elastic limit, they bend or stretch. • Before that limit, an earthquake occurs when they slip or crumble.
Types of Seismic Waves • The vibrations of the ground produced during an earthquake are called seismic waves. • Every earthquake generates three types of seismic waves: • Primary waves • Secondary waves • Surface waves • Also referred to as P-waves, primary waves squeeze and push rocks in the direction along which the waves are traveling.
Types of Seismic Waves • Secondary waves, called S-waves, are named with respect to their arrival times. • They are slower than P-waves, so they are the second set of waves to be felt. • S-waves have a motion that causes rocks to move perpendicular to the direction of the waves.
Types of Seismic Waves • The third and slowest type of waves are surface waves, which travel only along Earth’s surface. • Surface waves can cause the ground to move sideways and up and down like ocean waves. • Also known as Rayleigh Waves
Generation of Seismic Waves • The focus of an earthquake is the point of initial fault rupture, which is usually several kilometers below Earth’s surface. • The point on Earth’s surface directly above the focus is the epicenter.
19.2 – Seismic Waves & Earth’s Interior Seismic waves can be used to make images of the internal structure of Earth.
Seismometers & Seismograms • Most of the vibrations caused by seismic waves cannot be felt at great distances from an earthquake’s epicenter, but they can be detected by sensitive instruments called seismometers, which measure horizontal or vertical motion during an earthquake.
Seismometers & Seismograms • The frame of a seismometer is anchored to the ground. • When an earthquake occurs, the frame moves but the hanging mass and attached pen do not. • The mass and pen record the relative movement as the recording device moves under them.
Seismometers & Seismograms • The record produced by a seismometer that can provide individual tracking of each type of seismic wave is a seismogram.
Travel-Time Curves • Travel-time curves provide the average time it takes for P- and S-waves to reach seismic stations located at different distances from an earthquake’s epicenter.
Distance from the Epicenter • Waves recorded on seismograms from more distant stations are farther apart than waves recorded on seismograms at stations closer to the epicenter. • The separation of seismic waves on seismograms can be used to determine the distance from the epicenter of an earthquake to the seismic station that recorded the seismogram. • 3 Stations worth of information is needed to find the epicenter.
Earth’s Internal Structure • Seismic waves change speed and direction when at the boundaries between different materials. • As P-waves and S-waves initially travel through the mantle, they follow fairly direct paths. • When P-waves strike the core, they are refracted, which means they bend.
Earth’s Internal Structure • To find out what happens to S-waves generated by an earthquake, seismologists first determined that the back-and-forth motion of S-waves does not travel through liquid. • They then noticed that S-waves do not travel through Earth’s center. • The data collected for the paths and travel times of the waves inside Earth led to the current understanding that Earth has an outer core that is liquid and an inner core that is solid.
Earth’s Composition • Seismic waves change their speed as they encounter boundaries between zones of different materials. • Shadow zones do not receive seismic waves because the waves are bent or stopped by materials of different density.
Visualizing Seismic Waves • The travel times and behavior of seismic waves provide a detailed picture of Earth’s internal structure. • These waves also provide clues about the composition of the various parts of Earth.
Imagining Earth’s Interior • Because the speed of seismic waves depends on temperature and composition, it is possible to use seismic waves to create images of structures such as slabs and plumes. • In general, the speed of seismic waves decreases as temperature increases.
Imaging Earth’s Interior • Images like this one from Japan are generated by capturing the path of seismic waves through Earth’s interior.
19.3 – Measuring & Locating Earthquakes Scientists measure the strength and chart the location of earthquakes using seismic waves.
Richter Scale • The Richter scale, devised by a geologist named Charles Richter, is a numerical rating system that measures magnitude of an earthquake. • Magnitude is the measure of the energy released during an earthquake. • The numbers in the Richter scale are determined by the height, called the amplitude, of the largest seismic wave. • Scale goes from 1-10 • Each move magnitude number is a 10 fold increase in energy release. • Example) A earthquake with a magnitude of 3 releases 10 times more energy than a magnitude 2 earthquake.
Moment Magnitude Scale • The moment magnitude scale is a rating scale of the energy released by an earthquake, taking into account the size of the fault rupture, the amount of movement along the fault, and the rocks’ stiffness.
Modified Mercalli Scale • The modified Mercalli scale is used to measure earthquake intensity on a scale from I to XII. • The higher the number, the greater the damage the earthquake has caused. • The intensity of an earthquake depends primarily on the amplitude of the surface waves generated. • Maximum intensity values are observed in the region near the epicenter; Mercalli values decrease to I at distances far from the epicenter.
Depth of Focus • Earthquakes are classified as shallow, intermediate, or deep, depending on the location of the focus. • Shallow-focus earthquakes are the most damaging.
Locating an Earthquake • The location of an earthquake’s epicenter and the time of the earthquake’s occurrence are usually not known at first. • However, the epicenter’s location, as well as the time of occurrence, can be determined using seismograms and travel-time curves.
Distance to an Earthquake • Seismologists determine the distance to an earthquake’s epicenter by measuring the separation on any seismogram and identifying that same separation time on the travel-time graph.
Distance to an Earthquake • To locate the epicenter of an earthquake, scientists identify the seismic stations on a map, and draw a circle with the radius of distance to the epicenter from each station. The point where all the circles intersect is the epicenter.
Time of an Earthquake • Seismologists can use a seismogram to gain information about the exact time that an earthquake occurred at the focus. • The time can be determined by using a table similar to a travel-time graph.
Seismic belts • The majority of the world’s earthquakes occur along narrow seismic belts that separate large regions with little or no seismic activity. • The locations of most earthquakes correspond closely with tectonic plate boundaries.
19.4 – Earthquakes & Society The probability of an earthquake’s occurrence is determined from the history of earthquakes and knowing where and how quickly strain accumulates.
Earthquake Hazards • Earthquake hazards are factors that determine the severity of damage produced by an earthquake. • Identifying earthquake hazards in an area can sometimes help to prevent some of the damage and loss of life.