Learning PowerPoint Part Two: Working With Images
320 likes | 482 Vues
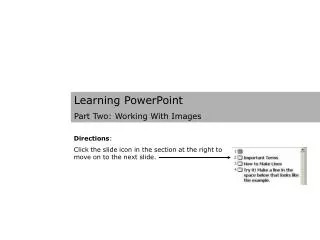
Learning PowerPoint Part Two: Working With Images. Directions : Click the slide icon in the section at the right to move on to the next slide. Important Terms. Drawing : A drawing is an image you make using the PowerPoint drawing tools.

Learning PowerPoint Part Two: Working With Images
E N D
Presentation Transcript
Learning PowerPoint Part Two: Working With Images Directions: Click the slide icon in the section at the right to move on to the next slide.
Important Terms Drawing: A drawing is an image you make using the PowerPoint drawing tools. Clip Art: A drawing or photograph made by an artist that can be inserted on your slide. AutoShapes: An AutoShape is a pre-drawn image that can be inserted on your slide and changed depending on your needs. WordArt: WordArt is a gallery of fancy graphic effects that can be applied to your own words. You can change the size and color depending on your needs. Draw Menu: The Draw Menu contains tools for changing the relationship between two or more images as well as their orientation on the slide.
How to Make Lines 1. Locate the Draw Tool Bar at the bottom of the screen. 2. Point on the Line icon, and click. When you move your pointer back to the slide, it will turn into a +. 3. Click and hold on the slide where you want the line to begin, move the mouse until the line is the right size, and release. 3. After you release the mouse, the line will have a box on each end. You can change the line by clicking and holding the pointer on a box and then dragging it it make it longer or go in a different direction. Once you have changed the line to your satisfaction, click an empty space on the slide to keep the changes.
Try it! Make a line in the space below that looks like the example.Note: If you hold down the Shift key while you move your mouse, your line will be absolutely straight. Example
How to Change the Way Lines Look 1. Click a line that you want to change and boxes will appear at each end. This means that the line is ready to be changed. 2. Point on the Line Styles icon, and click. You will be shown a variety of choices. 3. Point to one of the choices to choose it, then click it to apply the change to your line.
Try it! You can change the way a like looks at any time by clicking on the line. When the boxes appear at each end, the line is ready to change. For each of the following pairs, click the first line, then use the Line Style menu to make it look like the second line. Challenge! Figure out how to make the first line below look like the second line.
How to Change the Color of the Lines 1. After you have just drawn a line or selected a line to be changed, point on the down arrow next to the Line Color icon, and click. You will be shown a variety of choices. 2. Point to one of the color choices to choose it, then click it to apply the change to your line. Click here to see more color choices.
Try it! For each of the following pairs, click the first line, then use the Line Color menu to make it look like the second line. Challenge! Figure out how to make the top line look like the bottom line.
How to Change the Type of Line 1. In addition to drawing straight lines, you can also draw curved or free-form lines by selecting those choices from the AutoShapes menu. 2. Click the AutoShapes menu button, point to the Lines menu, then click one of the desired line types to select it. The “Scribble” tool allows you to draw as if you were using a pencil. The “Curve” tool allows you to draw curves easily.
Try it! In the space below, try each of the line tools from the AutoShapes menu to see how they work. Note: The Curve tool requires you to click your mouse when you change directions and to double-click when you have come to the end of your line.
About Shapes 1. Shapes are made up of lines and inside spaces. Two of the most common shapes—the rectangle and the oval—are on the Drawing toolbar. 2. Some of the things that you can do to change the way lines look, you can do with the lines that surround the shape.
How to Make a Rectangle Shape 1. To make a rectangle shape, click the Rectangle icon on the Drawing toolbar. 2. When you move your pointer to the slide, it will become a +. Click, hold, and drag the + to make your rectangle where you want it on the slide. Release when you have made it the desired size. Note: If you want your rectangle to be a square, hold down the Shift key while you are making it.
Try it! In the space below, make rectangle and a square that look like the examples below.
How to Make an Oval Shape 1. To make an oval shape, click the oval icon on the Drawing toolbar. 2. Then, click, hold, and drag the + to make your oval where you want it on the slide. Release when you have made it the desired size. Note: If you want your oval to be a circle, hold down the Shift key while you are making it.
Try it! In the space below, make an oval and a circle that look like the examples below.
How to Change the Way Lines Look in a Shape 1. Click the shape whose line you want to change so that the white boxes appear. 2. Point on the Line Styles icon, and click. You will be shown a variety of choices. 3. Point to one of the choices to choose it, then click to apply the change to your line.
Try it! In the space below, click the shape whose line you want to change so that the white boxes appear. Then, change the way the lines look. Try several different lines.
How to Change the Color of a Shape 1. Click the shape whose color you want to change so that the white boxes appear. 2. Point on the down arrow next to the Fill Color icon, and click. You will be shown a variety of choices. 3. Point to one of the choices to choose it, then click to apply the change to your shape. Click here to see more color choices.
Try it! In the space below, click the shape whose color you want to change so that the white boxes appear. Then, change the color of the shape. Try several different colors.
About AutoShapes 1. AutoShapes are pre-drawn shapes that you can change in the same way that you can change the shapes you make on your own. The AutoShapes menu button is on the Drawing toolbar. 2. There are several available shapes grouped according to purpose.
How to Make an AutoShape 1. To make an AutoShape, click the AutoShapes menu button. 2. You will be presented with a variety of categories. Point to the Basic Shapes menu, then click one of the desired shape types to select it. 3.When you move your pointer to the slide, it will look like a +. Click, hold, and drag the + to make your shape where you want it on the slide. Release when you have made it the desired size.
Try it! In the space below, make the following three shapes using the AutoShapes menu. Then, make two more shapes of your own choosing.
Just for Fun Using what you know about working with shapes, see if you can make these changes. Look like this shape Make this shape You try it
About Clip Art 1. Clip art is a name for drawings or photographs that you can insert on your slide. The Clip Art menu button is on the Drawing toolbar. 2. There are many available images grouped according to category.
How to Insert a Clip Art Image 1. To insert a clip art image, click the Insert Clip Art icon on the Drawing toolbar. 2. When the Insert Clip Art window appears, click one of the categories to view the available clip art images.
How to Insert a Clip Art Image 3. Right click a clip art image to choose it, then click Insert to place the image on your slide.
How to Change the Size of a Clip Art Image 1. If they are not already visible, click the clip art image to make the white boxes appear. 2. Point to the white box in the bottom right-hand corner. Then the point changes to a double arrow, click and drag the mouse to make the image larger or smaller. Release when the image is the way you want it.
Try it! Click the click art image below to make the white boxes appear, then make the image larger or smaller by clicking and holding on the corner box and dragging the mouse.
How to Move a Clip Art Image 1. To move a clip art image, point on the image, then click and drag to move the image to a new place on the slide. Release when the image is where you want it to be.
Try it! Click and hold the click art image below and move it to a new place on the slide by dragging the mouse.
Congratulations!You now know how to make a PowerPoint slide using images.