CESM Tutorial
CESM Tutorial. NCAR Earth System Laboratory CESM Software Engineering Group CESM 1.2.x and CESM1.1.x CESM1.0.5 and previous (see earlier tutorials). NCAR is sponsored by the National Science Foundation. New formula for the tutorial.

CESM Tutorial
E N D
Presentation Transcript
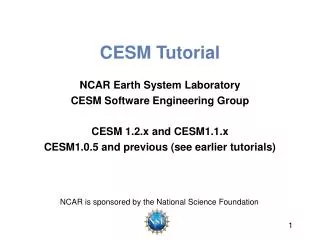
CESM Tutorial NCAR Earth System Laboratory CESM Software Engineering Group CESM 1.2.x and CESM1.1.x CESM1.0.5 and previous (see earlier tutorials) NCAR is sponsored by the National Science Foundation
New formula for the tutorial Previous years: Very detailed presentation about how to run CESM This year: Shorter presentation followed by a panel discussion Our panel Cecile Hannay Christine Shields Mariana Vertenstein Sam Levis Adam Phillips Dave Bailey Jim Edwards
Outline • Release Homepage on Web • Software & Hardware Requirements • One-Time Setup • Registration and Source Code Download • Create an Input Data Root Directory • Porting • Creating & Running a Case • Create a New Case • Invoke cesm_setup • Build the Executable • Run and Output Data • Getting More Help • Appendix
CESM 1.2 Web Page http://www.cesm.ucar.edu/models/cesm1.2/ ReportingproblemsGetting Help Scientific validation ReleaseNotes Post processing Tools Guidance onmodel versions ModelDocumentation How toacquire the code Background and Sponsors
CESM 1.2 Web Page http://www.cesm.ucar.edu/models/cesm1.2/ Datamanagement and distribution ModelInput data Timingand loadbalance
Hardware/Software Requirements • Supported platforms • CESM currently runs “out of the box” today on the following machines • yellowstone– NCAR IBM • titan – ORNL Cray XK6 • hopper – NERSC Cray XE6 • edison– NERSC Cray Cascade • bluewaters– ORNL Cray XE6 • intrepid – ANL IBM Bluegene/P • mira– ANL IBM Bluegene/Q • janus– UnivColorado HPC cluster • pleiades– NASA SGI ICE cluster • and a few others out of the box = works immediately after installation without any modification • Running CESM on other platforms • Require porting + software • Subversion client (version 1.4.2 or greater) • Fortran and C compilers (recommend pgi, intel, or ibmxlf compilers) • NetCDF library (recommend netcdf4.1.3 or later) • MPI (MPI1 is adequate, Open MPI or MPICH seem to work on Linux clusters)
Basic Work Flow (or how to set up and run an experiment) • One-Time Setup Steps • Registration and Download • Create an Input Data Root Directory • Porting • Creating & Running a Case • Create a New Case • Invoke cesm_setup • Build the Executable • Run the Model and Output Data Flow
(A) Registration • Go to CESM1.2 home page:http://www.cesm.ucar.edu/models/cesm1.2/ • Right hand column has a link to the registration page, click on it • Register -- you will be emailed a username and password
(A) Download the Source Code Repository • Code and input datasets are in a subversion repository (*) • https://svn-ccsm-release.cgd.ucar.edu/model_versions modelversions ccsm4 … • List the versions available on the CESM repository • svn list https://svn-ccsm-release.cgd.ucar.edu/model_versions cesm1_1 cesm1_2_0 • Check out a working copy from the repository (“Download code”) • svn co https://svn-ccsm-release.cgd.ucar.edu/model_versions/cesm1_2_0 • (*) You can get subversion at http://subversion.apache.org/
(A) Overview of Directories(after initial model download) The CESM root consists of 2 directories: models and scripts Code for all the components, coupler, etc… CESM Download ~/cesm1_2_0 $CCSMROOT models scripts create_newcase atm lnd ocn ice glc drv rof wav utils csm_share
Basic Work Flow (or how to set up and run an experiment) • One-Time Setup Steps • Registration and Download • Create an Input Data Root Directory • Porting • Creating & Running a Case • Create a New Case • Invoke cesm_setup • Build the Executable • Run the Model and Output Data Flow
INPUTDATA Directory (B) Overview of Directories(+ inputdata directory) /glade/p/cesm/cseg/inputdata /glade/p/cesm/cseg/inputdata $DIN_LOC_ROOT atm lnd ocn ice glc wav cpl share rof • Inputdata directory$DIN_LOC_ROOT • contains all input data required to run the model CESM Download ~/cesm1_2_0 $CCSMROOT - on supported machines - populated inputdata already exists - on non-supported machines - need to create inputdata directory root models scripts create_newcase • Ideally directory is shared by a group of users to save disc space atm lnd ocn • To download input data: use the script check_input_data • downloads only the data needed • puts the data in the proper subdirectories • Do NOT download input data manually (ie. by using svn co) ice glc drv rof wav utils csm_share
Basic Work Flow (or how to set up and run an experiment) • One-Time Setup Steps • Registration and Download • Create an Input Data Root Directory • Porting • Creating & Running a Case • Create a New Case • Invoke cesm_setup • Build the Executable • Run the Model and Output Data Flow
(C) Porting • Porting details are outside scope of tutorial • see User’s Guide on web and tutorial Appendix • - On supported machines - no porting is necessary • - On new machines – porting will need to be done
Work Flow: Super Quick Start CESM can be run with a set of 4 commands Set of commands to build and run the model on a supported machine: ”yellowstone” • # go into scripts directory into the source code download • cd /path_to_source_code_download/cesm1_2_0/scripts # (1) create a new case in the directory “cases” inyour home directory ./create_newcase -case ~/cases/case01 -res f19_g16 -compset B_1850 -machyellowstone # go into the case you just created in the last step cd ~/cases/case01/ # (2)invoke cesm_setup ./cesm_setup # (3) build the executable ./case01.build # (4) submityour run to the batch queue ./case01.submit (1) (2) (3) (4) It is that easy !
Basic Work Flow (or how to set up and run an experiment) • One-Time Setup Steps • Registration and Download • Create an Input Data Root Directory • Porting • Creating & Running a Case • Create a New Case • Invoke cesm_setup • Build the Executable • Run the Model and Output Data Flow
INPUTDATA Directory (B) Overview of Directories(+ before create_newcase) /glade/p/cesm/cseg/inputdata /glade/p/cesm/cseg/inputdata $DIN_LOC_ROOT atm lnd ocn ice glc wav cpl share rof CESM Download ~/cesm1_2_0 $CCSMROOT • This is the scriptyou need to create a new case models scripts create_newcase atm lnd ocn ice glc drv rof wav utils csm_share
Work Flow: Super Quick Start Set of commands to build and run the model on a supported machine: ”yellowstone” • # go into scripts directory into the source code download • cd /path_to_source_code_download/cesm1_2_0/scripts # (1) create a new case in the directory “cases” inyour home directory ./create_newcase -case ~/cases/case01 -res f19_g16 -compset B_1850 -machyellowstone # go into the case you just created in the last step cd ~/cases/case01/ # (2)invoke cesm_setup ./cesm_setup # (3) build the executable ./case01.build # (4) submityour run to the batch queue ./case01.submit
(1) Create a new case • In the scripts directory, create_newcaseis the tool that generates a new case. • create_newcase requires 4 arguments What is the casename ? Which resolution? Which model configuration ? Which set of components ? Which machine are you running on? case01 f19_g16 B_1850 yellowstone • create_newcase –case case01 -res f19_g16 -compset B_1850 -mach yellowstone
(1)create_newcase arguments • create_newcase requires 4 arguments • create_newcase -case ~/cases/case01 -res f19_g16 -compset B_1850 -mach yellowstone
(1)create_newcase arguments • create_newcase requires 4 arguments • create_newcase-case ~/cases/case01 -res f19_g16 -compset B_1850 -mach yellowstone • caseis the name and location of the case being created • ~/cases/case01
(1)create_newcase arguments • create_newcase requires 4 arguments • create_newcase -case ~/cases/case01 -res f19_g16 -compset B_1850 -mach yellowstone • resspecifies the model resolutions (or grid) • New grid naming convention • Each model resolution can be specified by its alias, short name and long name. • Example of equivalent alias, short name and long name: • alias: f19_g16 (atm/lnd_ocn/ice) • short name: 1.9x2.5_gx1v6 • long name = a%1.9x2.5_l%1.9x2.5_oi%gx1v6_r%r05_m%gx1v6_g%null_w%null atm lnd ocn/ice river lndmask lnd-ice wave
(1)create_newcase arguments • create_newcase requires 4 arguments • create_newcase -case ~/cases/case01 -res f19_g16 -compset B_1850 -mach yellowstone • compsetspecifies the “component set” • Component set specifies component models, forcing scenarios and physics options for those models • New compsetnaming convention • Each model compset can be specified by its alias, short name and long name. • Example of equivalent alias, short name and long name: • alias: B1850 • short name: B_1850 • long name = 1850_CAM4_CLM40%SP_CICE_POP2_RTM_SGLC_SWAV atm time lnd ocn river ice lnd-ice wave
More on CESM component sets • Plug and play of components with different component models active data stub • Color code: DATM lnd CLM SLND CAM atm Plug and play SGLC SWAV River RTM cpl G_ DROF SGLC SWAV Land-icewave cpl cpl B_ POP2 CICE POP2 ocn CICE ice CLM CAM CLM DATM I_ SGLC SWAV SGLC SWAV cpl cpl F_ RTM RTM CICE (P) DOCN SOCN SICE
(1)create_newcase arguments • create_newcase requires 4 arguments • create_newcase -case ~/cases/case01 -res f19_g16 -compset B_1850 -mach yellowstone • machspecifies the machine that will be used. • “supported” machines tested regularly, eg. yellowstone, titan, hopper, intrepid
(1) Valid Values for res, compset, and mach • Command line to list all the valid choices for grids, compsets and machines • ./create_newcase-list <type> • with type can be [compsets, grids, machines] • List of valid values is also available • from the CESM website • http://www.cesm.ucar.edu/models/cesm1.2/
(1) About create_newcase • ./create_newcase –helplists all the available options • Most often only four options are used: case, compset, res, and mach cd …/cesm1_2_0/scripts/ ./create_newcase –help SYNOPSIS create_newcase [options] OPTIONS User supplied values are denoted in angle brackets (<>). Any value that contains white-space must be quoted. Long option names may be supplied with either single or double leading dashes. A consequence of this is that single letter options may NOT be bundled. -case <name> Specifies the case name (required). -compset <name> Specify a CESM compset (required). -res <name> Specify a CESM grid resolution (required). -mach <name> Specify a CESM machine (required). -compiler <name> Specify a compiler for the target machine (optional) default: default compiler for the target machine -mpilib <name> Specify a mpi library for the target machine (optional) default: default mpi library for the target machine allowed: openmpi, mpich, ibm, mpi-serial, etc redundant with _M confopts setting -mach_dir <path> Specify the locations of the Machines directory (optional). default: /glade/p/cesm/cseg/collections/cesm1_2_0_beta08/scripts/ccsm_utils/Machines -pecount <name> Value of S,M,L,X1,X2 (optional). default: M, partially redundant with confopts _P -pes_file <name> Full pathname of pes file to use (will overwrite default settings) (optional). See sample_pes_file.xml for an example. -user_compset Long name for new user compset file to use (optional) This assumes that all of the compset settings in the long name have been defined. -grid_file <name> Full pathname of grid file to use (optional) See sample_grid_file.xml for an example. Note that compset components must support the new grid. -help [or -h] Print usage to STDOUT (optional). -list <type> Only list valid values, type can be [compsets, grids, machines] (optional). ...
INPUTDATA Directory (1) Overview of Directories(after create_newcase) /glade/p/cesm/cseg/inputdata /glade/p/cesm/cseg/inputdata $DIN_LOC_ROOT atm lnd ocn ice glc wav cpl share rof • subdirectory for case specific code modifications • create_newcasecreates case directory • that contains: CESM Download CASE Directory ~/cesm1_2_0 $CCSMROOT ~/cases/case01 $CASEROOT cesm_setup env_*xml xmlchange • cesm_setup: script used in the next step • files with xml variables used by CESM scripts models scripts create_newcase • script to edit env_*xml files atm lnd Buildconf ocn LockedFiles ice glc SourceMods drv Tools rof wav utils csm_share
Aboutenv_*.xml files • env_*.xml contains variables used by scripts -- some can be changed by the user • env_case.xml: set by create_newcase and cannot be modified • env_mach_pes.xml : specifies layout of components • env_build.xml: specifies build information • env_run.xml : sets run time information (such as length of run, frequency of restarts, …) • User interacts with this file most frequently • CESM will run for 5 days • Here’s a snippet of theenv_run.xmlfile • “id” - variable name • “value” – variable value <!--"sets the run length in conjunction with STOP_N and STOP_DATE, valid values: none,never,nst eps,nstep,nseconds,nsecond,nminutes,nminute,nhours,nhour,ndays,nday,nmonths,nmonth,nyears,nyea r,date,ifdays0,end (char) " --> <entry id="STOP_OPTION" value="ndays" /> <!--"sets the run length in conjunction with STOP_OPTION and STOP_DATE (integer) " --> <entry id="STOP_N" value="5" /> • To modify a variable in an xml file – use xmlchange • xmlchange STOP_N=20
Basic Work Flow (or how to set up and run an experiment) • One-Time Setup Steps • Registration and Download • Create an Input Data Root Directory • Porting • Creating & Running a Case • Create a New Case • Invoke cesm_setup • Build the Executable • Run the Model and Output Data Flow
Work Flow: Super Quick Start Set of commands to build and run the model on a supported machine: ”yellowstone” • # go into scripts directory into the source code download • cd /path_to_source_code_download/cesm1_2_0/scripts # (1) create a new case in the directory “cases” inyour home directory ./create_newcase -case ~/cases/case01 -res f19_g16 -compset B_1850 -machyellowstone # go into the case you just created in the last step cd ~/cases/case01/ # (2)invoke cesm_setup ./cesm_setup # (3) build the executable ./case01.build # (4) submityour run to the batch queue ./case01.submit
INPUTDATA Directory (2) Overview of Directories(after cesm_setup) /glade/p/cesm/cseg/inputdata /glade/p/cesm/cseg/inputdata $DIN_LOC_ROOT atm lnd ocn ice glc wav cpl share rof CESM Download CASE Directory ~/cases/case01 cesm_setup case01.build case01.submit user_nl_xxx* • cesm_setupcreates: ~/cesm1_2_0 $CCSMROOT • case scripts (to build, run and archive) models scripts create_newcase • namelistmodification files user_nl_xxx • this is where you modify your namelists atm Buildconf lnd CaseDocs • CaseDocs: contains copy of the namelistsThis is for reference only and files in this directory SHOULD NOT BE EDITED. ocn LockedFiles ice SourceMods glc Tools drv rof wav utils csm_share
Basic Work Flow (or how to set up and run an experiment) • One-Time Setup Steps • Registration and Download • Create an Input Data Root Directory • Porting • Creating & Running a Case • Create a New Case • Invoke cesm_setup • Build the Executable • Run the Model and Output Data Flow
Work Flow: Super Quick Start Set of commands to build and run the model on a supported machine: ”yellowstone” • # go into scripts directory into the source code download • cd /path_to_source_code_download/cesm1_2_0/scripts # (1) create a new case in the directory “cases” inyour home directory ./create_newcase -case ~/cases/case01 -res f19_g16 -compset B_1850 -machyellowstone # go into the case you just created in the last step cd ~/cases/case01/ # (2)invoke cesm_setup ./cesm_setup # (3) build the executable ./case01.build # (4) submityour run to the batch queue ./case01.submit
INPUTDATA Directory (3) Overview of Directories(after build) /glade/p/cesm/cseg/inputdata /glade/p/cesm/cseg/inputdata $DIN_LOC_ROOT atm lnd ocn ice glc wav cpl share rof Build/Run Directory • The build script CESM Download CASE Directory • (1) checks input data /glade/scratch/userx/ case01 $EXEROOT case01 cesm_setup case01.build case01.submit user_nl_xxx ~/cesm1_2_0 $CCSMROOT • (2) creates a build/run directory • withmodel executable • and namelists atm models scripts create_newcase lnd ocn atm Buildconf bld ice lnd CaseDocs glc ocn LockedFiles ice cpl SourceMods glc run $RUNDIR rof Tools drv wav rof • If any inputdatais missing, • Build abortsand provides a list of missing files • Run ./check_input_data –export to get missing data • Then re-run build script wav mct utils lib csm_share
Basic Work Flow (or how to set up and run an experiment) • One-Time Setup Steps • Registration and Download • Create an Input Data Root Directory • Porting • Creating & Running a Case • Create a New Case • Invoke cesm_setup • Build the Executable • Run the Model and Output Data Flow
Work Flow: Super Quick Start Set of commands to build and run the model on a supported machine: ”yellowstone” • # go into scripts directory into the source code download • cd /path_to_source_code_download/cesm1_2_0/scripts # (1) create a new case in the directory “cases” inyour home directory ./create_newcase -case ~/cases/case01 -res f19_g16 -compset B_1850 -machyellowstone # go into the case you just created in the last step cd ~/cases/case01/ # (2)invoke cesm_setup ./cesm_setup # (3) build the executable ./case01.build # (4) submityour run to the batch queue ./case01.submit
(4) Running the Model • Your job is waiting in the queue When you submit your jobs • ~/cases/case01>bjobs • JOBID USER STAT QUEUE FROM_HOST EXEC_HOST JOB_NAME SUBMIT_TIME • 960463 userx RUN regular yslogin3-ib 15*ys0702-i case01 Jun 17 08:34 • 15*ys1872-ib • 15*ys1906-ib • 15*ys1907-ib • 15*ys1908-ib • 15*ys1918-ib • 15*ys2055-ib • 15*ys2057-ib • 15*ys2058-ib • 15*ys2130-ib • 15*ys2131-ib • 15*ys2132-ib • 15*ys2216-ib • 15*ys2218-ib ~cases/case01>case01.submit check_case OK • Job <959733> is submitted to queue <regular> Use “bjobs” to check if job is running • Your job is running ~/cases/case01>bjobs • JOBID USER STAT QUEUE FROM_HOST EXEC_HOST JOB_NAME SUBMIT_TIME • 960463 userxPEND regular yslogin3-ib case01 Jun 17 08:34
INPUTDATA Directory (3) Overview of Directories(when the job is running) /glade/p/cesm/cseg/inputdata /glade/p/cesm/cseg/inputdata $DIN_LOC_ROOT atm lnd ocn ice glc wav cpl share rof Build/Run Directory CESM Download CASE Directory /glade/scratch/userx/ case01 $EXEROOT case01 cesm_setup case01.build case01.submit user_nl_xxx ~/cesm1_2_0 $CCSMROOT atm models scripts create_newcase lnd ocn atm Buildconf bld ice lnd CaseDocs glc ocn LockedFiles ice cpl SourceMods glc run $RUNDIR rof Tools drv wav rof • When running, the model scripts write files into your run directory. • After completion the model scripts will move files into the appropriate directories (next slide). wav mct utils lib csm_share
INPUTDATA Directory (4) Overview of Directories(when the job completes)(archiving data) /glade/p/cesm/cseg/inputdata /glade/p/cesm/cseg/inputdata $DIN_LOC_ROOT atm lnd ocn ice glc wav cpl share rof Build/Run Directory CESM Download CASE Directory Short Term Archive /glade/scratch/userx/ case01 $EXEROOT case01 cesm_setup case01.build case01.submit user_nl_xxx ~/cesm1_2_0 $CCSMROOT /glade/scratch/userx/ archive/case01 $DOUT_S_ROOT atm models scripts create_newcase atm lnd logs lnd ocn hist atm Buildconf ocn bld ice lnd CaseDocs ice Tools glc ocn glc SourceMods ice cpl HPSS cpl Timing glc run $RUNDIR rof rof Logs drv • (1) Move timing and log files into case directory wav dart rof • (2) Leave in $rundir what is needed to continue the run wav mct wav • (3) Move history and log files to short-term archive utils lib rest (4) Move data to permanent long-term storage Set DOUT_S to TRUE in env_run.xml csm_share
More Information/Getting Help • Model User Guides: http://www.cesm.ucar.edu/models/cesm1.2/
More Information/Getting Help • CESM Bulletin Board: http://bb.cgd.ucar.edu/ 42
Thank You! The NESL Mission is: To advance understanding of weather, climate, atmospheric composition and processes; To provide facility support to the wider community; and, To apply the results to benefit society. NCAR is sponsored by the National Science Foundation 43