Discover ARCHLine.XP Interior: Comprehensive CAD for Interior Design
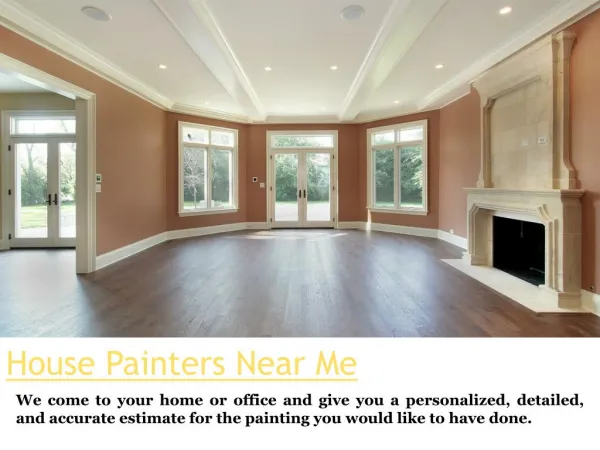
ARCHLine.XP Interior is a complete CAD software designed for professional interior design documentation. Ideal for designing reception rooms, kitchens, bathrooms, and office spaces, it equips users with easy design tools to create floor plans and 3D models quickly. Accessible to beginners and advanced designers alike, ARCHLine.XP Interior offers photorealistic 3D interiors and professional building plans. This tutorial guides users through practical exercises, enabling them to master CAD design fundamentals and produce visually stunning interior designs with confidence.


Discover ARCHLine.XP Interior: Comprehensive CAD for Interior Design
E N D
Presentation Transcript
What is ARCHLine.XP INTERIOR? • ARCHLine.XP Interior is a complete interior design CAD software. It gives you everything you need to produce a professional interior design documentation. • ARCHLine.XP Interior is perfect for those who want to design reception rooms, bathrooms, kitchens, new or renovated house interiors, offices and commercial units.
Benefits • Easy design tools allow users to design quickly a complete floor plan and space model quickly and efficiently within minutes from scratch. • Easy-to-use features make ARCHLine.XP the ideal software for beginners and advanced interior designers. • Photo-realistic 3D Interiors. • ARCHLine.XP makes designing your office, renovated house and business unit easy and fun to do, while providing you with professional building plans.
Getting Started and Working inARCHLine.XP Interior • This tutorial is a guide that helps you to practice using typical interior examples. To get the most out of this tutorial it is best to run ARCHLine.XP Interior and YouTube with the appropriate video, so that you can experiment with the concepts that are mentioned in the tutorial.
Lesson one: Reception Room • This workshop goes through the design of a typical reception room and provides you with the following principles and basic skills in both 2D and 3D: • Fundamentals of CAD design: Interface and drawing tools. • Basic architectural design: Accurate drawing of walls, doors, windows, slab, ceiling. • Interior design: Cornicing, skirting boards, curtains, wall mounted pictures, lights, furniture. • Visuals: Finishes and materials from producers, shadows, photorealistic/rendered images. • Documentation: Dimensioning, floor plan and elevations. • You will be able to visualize a 3D model, wall views, photorealistic/rendered images, incorporating textures and fabric patterns. • Suitability: Beginners in computer design.
Lesson one: Reception Room • Open your browser with: http://www.youtube.com/watch?v=AaUxAEi0oTw • Your screen should look as follows: Press the ARROW button in the bottom left corner to play the video and pause it any time you need with pressing the same button again.
Lesson one: Reception Room • Start ARCHLine.XP Interior, Your screen should look similar as follows: • Click on New Project to start .
1.1. Save your project • Before starting to design it is recommended to save your project with a real project name, as MyReceptionRoom.pro. • Click on File menu – Save project command and type your file name to save the project. Your screen should look as follows:
1.2. Room design 1. Click on Toolbox, Start menu, Pre-defined rooms command 2. Choose in the upcoming dialog the room shape: Bay window 3. Create your room with exact room internal measurements: Type these values and press redraw. A: 6.4, B: 4.3, C: 0.9, D: 0.5, E: 1.2,F: 2.9. The values represent the internal wall lengths. Wall properties: Thickness: 0.24, Wall height: 2.70 m, 4. Press the Close button and place the room shape on the drawing area with mouse left click near to the origin.
Your screen should look as follows: If you see your design partly, click on the bottom right corner icon marked as 1 in order to open the navibar tool and after click on the icon marked as 2 to have the optimal view.
1.3. Floor definition • Define floor properties: Toolbox- Building menu – Properties - Slab: Set up these values in the dialog: • Floor relative height (1): 0.0; Thickness (2) : -0.3;
1.3. Floor definition • Define floor: Toolbox - Building menu – Slab - Slab by walls. • Select the walls with selection window with two clicks somewhere outside the walls (1,2). • Finally click in Enter (3) button to close the command. The program creates now the floor and generates in 3D as well.
Your screen should look as follows: The slab is ready and you see it in the 3D view under the walls. • Note: Click with left mouse button in the 3D view on the blue triangle icon near to the bottom right corner (1). It opens the Navibar where you find the Rotate icon (2). Move the cursor over it. Click and hold down the mouse button and start to move the mouse in any direction. It will rotate the model as you move the mouse.
1.4. Ceiling definition • Activate the 2D view with a left click inside the window. • Define ceiling: Toolbox - Building menu – Ceiling. • Click on the wall vertex points one by one as below. Finally click in Enter button (11) to close the ceiling contour.
1.5. Perspective views • It is recommended to save some perspective views now. These saved views makes easier later to overview your room inside. Activate the 3D window and click on the Navibar Perspective view icon. Define and save 2 views in the upcoming dialog.
1.6. Perspective view dialog • Click on the floor plan icon (1) below. Then click on the camera point (2) and drag it near to the room bottom right corner. Now click on the target point (3) and drag it near to the bay window left corner..
1.6. Perspective view dialog When you are ready click on the green plus sign and the view is saved. Repeat it once again with an eye point near to the room bottom left corner and the destination point near to the bay window right corner. Save it again with green plus and press Ok to close the dialog. Note: Use Page Up and Page Down buttons to swap among the saved views.
1.7. Room Maker • Room Maker is an all-in-one design tool that highly speeds up the interior design starting from an empty room. • Start off by placing doors and windows. Then you can decorate the room with your choice of items very quickly.
1.7.1. Room Maker • Start the command: Toolbox – Start menu – Room Maker as indicated with 1 • Click inside the room on the floor plan asindicated with 2 • The Room Maker dialog appears on your screen.
1.7.1. Room Maker – Interface overview • The Room Maker dialog appears on your screen. Wall finder Toolbar Type finder Texture finder Favorites Other types Properties Add new item Zooming Undo / redo Floor plan 3D view
1.7.2. Room Maker – Interface overview Wall finder: The room will turn to the left / right and displayed frontal to the selected wall. You work on this wall or some cases on floor or ceiling. Toolbar: The container for interior design items. One of them is always active and Room Maker works with the selected one. Type finder: It enables to see the last used types in the Favorites box. Texture finder: It enables to see the last used textures in the Favorites box. Favorites: You see here the last used types or textures. Other types: Here you can choose from the library of types or textures. Properties: This values are used when you insert a new item or modify it. Insertnew: You can insert a new item with a click on the Green Tick. Zooming: Zoom in or zoom out the 3D view. In order to get a close-up view of the selected item click in the Close-up checkbox. Undo / redo: Deletes the last change done reverting it to the older state. Redo reverts the effects of the undo. You can undo and redo up to 16 actions Floor plan: The floor plan that focuses on the selected item (highlighted) 3D view: Three dimensional view facing to the selected wall / floor
1.7.3. Room Maker – First door • Select the indicated wall with Wall finder: We place 2 doors on 6.4m long wall. • Select Glassed door1 from the favourites and change properties: Width:1m Height: 2.1m; • Click on the Texture finder button • SelectBright_white from the favourites • Click on Green tick – it will place the door in • the wall centre point
1.7.4. Room Maker – Next door • Place now the second door on the same wall. Press the + (Green Plus) first to prepare the next door on the same wall. • The Glassed slid. in. 2 diff door is missing from the favourites so must find it with pressing the Other button. • You will see the Design Centre that contains all door types. • Click on the arrow button (1) and select the first line as “Search in all categories” • Type the door name partly in the search field (2) : Glassed slid • Press the Search button (3) • Click on the marked type in the search result list. • Press Ok to close the dialog. The selected door will be placed in the Door favourites list in Room Maker
1.7.5. Room Maker – Next door • Click on Green tick – it will place the door in the wall where it is possible. • Change left distance to 0.65m (1) and press Enter or Update icon (2).
1.8. Room Maker – Bay window • Place 4 windows in the bay. Press on the Toolbar the window icon (1). Select the indicated wall with Wall finder (2): We place one window on this 1.2m long wall. • Choose Default type from the favourites (3) and change properties: Width:1m, Height: 1.5m, Sill height 0.9m, (marked as 4,5,6,) Texture: Bright_white (7); • Click on Green tick (8) – it will place the window in the centre of the wall.
1.8.1. Room Maker – Next windows • Place 2 windows on the next wall. Repeat the instructions as in 1.8. • When you placed the first window you have to change its “Distance from left” value to 0.3m (1) and press Enter or Update icon (2). • Place the second window on the same wall. • Press the + (Green Plus) first to prepare the next window. (See in 1.7.4.) • Click on Green tick – it will place the window on the wall where it is possible. • Change its “Distance from right” value to 0.3m (1) and press Enter or Update icon (2). • Note: Place now the missing 4th bay window on next wall repeating the technique described here in 1.8.
1.9. Curtains • Place the 4 curtains in front of the windows in the bay. • Press on the Toolbar the curtain icon (1). Click on the left bay window (2). The curtain will be placed on this window. • Select the second curtain type from the favourites (3) and change properties: Wrinkles: high (90), Retraction in the middle: high (90), With pelmet, Bottom height: 0.0m. (4,5,6,7) • Click on the Texture (8) and select “Curtain 02” • Click on Green tick (9) – it will place the curtain in front of the window. • Click on Close-up (10) checkbox to see the curtain in optimal view.
1.9.1. More curtains • Select the next wall in the bay with Wall finder and place the curtains on two windows repeating the instructions as in 1.8. • There are two ways to select the second window: (1) click on the window or (2) click on the blue left or right arrow on the dialog left side to select the consecutive window. • Note: Place now the missing 4th curtain on the right side of the bay repeating the technique described here in 1.9.
1.10 Light Switches & Sockets • Place light switch and socket between the two doors on the 6.4 m long wall • Press on the Toolbar the Switches & Sockets icon (1). • Select the 6.4 m long wall with Wall finder (2) • Select the Plateswitch_2Gang type from the favourites (3) and change properties: Distance from floor: 1.2m, Distance from left: 2.5m (4,5) • Click on Green tick (6) – it will place the switch on the wall. (See image below) • Press the + (Green Plus) to prepare the next socket. • Select the Switchsocket_2Gang type from the favourites and change properties: Distance from floor: 0.3m, Distance from left: 2.5m. • Click on Green tick (6) – it will place the socket on the wall.
1.10.1 Light Switches & Sockets • Your screen should look as follows:
1.11. Cornice • Place cornice and skirting board that goes around the room. • Press on the Toolbar the Profiles icon (1). • Select the px-001 profile from the favourites (2) and change properties: width: 0.11m; height: 0.165m, Distance from the floor: 2.7m (3,4,5) • Click on the Texture (6) and select “Bright_white” • Click on Green tick (7) – it will place the cornice around the room. (See image below)
1.12. Skirting Board • Click on the Skirting Board icon on the left (1) • Select the skirting board_001 profile from the favourites (2) and change properties: width: 0.02m; height: 0.15m, Distance from the floor: 0m (3,4,5) • Click on the Texture (6) and select “Pine-natural” • Click on Green tick (7) – it will place the skirting board around the room. (See image below)
1.13. Ceiling lights • Place lights on ceiling. • Press on the Toolbar the Ceiling lights icon (1). • The Hidden_Halid_001 (3) is missing from the favourites so must find it with pressing the Other button (2). • Click on Green tick (4) – it will place the light on the ceiling. (See image left) • Press the + (Green Plus) to prepare the next light: X pos: -1m, Y distance: 0m, • Click on Green tick (4) – it will place the light on the ceiling. • Repeat it once again: Press the + (Green Plus) to prepare the next light: X pos: +1m, Y distance: 0m, • Click on Green tick (4) – it will place the light on the ceiling. (See image right)
1.14. Wall lights • Place lights on the wall. Press on the Toolbar the Wall lights icon (1). • Select the left side wall with Wall finder (2) • Choose ”Wall Lamp 1” (3) from the favourites and change properties: Distance from left: 1m, Distance from floor: 1.4m (marked as 4,5) • Click on Green tick (6) – it will place the light on the wall (See image left) • Press the + (Green Plus) to prepare the next light: Distance from right: 1m, • Click on Green tick (6) – it will place the next light on the wall. (See image right)
1.15. Picture on the wall • Place a picture on the wall. Press on the Toolbar the Picture on Wall icon (1). • Choose ” Gogh - Irises” (3) from the favourites and change properties: Distance from left: 1m, Distance from floor: 1.4m (marked as 4,5) • Click on Green tick (6) – it will place the light on the wall (See image left) • Press the + (Green Plus) to prepare the next light: Distance from right: 1m, • Click on Green tick (6) – it will place the next light on the wall. (See image right)
1.16. Floor material • There is a wide choice of material for floor covering . Press on the Toolbar the Floor Material icon (1). • Choose ” Parquet – S002” (2) from the favourites (See image left). It will apply the selected material on the floor (See image right).
1.17. Ceiling material • The command is very similar to floor material . Press on the Toolbar the Ceiling Material icon (1). • Choose ” Bright_white” (2) from the favourites (See image left). It will apply the selected material on the ceiling(See image right).
1.18. Wall material • The command is very similar to floor material . Press on the Toolbar the Wall Material icon (1). • Select a wallpaper that is missing from favourites. First activate the “All walls” checkbox (2) as condition to change the wallpaper on each wall in one step. • Click on the Other button (3). You will see the Design Centre with all textures. • Click on the arrow button (4) and select the first line as “Search in all categories” • Type the name partly in the search field (6,7) : Stucco • Press the Search button (8). The search term “Stucco" returns all names beginning with “Stucco". • Click on the marked item named Stucco2 (9) in the search result list. • Press Ok (10) to close the dialog. The selected texture will be placed in the favourites list in Room Maker and will be applied to all walls right away.
1.19. Change Texture on one wall • Switch off the All wall checkbox (1) and click on “Obbivka_wallpaper” (2). It will be applied only on the selected wall. • Your screen should look as follows:
1.19. Change Curtain fabric 1/2* • *This topic is optional as requires Internet connection to import fabric from Producer website. • Press on the Toolbar the Soft Furnishing icon (1) and click on a curtain (2). Click on the Texture button (3). • Click on the Internet button (4). Your browser opens the ARCHLine.XP Useful links website. www.archlinexp.com/useful_links • Go to Curtain Up website to select a Sanderson fabric. Choose Mereville DMERME303. Click on the image, it will be enlarged. Now right click on the big image, and choose Copy image command. • Return to Room Maker and select New material icon (5).
1.19. Change Curtain fabric 2/2* • Press the Paste button (1). The image will be copied into the dialog. • Type the name or copy and paste from the website into the name field (2). • Select the curtain category to qualify the texture quality (3). • Move the Opaque slider (4) to the left because this fabric is not transparent. Click on Ok to close the dialog. The new fabric is added to the favourites list in the Room Maker. • The curtain takes the new fabric. Please repeat it for the remaining 3 curtains. • Your screen should look as follows:
2.1. Curtain editing • Close the Room Maker: Press on Close button. • Zoom in the floor plan focusing on the curtains and click on the left curtain (1). • The curtain is highlighted now. Click on the blue dot marker on the left side (2). Select the Change length command from the upcoming menu (3). • Extend the curtain till the wall corner on the left(4). Repeat the command with the next blue dot marker on the right side and extend it till the middle point between the two curtains. • Repeat the procedures to the remaining 3 curtains. You will get a continuous curtain line in the bay window. • Your screen should look as follows:
2.2. Lights editing • Zoom in the floor plan focusing on the lights and select all with two clicks that forms an enclosing box around the lights (1,2). • The lights are highlighted now. Click on the middle anchor marker (3). Select the Move a copy command from the upcoming menu (4). • Move the cursor vertical down. You will see the green vertical dotted line as direction line. • Type 1 on the keyboard (5) and press ENTER. The three lights will be duplicated with 1m distance. • Repeat the procedure once again in vertical up direction. You will get 9 lights in a matrix form. • Your screen should look as follows:
3.1. Furniture • Press ESCAPE now and click inside the floor plan. This way you activate that window. • Click on DC: Object... Button (1) . Choose the chair icon on the top (2). It represents the object library. Click on the categories arrow (3) and select the Workshop Reception Room 2012 category (4) . • You will place the appropriate furniture to the floor plan from here using the drag and drop method. • The basic sequence of drag-and-drop is: • Move the mouse to the furniture. • Press, and hold down, the left button on the mouse , to "grab" the furniture, • "Drag" the furniture to the desired location, • "Drop" the furniture by releasing the left button. • Choose Sofa classic01 and place it on the floor plan using drag and drop method.
3.2. Editing furniture • Place the sofa near to the left wall of the room. In the next step we will rotate it by 90 degrees. • Click on the sofa (1). The sofa is highlighted now. Click on the right rotation marker (2). Select the “Rotate 90 ccw” command (3) from the upcoming menu. • The sofa will be rotated and will be parallel to the left wall. • In the next step we will move it near to the wall corner. • Click on the sofa. The sofa is highlighted now. Click on the top left blue dot marker (1). Select the Move command from the upcoming menu. • Repeat the procedure to place the following items: armchair_classic, carpet_large, antik, konzol, table_classic, antika.
3.3. Editing furniture • Your screen should look as follows:
4.1. Shadows • Open View menu and select the View properties / Sun position command. • Select the following setting in the dialog : Location – UK-Bristol (1), Date: March, 16 (2,3), Time: 13, 10 minutes (4,5) North: 266 degree (6). Press Ok.
4.2. Shadows • Open Navibar (1) and click on Shadow icon (2) • Your screen should look as follows:
5.1. Documentation • Open in the Toolbox the Dimension menu and choose Walls command (1). • Select the following settings in the dialog as indicated (2,3). Press Ok. • Zoom in the floor plan focusing on the room and select all items with two clicks that forms an enclosing box around all (1,2). • Press ENTER and click a little bit outside of the room (1).
5.2. Documentation • Your screen should look as follows: