Pop-Up Cityscapes
240 likes | 398 Vues
b y Mr. Priestley. Pop-Up Cityscapes. The basic steps that I will be repeating over and over (with slight variations) I have written below. Create a long horizontal fold in a large piece of paper. Cut two straight lines ( starting on and perpendicular to the fold) that are the same length.

Pop-Up Cityscapes
E N D
Presentation Transcript
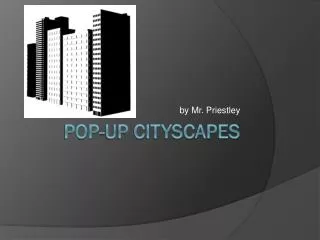
by Mr. Priestley Pop-Up Cityscapes
The basic steps that I will be repeating over and over (with slight variations) I have written below. • Create a long horizontal fold in a large piece of paper. • Cut two straight lines (starting on and perpendicular to the fold) that are the same length. • Create a fold that connects the tops of your cuts. Bend this fold forward and backward 3 times so that you have a new fold parallel to the original one. • Open the front and pop it forward. Some folks like to fish it out with their finger from the front. • Now close the pop-up and you are done.
Now make two more pop-ups using these same steps I just showed you.
Making new boxes “on-top” or “out-in-front” of your previously made boxes… • Find a place where you see 2 folds stacked on top one another. • Cut two straight lines perpendicular to the fold that are the same length. Tip keep them kind of short. • Fold them forward and backward 3 times. • Open the front and pop them both forward.
Question: You just made a box on top and out front. Is there a way to just do one or the other? Who can answer the question above? or
Making new boxes on top or out in front of your previously made boxes… • Close the cityscape and find a place where you see 2 folds stacked on top one another and pick to cut either the top or bottom fold, but not both. • I think you know the rest of the steps by now.
Making new boxes directly next to pre-existing boxes. • Fold your paper down and find a place where you see a void. • Cut one straight line perpendicular to the fold and parallel to the previous cuts. Tip: keep it shorter then the cuts that make the void. • I think you know the rest of the steps by now.
Making new boxes directly into the front top edge of pre-existing boxes. • Leave your paper open so pop-ups are visible, pinch the fold you will see at the front top edge of a large pre-existing box. • Cut two straight lines perpendicular to the fold that are the same length. Tip: keep them kind of short. • Fold it forward and backward 3 times. • Open the front and push it backward.
Taking a corner away from the front top edge of a pre-existing box. • Leave your paper open so pop-ups are visible, pinch the fold you will see at the front top edge of a large pre-existing box. • Cut one straight line perpendicular to the fold. Tip: keep it kind of short. • Fold it forward and backward 3 times. • Open the front and push it backward.
Coloring Tips… • Color the flat background and flat ground areas first. • Explain to kids the difference between rooftops and building fronts. Windows go on fronts, not tops. • Give students options, they could use different types of … • Land options: grass, roads, ponds, rivers, sidewalks… • Window options: square, round, triangle, long, tall…
1. All cuts should be… • Horizontal & Parallel. • Vertical & Parallel. • Horizontal & Perpendicular. • Vertical & Perpendicular.
2. All folds should be… • Horizontal & Parallel. • Vertical & Parallel. • Horizontal & Perpendicular. • Vertical & Perpendicular.
3. Which form is closest to the work done today? • Sphere • Cylinder • Cone • Cube • Pyramid
4. Is the artwork created today 2-D or 3-D? 2-D or 3-D
5. You just created something called a “Cityscape”, what do you think you call this type of artwork? An Oceanscape or Seascape
6. What element(s) of art do you NOT see in the artwork you made today? • Line • Shape • Texture • Form • Value • Space • Color Answer will depend on several variables. If you did not color then you did not use “G. Color”. If you did not draw texture on the roofs or the texture of grass, you did not use “C. Texture”. The other should be pretty easy to see, for exampe, you can see the changes of “E. Value” in the shadows you have just created or the cubic forms on your paper suggest “D. Form”