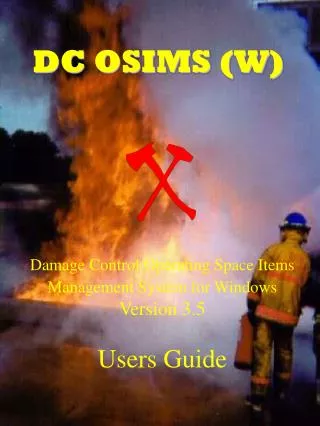
DC-OSIMS Training Overview
DC-OSIMS Training Overview. Unit 1.14. Damage Control Inventory Management Stowage System for Windows. We are concerned about shortages? We must be ready for all casualties all the time? Because we are told too. NTTP 3-20.31


DC-OSIMS Training Overview
E N D
Presentation Transcript
DC-OSIMSTraining Overview Unit 1.14 Damage Control Inventory Management Stowage System for Windows
We are concerned about shortages? We must be ready for all casualties all the time? Because we are told too. NTTP 3-20.31 “ A complete inventory of operational DC equipment at DCRS is Mandatory”. IAW with NSTM 079, Volume 2, DC-OSIMS where installed shall be used as the principal repair station logistics support management tool for monitoring onboard allowances and shall be used for inspection purposes. Why do we do Inventories?
AUTOMATED MEANS FOR INVENTORY MANAGEMENT AND UPDATE INVENTORY POSTING CAPABILITIES FOR SHIPBOARD PERSONNEL INVENTORY AID SHEETS ALLOW, DUE AND ON HAND QUANTITIES LOADED INTERNAL CALCULATIONS OF EXCESSES AND SHORTAGES SUMMARY REPORTS OF EXCESSES AND SHORTAGES REQUIREMENTS GENERATION SELECTED REPORTS GENERATION Features and Benefits
Introduction DC OSIMS (W) was designed to provide visibility of each Damage Control AEL and Kit content and provide a mechanical means of managing your Damage Control Assets Identifies allowances Post inventory (Shortages and Excesses) Allows Review of On-Hand Assets Generate Selected Reports
ALL UPGRADES ARE IN RESPONSE TO FEEDBACK FROMFLEET USERS INCLUDE PRINT CAPABILITY FOR CHARACTERISTICS DATA TO AID IN INVENTORY FUNCTIONS ALLOWS TOTAL ENVIRONMENT POPULATION VISION TO MANAGE SHORTAGES/OVERAGES BETWEEN REPAIR LOCKERS INVENTORY AID BOOKLET IMAGES LAN INTERFACE FOR NETWORKING POSSIBLE INTERFACE TO SNAP AUTOMATED REQUISITION PROCESS FOR SHORTAGES Windows VersionEnhancements
Hardware: 486 minimum 8 Meg RAM 25 Meg free disk space Software: Operating System: Windows 95/98 or NT Today, most ship’s easily meet the minimum requirements to operate this software System Requirements
+/- (Shortage / Excess Material) - This field is a system generated field to identify any material shortages or excesses. Allowance Quantity - (On Hand Quantity + Due Quantity). Any shortages will be identified with a negative sign, excesses with a positive sign. AEL (Allowance Equipage List) -The Damage Control AELs have been built and formatted into a two tier system. The first tier consists of the Parent DC AELs. These include the Damage Control Repair Stations, Unit Lockers, Unit Patrol Stations, and Re-Entry/Rescue and Assistance Lockers. The second tier consists of the actual Kit AELs in which the equipment is grouped by the function it serves (Dewatering, Desmoking, Firefighting Access, etc.). Allow (Allowance Quantity) -This field represents the allowance from the kit for each line item within each Repair Station, Unit Locker, Unit Patrol Station or Re-Entry Locker. Baseline (Baseline DCID) -The program uses this field to identify the damage control locker/space. The user has no ability to edit or change this field. Fields & Definitions
DCID (Damage Control Identification) - This field is used by the program to identify the damage control locker/space. The user has no ability to edit or change this field. Description (Item Name) - Item Name from AEL used to identify particular line item. Includes each item that is included in each kit within a repair station. Due (Due Quantity) - Used to identify which damage control items are on order. The baseline data base contains zero in this field. Shipboard personnel may update this field based on knowledge of items on order. The system uses the due quantity field with the on hand quantity to calculate shortages and excesses based on allowance quantities. Extended Price - The Extended Price field is shown on the Summary Reports. This field is calculated by the Unit Price multiplied by the Allowance Quantity. FSC (Federal Supply Classification) - Classifies each equipment piece within a damage control kit. First two digits denote the group or major division of commodities. Last two digits denote the class or subdivision of commodities within a group. Part of the National Stock Number (NSN). Fields & Definitions
Image - Taken from the NAVSEA 03G Inventory Aid Booklet for Damage Control Equipment (NAVSEA S5090-BL-DCB-010). Assists shipboard personnel in identifying items during inventory. Location - This field appears on the Redistribution Review Report and displays the item location. The baseline data base has generic locations loaded in the compartment field (i.e., Repair 2 for Damage Control Repair Station (DCRS) 2). See Compartment field definition for edit options. NIIN (Navy Item Identification Number) - Assigned under the Federal Cataloging Program to identify each equipment within the Damage Control Kit. In this database, Navy Item Control Numbers (NICNs) have also been included in the NIIN field. Certain NICNs for items such as boots, coveralls, and gloves have several NIINs associated with them (for different sizes). Fields & Definitions
Logon Screen • Enter User ID (Name Assigned) (Will be DCOSIMS for this course) • Enter password (Will be DCOSIMS for this course) • Click LOGIN button. • System will display DC OSIMS (W) Main Menu Screen. NOTE: The first time logging into DC OSIMS (W) with a new user id, the "Select a Ship to Connect to the Database" dialog screen will appear. The user's ship will appear in the dialog box. The user highlights the ship and clicks the "Select" button. A confirmation box will appear, asking "Select the ship (ship name)." The user selects the "OK" button to continue. The main DC OSIMS (W) screen will appear with the applicable ship's configuration/database.
DC OSIMS has four access levels. The lowest level, Read, is designated for read-only purposes. The next level, Ship User, is for normal shipboard use. At this level, the user has access to all functions except the following: ability to add/delete record change Allowance Quantity ability to print allowance quantities on the hard copy Inventory Aids, and ability to update the data base file with NAVSEA generated updates that may occur. Logon IDs / Access
The next level, Ship Manager, includes all functions available to the Ship User and includes the ability to add/delete record, change Allowance Quantity, print allowance quantities on the hard copy Inventory Aids, and update the data base file with NAVSEA generated updates that may occur. The Ship Manager also has the ability to add new users to the access list by accessing the File, Tools, Users button. A Ship Manager can add any additional User IDs at the Ship Manager level or below. The fourth level, System Manager, is used for System Management at the sponsor (PEO TSC-F3) level. Note: Once a user logs into the OSIMS system and updates any records within the data base, the system will automatically enter the user name and date into the User Name and Date field of the record that was updated. This enables future users the visibility of who last updated/inventoried the record and when. Logon IDs / Access
DC or CBR?You Choose This Option became available in the very latest versions of DC-OSIMS. The most Current Version is DC-OSIMS 3.3x
DC-OSIMS Main Screen • Left-hand Side of screen displays the primary (first level) of the database. • Right-hand Side of screen reflects the secondary level, which varies depending on the primary level selected. First Level Secondary Level
Main Screen (Left Side) • DCID Tab - gives users the option of viewing all AELs that apply to that DCID (Repair Locker). Right-hand side will show all the AEL and Nomenclature that applies to that locker. On the bottom of the right-hand side is a bar mark “Allowance/Inventory”, this allows user to Add, Delete, Edit, Print and Cancel transaction. DCID TAB
Main Screen (Left Side) • AEL Tab - Gives users the option of viewing all DCIDs that the selected AEL resides in or the individual NIINs that apply to that AEL. This can be done by switching between the two tabs on the right-hand side of the screen. AEL TAB
Main Screen (Left Side) • NIIN - Gives the user the option of viewing all the AELs that the NIIN applies to. The allowance for that AEL can be viewed by pressing the “Allowance/Inventory” button located on the bottom right-hand screen. NIIN TAB
Posting Inventory Procedures • To post an inventory • Select the DCID Tab • Choose the baseline the AEL falls under • Then locate the AEL on the right-hand side • Once you find the AEL, “click the” the Allowance/Inventory bar which is located on bottom right-hand side. DCID TAB Locate AEL Select Baseline Allowance/ Inventory Bar
Posting Inventory Procedures All the NIINs pertaining to that AEL will appear showing allowance amount, on hand, excess/shortages, due and bin loc. By selecting a NIIN, you can Edit the profile, on hand due and allowance. Edit Add Delete
Posting Inventory • Another way to post inventory is to select AEL tab, highlight the applicable AEL and the “click” on the “Allowance/Inventory” bar. Now you can Add, Edit, Delete, Undelete, Print or show On-Hand information. AEL Tab DCID (Repair Locker) NINN Edit Add Delete Highlight AEL Allowance/ Inventory Bar The Allowance/On Hand view also shows which Repair Locker (DCID) the AEL is found in and all the NIINs that are associated with that particular AEL.
View/Edit All Asset for NIIN • To view/Edit all asset for a NIIN • Select the NIIN Tab on left side, then highlight the NIIN you are desiring to view or edit. Note all AEL’s that contain the selected NIIN will be displayed on right hand side of screen. • “Click” on the “Allowance” bar. NIIN Tab Allowance/ Inventory Bar
Editing Allowance Data Click “Done Button” and all changes will be reflected Click on “Done”
Adding AEL • Click “AEL Tab” (Primary “First Level”) • Click on the “Add Button” (Primary “First Level”) • Add AEL Window will appear AEL Tab Add Button
Adding AEL • Edit AEL Window will appear.. • Enter the new AEL info and Nomenclature and select “save” button. After Edit you can Save or Cancel Action
Edit AEL Nomenclature • Click “AEL Tab” (Primary “First Level”) • Click on the “Edit Button” (Primary “First Level”) • Edit AEL Window will appear AEL Tab Highlight AEL To Be Edited Edit Button
Edit AEL Nomenclature • Edit AEL Window will appear.. • Edit the AEL info and Nomenclature and select “save” button. After Edit you can Save or Cancel Action
Adding NIIN • Click “NIIN Tab” (Primary “First Level”) • Click on the “Add Button” (Primary “First Level”) • Add NIIN Window will appear NIIN Tab Add Button
Adding NIIN • Add NIIN Window will appear.. • Enter all NINN data • When completed entering NIIN data, click the “Save button” and Add NIIN Window will go away.
Adding a NIIN to an AEL • Click “AEL Tab” (Primary “First Level”) • Click “NIIN Tab” (“Secondary Level”) • Click on “Add Button” Lower Right (“Secondary Level”) • Add AEL/NIIN Combination Window will appear AEL Tab NIIN Tab Select AEL Add Button
AUTOMATED DAMAGE CONTROL AELs FOR ALL SURFACE SHIPS WELL ACCEPTED AND RECOGNIZED MANAGEMENT TOOL IN DEMAND BY FLEET USERS ALLOWS MANAGEMENT OF SCARCE RESOURCES ANDFUNDING THROUGH AUTOMATED PROCESSES ALLOWS CONTROLLED INVENTORY MANAGEMENT WITH LIMITED PERSONNEL RESOURCES Summary