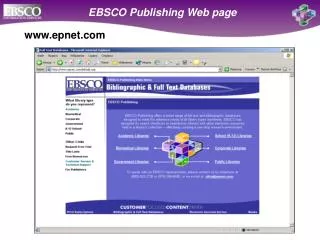
Mastering Web Page Publishing with Dreamweaver 4.0 Trial Version
Learn web page publishing using Dreamweaver 4.0 trial version. Create, upload files to server, insert images, and set backgrounds easily.

Mastering Web Page Publishing with Dreamweaver 4.0 Trial Version
E N D
Presentation Transcript
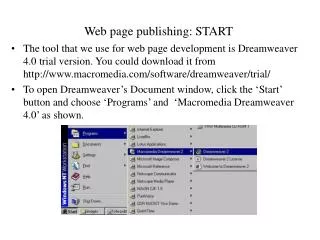
Web page publishing: START • The tool that we use for web page development is Dreamweaver 4.0 trial version. You could download it from http://www.macromedia.com/software/dreamweaver/trial/ • To open Dreamweaver’s Document window, click the ‘Start’ button and choose ‘Programs’ and ‘Macromedia Dreamweaver 4.0’ as shown.
Web page publishing: START • Before doing anything, you have to tell the computer where to store your files and where is your remote web server. • To do this, click ‘Site’ on the top menu bar, and choose ‘New Site’. • Click the ‘Local Info’ and name your site as ‘1st attempt’. Then choose the local Root Folder as C:\TEMP\
Web page publishing: START • Then click “Remote Info’ to define the location of your web server. Choose ‘FTP’ as the ‘Server Access’. Then press ‘OK’.
Web page publishing: START • Remote Info: • FTP Host: 158.182.250.219 or res.hkbu.edu.hk • Host Directory is: ‘This should correspond to your personal folders’ • Login:educ4210-1 • Password: educ4210-1 • Then press ‘OK’.
Task 1: Creating a web page with a simple heading • In the Document window, type a heading for your page as you do in a word processor. You could change the font size, font type, alignment, etc. by clicking ‘Text’ on the top menu bar of the Document window. • Then click ‘File’ and choose the ‘Save as’ option. • Enter the file name as ‘test.html’ and press ‘OK’.
Task 2: Upload your page to the web server • To transfer file to the server, open the site file window by clicking ‘Window’ and choosing the ‘Site File’ option. • Press the ‘Connect’ button. The left pane shows you the file system on the remote server while the right pane displays your local site files.
Task 2: Upload your page to the web server • Highlight the file on the right panel and click the ‘Put’ button on the top tool bar. • A pop-up window will appear and you just click ‘Yes’. • You file has already been up-loaded. By typing the correct URL http://158.182.250.219/educ4210-1/your_folder_name/???.html, you could use IE 4.0 to browse your document.
Task 3:Changing the background colour and inserting images • To change the background colour: Move the cursor onto the the Document window and right-click the mouse. Then choose the ‘Page Properties’ option. • Then choose a colour for your page.
Task 3:Changing the background colour and inserting images • Your page will appear as the one shown above. • To insert an image, click ‘Insert’ and choose the ‘Image’ option.
Task 3:Changing the background colour and inserting images • The images are stored on your desktop\images folder • Then open the ‘images’ folder by double-clicking it. • Choose the any of the image files you like.
Task 3:Changing the background colour and inserting images • A window will pop up to remind you to save the file. Click ‘Yes’. • Then click ‘Save’ to move the file from the ‘images’ folder to your local site. • Save your file and transfer it to the web server.
Task 4: Use a wall paper for your page • To choose an image as the wall paper, move the cursor onto the Document window and right-click the mouse and choose the ‘Page Property’.. • Click the ‘Browse’ button to choose the image at ‘desktop\images\bkgr04.gif’ • Then save the file and upload it to the server.
Task 5: Inserting a table of images as hot buttons • Click ‘Insert’ and choose the ‘Table’ option. • Choose ‘1’ row and ‘3’ column as shown below.
Task 5: Inserting a table of images as hot buttons • Insert the three images named: ‘ani-inew.gif’, ‘mpschool.gif’, and ‘health.gif’ respectively in ‘desktop\images’.
Task 5: Inserting a table of images as hot buttons • To add a hyperlink to an image, first hightlight the image and open the Property window of the image. • A window shows the properties of the image:
Task 5: Inserting a table of images as hot buttons • In the ‘Link’ box, type in the URL. • URLs of the respective images are as follow: • MingPao News Net: http://www.mingpaonews.com/ • MingPao School Net:http://www.mingpaoschool.com/ • MingPao Health Net:http://www.mingpaohealth.com/ • Then save the file and upload it to the server.
Task 6: Creating a layer containing an image • A layer is a container of objects, which can move around a page. It can contain text, images, etc. It looks like a separate web page floating on top of its parent. • To insert a layer, click ‘Insert’ and choose ‘Layer’.
Task 6: Creating a layer containing an image • Hightlight the layer by click the square box at the top-left corner of the layer border. • Then insert a banner named: ‘banner.jpg’ at ‘desktop:\images as shown on the right.
Task 7: Creating an animated layer • First highlight the selected layer by clicking the square at the top-left corner of the layer border. • Since you are going to animate the layer, you need to modify the property of the layer. Click ‘Modify’ and choose ‘Add Object to Timeline’.
Task 7: Creating an animated layer • To create a timeline for the layer, click ‘OK’. • ‘1 - 15’ corresponds to the number of frames required for the animated. You may increase the number to ‘40’ by dragging the circle at the end of the line.
Task 7: Creating an animated layer • If you want the banner to rise from the bottom of the page to the top, you only need to define where are the initial and final position of the banner. • To define the final position, click the ‘small circle’ at frame ‘40’ shown in the Timeline window, then highlight the layer by clicking the ‘square’ at the top-left hand corner.
Task 7: Creating an animated layer • Similarly, to define the initial position, click the ‘small circle’ at the first frame shown in the Timeline window, then drag the layer down to where you decide. • Then save the file and upload it to the server.