Download
1 / 41
480 likes | 772 Vues
Food Preservation & Home Canning. Updated & Presented by: Jana Darrington FCS Agent, USU Extension-Utah County 801-851-8460 jana.darrington@usu.edu. http://extension.usu.edu/utah. Created by: Teresa Hunsaker FCS Agent, USU Extension-Weber County. Why Preserve Food?.

E N D
Food Preservation &Home Canning Updated & Presented by: Jana Darrington FCS Agent, USU Extension-Utah County 801-851-8460 jana.darrington@usu.edu http://extension.usu.edu/utah Created by: Teresa Hunsaker FCS Agent, USU Extension-Weber County
Why Preserve Food? • To enjoy garden produce all year long. • Better flavor through home processing. • To improve canning skills. • The convenience of having food on hand. • You get a sense of satisfaction. • Improved nutritional content – fresher, not as old. • Can control for special diet needs – less sugar or salt.
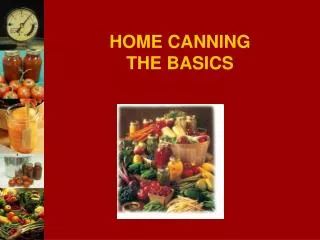
Preserve the Harvest A variety of ways to preserve. Use all three! • Freezing • Advantage – product most like fresh; freezing is rarely “dangerous” • Disadvantage –expensive (freezer, packaging, energy, time) • Dehydration • Advantage – Storage takes little space; equipment not expensive • Disadvantage – Product most changed from fresh; some nutrition lost (not enough to worry about) • Canning • Advantage – Longest storage time with high quality • Disadvantage – Person needs to be knowledgeable about process as well as high- & low- risk foods
Canning 101 Quiz (T/F) • Food preservation guidelines and methods do change. • The last time major changes came out was in 1988. • A sealed jar is a safe jar. • Jams and jellies do not need to be water bathed. • It is OK to alter ingredients just a “little bit” when canning. • Adding extra starch, flour, or thickener to a recipe is fine if it seems to thin for your liking. • Rings must remain on the jars during storage. • All bottles and lids must be sterilized before using.
“I’ve been doing it this way for years and no one has died yet!” That may be true, but...
Food Safety is Our #1 Priority! • Canning is NOT Cooking! • Successful Cooking = Good tasting food w/ expected consistency • Successful Canning = Control of potentially harmful microorganisms • Appearance, taste, texture not always good indicators
Use Current, Tested Recipes • BE CURRENT: • Test dial gauge each year • Call local Extension office and ask if there are new canning guidelines • USE TESTED research-based recipes – these recipes have been tested repeatedly in labs to control for microorganism growth • USDA Complete Guide to Home Canning • Ball Blue Book • Control your creativity when canning
More Food Safety • A sealed jar does not mean a safe jar • Enough heatmust reach center of jar to control molds, yeasts, or bacteria that might cause illness • MUST be enough time for the heat to penetrate the food and eliminate undesirable microorganisms. • Processing Time Scientifically determined • Researchers repeat process over and over until they can guarantee control of the target microorganism. • Jars do not need to be sterile. Clean is good.
Let’s Start at the Beginning… Factors affecting processing times: • Acid content of the food • Density of the food • Altitude • Starting Temperature of the Food • Size – quarts or pints
Foods on pH Scale Process at 212° F In Boiling Water Bath (Kills Molds & Yeasts in High-acid Foods) Process at 240° F In Steam Pressure Canner (Kills anaerobic organisms like those that cause botulism in low acid foods) Source: USDA Complete Guide to Home Canning, revised 2006
Let’s Talk Bot... • Most of us have heard about botulism and anyone who has heard about it does NOT want it in their food! • The c. botulinum spore is all around us and can be found in soil. Yet, we can pull a fresh carrot from the ground, wash it off and eat it without any ill effect.
Botulism Toxin • It is when the botulism spore is placed in an environment with • Low acidity (pH is greater than 4.6) • Moisture (and it doesn’t take much!) • And no oxygen that it creates a toxin that is deadly! • When we home can low-acid foods, we have just created the PERFECT environment for botulism (if not killed) to kill us!
Killing Botulism • It is impossible to reach 240° F in a regular boiling water bath canner. The highest possible temperature we can reach is 212° F (the boiling point of water at sea level). • In order to kill botulism, we must use a pressure canner when we home-can any meats or vegetables (that aren’t pickled). • With pickled vegetables, if we follow an approved recipe, we add enough acid (i.e., vinegar) to make it safe from botulism.
Density: Heat Penetrationimpacted by thickness of contents Heat must travel from molecule to molecule to center of jar (slow process) Heat travels through convection currents which circulates to bring heat to center Cold Zone Cold Zone Conduction: Thick/solid contents Convection: Liquid/Less dense contents When it says to cut 1” cubes, it is for a reason!
Changing Density • Changing a recipe will alter the density of the product. Examples: • Simmering salsa 3 hours instead of 30 minutes • Adding thickeners (flour, barley, pasta) • Adding more solids (meat, beans, vegetables) to recipe • Altering density impacts processing time: Processing time in recipe no longer valid • If you are unhappy w/ thickness, add thickener just before serving!
Adjusting for Altitude • Water boils at 212°F at sea level • At higher altitudes, water boils at lower temperatures – for example: between 4,000 and 6,000 feet, water boils from 204°F to 201°F. • This means it takes longer to heat the center of the jar to the necessary temperature to kill molds/yeast (high-acid) and botulism (low-acid). A little side-note for any candy-makers out there... You also need to apply altitude adjustments to your candy thermometer to have the best success! Source: USDA Complete Guide to Home Canning, revised 2006
Remember: Processing Time Scientifically DeterminedONE ADJUSTMENT NECESSARY… As Altitude Increases ADD: • TIME (Boiling Water Canner) • add 10 min. for 3,000-6,000 ft. OR • PRESSURE (Pressure Canner) • Dial gauge: 13 lbs. at 4,001-6,000 ft. • Weighted gauge: 15 lbs. at 4,001-6,000 ft. ALWAYS verify according to guidelines Source: Ball Blue Book, 2009 Source: USDA Complete Guide to Home Canning, revised 2006
Starting Temp of Food:Packing Method Source: USDA Complete Guide to Home Canning, revised 2006 • Raw pack • Raw food put into jar; then boiling canning liquid is poured in over food. • Oxygen in food tissue may cause discoloration after 2 to 3 months • More suitable for vegetables processed in a pressure canner • Fruits (high air content) will float in jars
Hot Pack • Hot pack • Boil raw foods and canning liquid 3 to 5 minutes in a saucepan or blancher, then poured into jars. • Advantages • Helps remove air from food tissues • Helps keep the food from floating in the jars • Increases vacuum in sealed jars, and improves shelf life. • Preshrinking food permits filling more food into each jar. Source: USDA Complete Guide to Home Canning, revised 2006
Preparing Jars & Lids • Fill jars w/food, leaving correct headspace. • Remove air bubbles w/rubber spatula. • Wipe down mouth of jar. • Put on warm lid & screw band. • Lids need to be heated in pan of warm or simmering water. Do not need to boil.
Other Terms:Headspace Needed for food expansion & proper vacuum sealing during canning process. USDA Guidelines: • Jams & Jellies: ¼ inch • Fruits and tomatoes: ½ inch • Low acid foods: 1-1 ¼ inches
Jars & Lids • Follow directions on the box for tightening the jar lids properly and heating. • Too tight: air can’t escape, buckling, food discoloration and jar breakage • Too loose: liquid escapes, seal fails. • DO NOT readjust the lid after processing!
Boiling Water CannerProcedure HANDOUT • Aluminum or porcelain-covered steel. • Must have flat bottom and cannot be more than 4 inches wider than the diameter of the electric coil burner. • Steam Canners not recommended. • Update Handout: 9.5 Allow jars to sit for 5 minutes before removing. From the files of Alltrista Consumer Products Company, marketers of Ball Brand and Kerr brand home-canning products.
Pressure CannerProcedure HANDOUT • Vent at least 10 minutes before pressurizing. • For altitudes above 1,000 feet the pressure must be adjusted: Utah County = 13 lbs. • Gauges should be checked before use each year. • Check gaskets. Nicked or dried gaskets could result in steam leaks. • Update Handout: 7.5 Allow jars to sit for 5 minutes before removing.
Cooling Jars • DO NOT retighten lids. • Cool at room temperature for 12-24 hours on a rack or a towel. • When cooled remove screw lid, wash, dry (bottles & screw bands), label jars & store. Testing Seals
Reprocessing unsealed lids • Change lid or possibly jar and reprocess within 24 hours for the whole processing time. • Refrigerate and consume within several days if not reprocessed.
Removing Metal Screw Bands • After jars have cooled, remove metal screw band. • Clean it: warm soapy water • Dry it: air dry or towel dry • Store it: in a box or container with tight lid in a cool, dry location • If you do this, you’ll never need to purchase new screw bands. • If screw bands stay on the jar, become rusted, or stuck (sticky juice runs out), then there is some risk that the food inside could be compromised. • Rust working itself inside, opens the door for other microorganisms to get inside.
Storing Your Food • Label and date your jars. • Store filled jars in clean, cool, dark and dry place. • Accidental freezing may cause unsealing or softening of food. Insulate jars if they are stored in a place with possible freezing capabilities.
Steam Canners USDA does not recommend them. If you do not want to follow this guide and choose to use them anyway, we remind you that………. They are not a substitution for foods that needed to be pressure canned. You must use processing times for a boiling water bath at your altitude. An 8 to 10 inch plume of steam needs to be present during the entire processing time. You need adequate water in the steamer so it doesn’t run out during processing. If it runs out, you must start over. DO NOT use for whole fruit or salsa – use only for juice & jams/jellies (See Our USU Position Statement on the USU Extension website)
What about Salsa? HANDOUT • Use only scientifically tested recipes • The only changes you can safely make: • Substitute bottled lemon juice for vinegar • Change the types of dried spices and herbs (keep amounts the same) • Reduce the number of hot peppers (but increase green peppers or onions proportionally)
What about Salsa? • Do NOT: • Use a recipe that is from the friend of a friend of a friend or from your favorite relative unless… it has been tested or is from an approved source (do you want to Take Your Chances?) • Change thickness by adding more tomatoes, corn starch, etc. • Add more vegetables • Leave out added acid (vinegar or lemon juice)
What do I do with my FAVORITE salsa recipe? • Make and serve it fresh • Make and freeze it • Process in a pressure canner • Use same time for green peppers: Pints or half-pints for 35 min @ 13 lbs pressure • If it has beans: Pints for 75 min @ 13 lbs (No current recommendations for quart jars) • After processing, it won’t taste the same as when made fresh
Resources: • USDA Complete Guide to Home Canning, Agriculture Information Bulletin No. 539 http://extension.usu.edu/cooperative/publications/ • National Food Safety Database Canning, Freezing and Drying Clipart, University of Florida Extension http://foodsafety.ifas.ufl.edu/HTML/clip002.htm • National Center for Home Food Preservation www.uga.edu/nchfp/ • Ball Canning Company www.freshpreserving.com