HOME CANNING THE BASICS
HOME CANNING THE BASICS . MARTHA SMITH PATNOAD, CP-FS CE FOOD SAFETY EDUCATION SPECIALIST DEPT OF NUTRITION AND FOOD SCIENCES UNIVERSITY OF RHODE ISLAND 401-874-2960 mpatnoad@uri.edu 8/10. Two Approved Methods of Canning Foods At Home. Boiling Water Canning (212 °F)
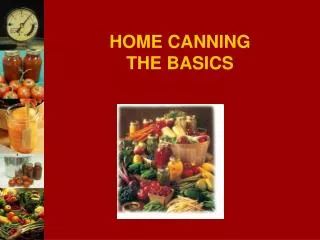

HOME CANNING THE BASICS
E N D
Presentation Transcript
MARTHA SMITH PATNOAD, CP-FS CE FOOD SAFETY EDUCATION SPECIALIST DEPT OF NUTRITION AND FOOD SCIENCES UNIVERSITY OF RHODE ISLAND 401-874-2960 mpatnoad@uri.edu 8/10
Two Approved Methods of Canning Foods At Home • Boiling Water Canning (212°F) Acid foods, ie- tomatoes, pickles, relishes, salsas, jams and jellies 2) Pressure Canning (at least 240°F) • Low acid foods • Mixtures of acid and low acid foods )
Why Two Methods? • Depends upon the food item • Acid vs Low Acid
Why Two Methods? Clostridium botulinum • Yeasts, molds and most bacteria are destroyed at boiling temperatures (212oF). • C. botulinum forms spores that require higher temperatures for destruction in a reasonable period of time (usually 240oF).
Botulism Foodborne Illness • The botulinum toxin, one of deadliest known, causes botulism food poisoning. • 1 mg can kill 655 tons of mice. • Food can contain toxin without showing signs. • Antitoxin is available, but there is slow recovery. Permanent nerve damage is possible.
Botulism Foodborne Illness • Symptoms usually appear within 12 to 72 hours: • Digestive upset (in some cases) • Blurred, double vision • Difficulty swallowing, speaking and breathing • Possible death from suffocation
Botulism Poisoning • To germinate and produce toxin, the spores need the following conditions: • Anaerobic ( no air) • Low acid (pH > 4.6) • 40oF to 120oF • Relatively high moisture growth (multiplies) spore (germinates) bacterium waste materials and toxins
Preventing Botulism • Home Canned Foods • Spores won’t germinate in acid foods (pH < 4.6). • Spores are killed when heated long enough at a specific temperature. • USDA usually recommends 240oF canned low-acid foods. • Pressure canner MUST be used for all low-acid foods.
Preventing Botulism, cont. • Food must be properly prepared and processed for the correct time • Pressure canner accurate and operated correctly • Foods checked when opening jars • Foods should be boiled for at least 10 minutes before serving
Preventing Botulism, cont. • Follow the recipe- NO MODIFICATIONS The following slow down heat penetration: • Extra sugar or fat • Oversize food pieces • Added thickeners • Use recommended canners Heat-up and cool-down times in pressure canners are counted toward “sterilizing” the contents of the jar. Don’t rush!!!
Home Canning Basics FOODS CAN BE DIVIDED INTO TWO CATOGORIES: 1. ACID 2. LOW ACID
Acid Foods • Generally all fruits • Tomatoes (specific amounts of citric acid or bottled lemon juice are added to acidify) • Sauerkraut • Foods to which large amounts of acid are added (pickles, relishes, salsas)
Low Acid Foods • Generally all vegetables • Meats • Poultry • Seafood • Soups • Mixtures of acid and low acid foods (spaghetti sauce – meat, vegetables and tomatoes)
Acidity Acidity measurement = pH Low pH values = high amount of acidity Bacteria can grow between pH 4.6 and pH 9.0 Bacteria grows best between pH 6.0 and pH 7.5 Vinegar 17
Acidity Alkaline Acid 0 1.0 2.03.0 4.04.65.0 6.0 6.4 7.08.0 8.5 9.0 10.0 11.0 12.0 13.0 14.0 Distilled Water Egg White Commercial Mayonnaise Apples Orange Juice Chicken Milk Corn Soda Crackers Beef, Veal Pork Carrots, Pumpkins Sweet Potatoes Cheddar Cheese Limes Pickles Vinegar • Acidity levels affect bacterial growth • Different bacteria, different acid tolerance 18
Home Canning Basics • Use only recipes/directions and DO NOT MODIFY from: USDA/ Cooperative Extension, National Center for Home Food Preservation (www.homefoodpreservation.com), Ball Blue Book, So Easy To Preserve. • Always use current methods and information. NEVER USE “granny’s method.” • Use only high/ quality food/ fresh produce. • Food must be properly prepared and processed the correct amount of time.
Home Canning Basics • Food is placed in a canning jar with a 2-piece lid and is heated to a temperature that destroys microorganisms. • Pressure canner must be accurate and operated correctly. • Heat also inactivates enzymes that can cause changes in color, flavor and texture. • Air is driven from the jar during heating. • As the jar cools, a vacuum seal is formed.
Home Canning Basics Processing Time * Each food has its own processing time. Follow directions carefully! * Time differs with size of jar. * Too Little • Spoilage
How Canning Process Times Are Determined • Foods are prepared by a specific procedure. • The length of time it takes to adequately heat the coldest spot in the jar is determined. • Size of the jar, size of the food, consistency of the canning liquid, etc. all have an effect on how heat penetrates through the product.
Jars and Lids • Wash canning jars; don’t use if nicked or scratched – keep hot until used • ALWAYS use new flat lids • Follow package instructions to prepare 2-piece lids and ring bands
Home Canning Basics Vacuum Seal • Holds the lid on the jar. • Prevents recontamination of the food. • Prevents air from drying out the food.
Testing for Seals • Listen for “pop” • Lid curved inward, won’t move when pressed * Clear ringing sound when tapped
Packing Methods Raw/Cold Pack • Use fo foods that lose their shape when cooked • Raw food put into jars • Boiling hot liquid is poured over the food • Pack firmly, don’t crush
Hot Pack • Preferred method for most foods. • Food is cooked in liquid before packing • Cooking liquid poured over food in jar • Fewer jars needed • Less floating • Better color and flavor • Easier to pack, foods pliable Note: If directions say only hot pack then hot pack!
Headspace • Is the space in the jar between the inside of the lid and the top of the food or it’s liquid • Check directions for the correct headspace * Usually: • 1/4” jellied fruit products • 1/2” fruits, tomatoes and pickles • 1” to 1-1/4” low acid foods
Headspace * Too little • Food may bubble out during processing • Deposit on rim may prevent sealing * Too much • Food at the top is likely to discolor. • Jar may not seal properly, as all the air may not be forced from jar during processing
Low Acid Foods pH greater than 4.6 • Meats • Poultry • Seafood • Generally all vegetables • Soups • Mixed canned foods (low acid + acid) • However, if pH < 4.6 = acidified foods
Pressure Canners vs. Cookers • To be considered a pressure canner for USDA processes, the canner must be big enough to hold at least 4 quart-size jars • Pressure cookers/saucepans with smaller volume capacities are not recommended for use in canning • Enough heat may not be delivered during pressurizing and the cool-down period in smaller pressure cookers/saucepans
Pressure Canner Features • Flat rack in bottom • Pressure regulator or indicator • Dial or weighted gauge • Vent pipe (port) for pressurizing • Safety valves or overpressure plugs • Safety locks when pressurized • Flexible gasket in lid
Pressure Canners Features • Dial Gauge • Indicates pressure inside the canner • Must be checked for accuracy • Has dead- or counter-weight to close open vent for pressurizing • Pressure is increased or decreased by adjusting burner heat.
Pressure Canners Features • Weighted Gauge • Regulates pressure inside the canner • Open vent is the same one that pressure regulator fits • Will continue to allow some air to be released from canner during process • Can’t be tested for accuracy
Weighted Gauges cont’d • One piece • Fitting for 5, 10 or 15 pounds • Do not use dead- or counter-weight from dial gauge canner or pressure cooker. • Mirro: “jiggles” 3 to 4 times per minute. • Three piece • Number of pieces used determines 5, 10 or 15 pounds • Presto: rocks gently throughout entire process. • Mirro: “jiggles” 3 to 4 times per minute.
Pressure CannerHow it Works • Steam inside the pressurized canner circulates around the jar • Transfers heat by conduction • Food in center of jar much reach 240°F
Pressure Canner Processing • Use 1 inch headspace in jars. • A few products use 1-1/4” • Have 2” to 3” of water simmering or hot in canner. • Hot packed jars – simmering water, 180 F • Raw packed jars – warm to hot water, 140 F • Place jars on rack in canner. • Put lid on canner with weight off or petcock open.
Venting the Canner • Also called “exhausting” the canner. • As the water boils in the canner, the “empty” space becomes a mixture of steam and air. • The temperature of a steam/air mixture is lower than the temperature of pure steam. • Venting eliminates (“exhausts”) the air so processing takes place in a pure steam environment. • Process times are intended only for a pure steam environment.
Venting the Canner, cont. • Some manufacturers of weighted gauge canners say venting is not necessary. • USDA instructs to vent ALL pressure canners. • The one difference in “following manufacturer’s directions” if not included there. • Without proper venting, up to 30% of the sterilizing value of a 20-minute process may be lost. • At 10 pounds.
Venting the Canner, cont. • Steam must flow freely from the open vent port in the lid for 10 minutes prior to pressurizing. • After putting filled jars in the pressure canner, fasten the lid in place. • Leave the ventport open. • Pipe where weighted gauge or dead weight will go. • Turn the heat on high. • When water boils, steam will start to come out of open vent. • Wait until there is a constant, strong funnel of steam, then start timing 10 minutes. • At the end of the 10 minutes, place weight in place to start the processing for the time sprecified in the directions.
Loss of Pressure • Drop in pressure during processing means the sterilizing value of the process will be decreased. • Underprocessing. • Foodborne illness (botulism) and/or spoilage could result. • If pressure drops below target anytime during the process time, bring the canner back up to pressure and start timing the process over, from the beginning.
Fluctuating Pressure • Large and/or quick variations in pressure during processing may cause loss of liquid from jars. • If the variation is a drop in pressure after process has begun, it also means the process must be started over.
Opening the Pressure Canner • Turn off the heat at end of process and let jars cool in canner until pressure is 0 (Dial gauge should read zero) • Wait 10 minutes to remove the canner lid. • When the canner lid is opened, tilt it so the steam is pushed away from your face. • The steam, water and jars in the canner will still be very hot, even bubbling or boiling.
Prepare the Canner • The canner must have a rack in the bottom • Fill the about half full of water, and begin heating • There must be enough water so the filled jars will be covered with 1 to 2 inches of water • The temperature should be about 180°F when it is time to add your filled jars