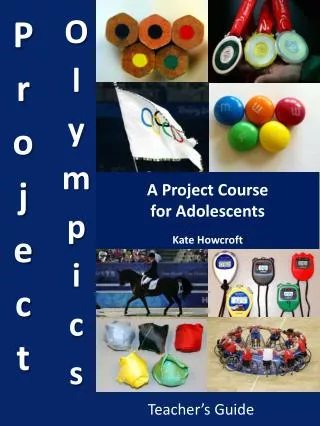
Project Olympics
Project Olympics. A P roject C ourse for Adolescents Kate Howcroft. Teacher’s Guide. © Kate Howcroft 2012 57 Regent Drive, SKIPTON, BD23 1BB These materials may be freely copied and adapted for classroom use. Please acknowledge the author.

Project Olympics
E N D
Presentation Transcript
Project Olympics A Project Course for Adolescents Kate Howcroft Teacher’s Guide
© Kate Howcroft 2012 57 Regent Drive, SKIPTON, BD23 1BB These materials may be freely copied and adapted for classroom use. Please acknowledge the author. No part of these materials may be used commercially without prior written permission from the author. Kate Howcroft has no responsibility for the persistence or accuracy of URLs for external websites referred to in this publication, and does not guarantee that any content of such websites is, or will remain accurate or appropriate. Factual information given in this work is correct at the time of writing but Kate Howcroft does not guarantee the accuracy of such information thereafter. This Teacher’s guide is designed to be used alongside the website and wiki. All photographs and other images used throughout all components of Project Olympics have been taken with permission from getsetlondon2012.com (image bank) or www.flickr.com/photos/sarahhyndman Acknowledgements Kate Howcroft would like to thank: Sarah Hyndman (sarah@withrelish.co.uk) for her kind permission to use her wonderful photographs throughout these materials. Find out more about Sarah’s work at www.olympiclogoaday.com. Gaynor Evans for her help in evaluating these materials prior to their submission. The British Council for providing detailed information on the CEF levels in their EAQUALS Core Inventory for General English publication
IntroductionLondon 2012 – Project Olympics HOW DOES IT WORK? Project Olympics isn’t a linear course. It is dynamic and contains many components that will help to ensure your project is a success. The key to successful project work is that it must be student driven, and this course cannot and does not try to second guess their preferences. Instead, this Teachers’ Guide will equip you with the knowledge and tools to use the course effectively in your classroom, and to enable you to facilitate your students to produce their project work,giving both you and them a great sense of satisfaction come the end of the project. COURSE COMPONENTS Teachers’ Guide Use this guide to give you all of the information & help you’ll need to prepare for Project Olympics. Project Olympics is designed to not require a student book or workbook 2) Website www.wix.com/howcroftkate/projectolympics The website has a number of links to further information relating to EVERYTHING Olympics. Great for teachers and students alike. 3) Wiki http://projectolympics.wikispaces.com/ A place for students to upload and share their work, to seek assistance and to enable peer correction and collaboration. PROJECT OLYMPICS & CEFR - Encourages student reflection on learning. - Encourages students to use language to meet authentic linguistic needs. - Encourages the incorporation of teaching many features from the B1 Core Inventory and revising and recycling content of the A1 + A2 lists. See page 2 for a detailed breakdown of the inventory taken from The British Council’s EAQUALS Core Inventory for General English. - More information on pages 3 & 4. WELCOME!The summer of 2012 is a great time for your learners to be visiting the UK, and Project Olympics will help themto make the most of this special year in your English lessons. It’s unlikely your students will be going to watch any of The Games live, but Project Olympics can bring this major sporting event to life this summer. The project is best used alongside real time news, and nothing will beat getting your students interested in The Games as they are taking place, and adding this discussion and interest as part of Project Olympics. WHAT IS PROJECT OLYMPICS? Project Olympics is a unique project-based English course for teens and pre-teens studying English in the UK during 2012. The course is suitable for students from all over the world, with approximately a pre-intermediate level of English, or B1 on the Common European Framework. The course is flexible, and this Teachers’ Guide provides you with the tools to adapt and tailor the materials to fit your timescale and requirements. Project Olympics provides the perfect way to motivate your students to work collaboratively and to use authentic language and materials to practise and improve all four skills. Students will be challenged to take responsibility for their own learning and to set their own goals, which is proven to build confidence and ability with greater success than traditional English language courses. You will given all of the guidance you need to be confident in overseeing your students at work. 1
Course Overview Course Aims Project Olympics follows a simplified version of Alan & Stollers’ ten-step process to gain Project success. The whole process is summarised below, and pages 6 - 14 of this guide detail how to implement these steps simply into your classroom. • Students and teacher agree on a project theme. • Student and teacher determine final outcome of the project. • Student and teacher structure the project. • Teacher prepares the students for the demands of information gathering. • Students gather information. • Teacher prepares students to compile and analyse data. • Students compile and analyse information. • Teacher prepares students for the language demands of the final activity. • Students present the final product. • Students evaluate the project. The whole point of the Project Olympics Teachers’ Book is to give you the knowledge, skills and confidence to design your project to fit your timetable, your classroom, your organisation and most importantly your learners. It’s important to understand at this stage that Project Olympics does not offer a linear step-by-step plan for you to pick up and take straight into class. Instead, it gives you lots of ideas and great tips on how to implement those ideas in a way which will be tailored to your individual situation and that will maximise learning potential for your students. As you make your own choices and negotiate a course for your Project Olympics with your class, it’s important to keep the above 10 steps in mind. To facilitate the building of team spirit and class camaraderie . To establish a platform for student-centred learning and goal setting. To use current theory on the communicative approach to focus the course on using language for a real purpose rather than being based on tasks and exercises focussing on grammar and language points in isolation. To use technology to engage teenage learners and to allow them to save their work online so that they can access it once back in their home country. To build confidence by offering clear scaffolding for the introduction of new language, and regularly offering opportunities to review and reuse new vocabulary, grammar and structures. To give teachers the tools and the confidence to successfully lead a project driven class. To give the teachers the options and understanding to tailor the course to their own class with ease. 2
Project Olympics & The CEF Page 3 gives details of the CEF core inventory for level A1-B1. Project Olympics is intended to equip students with the skills listed at B1 language proficiency, and also to review A1 & A2 features. On this page, examples of how Project Olympics can meet the various components of the CEF are described. Functions Checking Understanding, Managing Interaction, (Dis)agreeing, Initiating & Closing Conversations– Naturally occurring functions of a Project based course. Can be pre-taught and then will be used automatically. Describing Events, Places, Experiences & People – Could be the Olympic event as a whole, venues, countries athletes come from & athletes themselves. Describing Feelings and Emotions – Imagining winning/losing events, talking about national pride Discourse Markers Connecting Words (expressing cause & effect, contrast etc.) - Effect the games have on London, Effect exercise has on people, contrast between different athletes/events e.g. As a result of The Olympics coming to London, many jobs have been created. Sequential Past Time Conjunctions - to talk about the history of The Games, or about athletes or events previous information e.g. Prior to London 2012, Jessica Ennis had won silver in Beijing. Grammar Future Continuous – comparing the Olympic timetable with their own daily schedule, or comparing two different sport schedules. Will/going to for Prediction – predicting results of different events, and comparing the different use depending on level of certainty of prediction. Reported Speech – use current newspaper reports on the games. Modal – Writing rules for different sports, actual or invented by students. Vocabulary Collocation – Sporting collocations (do, go, play), Olympic collocations Colloquial Language- American v English colloquialisms for travelling/watching the games. Things in Town , Shops & Shopping – Focussing on London, what else you can do in the city. Travel & Services - What do people coming to the games need to know to get around and have a pleasant stay? Topics Education – How school in the UK are getting involved in the Olympics and compare this to other countries. Leisure activities – Sports and fitness can be explored and also contrasted with other leisure activities. Media – How the games are reported , news articles – TV & newspapers. News, lifestyles and current affairs – London 2012 and The Olympics are very topical at the time of summer residential courses. 4
Tips & Troubleshooting Getting Your Project Olympics Started Planning for a project works differently to planning for more traditional coursebook based lessons. It is simply impossible to plan what will happen in your lessons until you have consulted with your students and come to an agreement about the form their projects will take and what the end product s will be. This doesn’t mean planning isn’t important though. Instead of planning step by step procedures, you need to do your research and be knowledgeable both about The Olympics and possible outcomes of the this project. This guide will equip with resources to ensure you’re well versed in both of these areas. Student Involvement is Key Many coursebooks profess to be ‘task-based’ or student centred, however they often proceed to give step by step instructions to each part of the course, with little space for students to make their own decisions, or for there to be a true meaningful outcome to the series. For Project Olympics to be different, it’s important that you, the teacher, allow the students freedom to choose, and don’t make any of the big decisions for them. Be Enthusiastic! If you are enthusiastic about the project, your students will be too! At the beginning have lots of ideas to add to brainstorming sessions, be ready to help an idea progress to a more concrete project, or to steer students away from ideas with little potential. During the project work itself, be positive about what the students are doing. Offer lots of praise and encouragement to help keep things on track. You are not the focus of the project lessons, but you are by no means passive. Get involved, show a genuine interest in students’ work, and you’ll see greater results. To help your enthusiasm levels, use the website to increase your knowledge before Project Olympics begins. What to do if things aren’t going to plan? The first thing is to remember not to panic! Especially with longer projects, or with a very diverse mix of students, Project Olympics won’t always be plain sailing. But if you’re prepared with ways to troubleshoot the hitches, things will soon be back on course. Diana Fried-Booth gives a very useful list of possible problems and solutions in her book (see further reading for more details). Here, I’ve adapted his list for Project Olympics: 1) Sense of anti-climax after initial burst of enthusiasm; students may feel overwhelmed. Reassure and encourage, this is a natural reaction. But as long as proper planning has taken place and you encourage students to stay on track, and show them the progress they’ve already made, they’ll keep going. If possible, have a colleague pop in and praise their work. 2) One or two students are reluctant to join in, or signs of being disruptive. Fully utilising the teambuilding and ice-breaking stages of the Project will help with this. Other than that, be patient and offer roles that will give these students responsibility e.g. keeping a class project diary. 3) Relationships become fraught and some students refuse to work with one another. Don’t panic. Encourage people to sort it out, allow groups to swap around if they want to. 4) Unproductive Feedback sessions. Model how you would like feedback to be given, and always be ready with your own if students are unable to lead the session. Be content with one or two constructive points from peers. 5) Cries of ‘boring’. Give the project a rest – do something completely different: bring in an outside visitor or arrange a visit if possible; invite suggestions from students for ways to move forward. Don’t give up! Fried-Booth D. (2002) Project Work OUP: Oxford pp. 24 5
NEW SPORT Develop a new Olympic Sport with an instruction manual/video GEOGRAPHY Design a holiday brochure for previous and future Olympic locations HEALTH & FITNESS Research fitness routines and develop a diet/ fitness routine for an athlete. Healthy cookbook. Project Ideas HISTORY Compare The Modern Olympics to the Ancient Olympics DANCE & DRAMA Researchand design an opening ceremony and a programme to explain it. MEDIA Look at Olympics in the news, review the criticisms DESIGN Researchthe symbolism related to The Olympics, and design new symbols/mascots 7
On your marks………How to prepare for your project How you introduce Project Olympics can have a great baring on how successful the course will be. By instilling a sense of fun, interest and ownership in your students from the start, you’ll be well on your way to a gold medal! This section will give you lots of ideas for your first steps into Project Olympics. ICEBREAKERS You might choose some of the following ideas to kick off your Project Olympics course. Icebreakers are really useful to help learners get to know each other, to put them at ease & for you to start to get to know your class. Here are a couple of ideas: • TEAM SPORT CHARADES In teams, students take it in turns to act out a sport while the others guess. • FIND SOMEONE WHO (SPORTS) Play a version of the classic but make the questions sports/Olympics based. • WACKY RACES Three legged-races, ball and spoon, frog hopping etc. • CROCODILE RACES Students stand in a line, teacher draws chalk lines at either side of the line. T calls out something e.g. ‘line up in first name alphabetical order’, the students have to re order themselves as fast as they can, BUT, they must not step outside of the chalk boundaries, so they have to climb around each other. LET’S TALK ABOUT THE OLYMPICS Before jumping into setting up the project, it is a good idea to introduce the topic with a general class discussion and brainstorm to see what The Olympics mean to your class. What to brainstorm? • General Olympics Knowledge. • Linking the Olympics to the countries of people in the class. • Linking the Olympics to different school subjects (similar to The Project Wheel). • Specifically looking at London 2012 and the effects on The UK. An Olympic Introduction First impressions count! How you introduce Project Olympics could have a great baring on your students initial interest and excitement for the course. Remember, this is their summer holidays, they’re along way from home and surrounded by unfamiliar people. You need to show them why they should be excited about Project Olympics! Before your first class, make sure you’ve done your own background reading on The Games, using the website to help you. If you’re well informed and interested in the subject, your students will pick up on it! When reading and researching before class, pay attention to the Project Ideas Wheel on the previous page; remember that The Olympics are much much more than just the athletes & sports. Don’t worry though, this Teachers’ Guide is here to guide you through the whole process and help you to ensure your learners have a memorable summer learning English! And remember, it’s not just what you know, it’s what you and your learners know. Use their varied knowledge on the subject to add depth to discussions and activities. Depending on the countries your students come from, you may ask them to use their own country as a starting point of Olympic knowledge, do check first that all of your students’ countries are or have been represented at The Olympics. If not, keep the introduction more general and varied. This support begins opposite with some ideas to get the project ball rolling. 8
GetSet….Planning is key Once Project Olympics has been introduced it’s time to get down to business! This section gives suggestions on how to complete the first three stages of the course overview listed on page 2: Agreeing project themes, determining final outcomes & structuring the project. You have already introduced The Olympics, but now it’s time to introduce The Projects! Explain carefully to the class how Project Olympics will work, from idea generating, to planning, to implementing, to presenting & finally evaluating. GENERATING PROJECT IDEAS This could take a number of forms: • Class discussion • Group discussion • Individual ideas • A mixture of the above For example, following on from the initial discussion about the Olympics, and an introduction to how the projects will work, you could ask the students to think on their own for a while and write down what they would like to do their own project on. Next, these ideas would be shared with the whole class and discussed. DECIDING ON AN END PRODUCT Then the class vote for their favourite project ideas, and initial teams are formed. These teams then decide on a final project idea. At this stage it’s still possible for students to change teams until everyone is happy. You will have to be ready for there to be some students who are unhappy with this process, and it’s your job to make sure they’re involved and find an interest. It’s important to remember that the teams don’t need to be of equal number, it’s students’ interests that is the most important. FINAL PRODUCT IDEAS Although the final product idea should be generated by the team, it’s your job to ensure that all the groups in your class choose ideas that offer enough scope and challenge to keep their project going for the duration of the course. Here are some ideas: • A newspaper • A play • A TV programme • An advertising campaign • A diary • A game • A model • A song • A cartoon • A story • A podcast BACK TO THE START Once the end product has been decided, the students must work in their teams and under your guidance decide how they are going to achieve their goal and make a timeline. Students can use the Team & Project Planner documents provided in the final section of this guide to help them to think about the whole project. Your role is to ensure you’re clear on the time available, so that students know from the start how long they have to work on their Project. You want to encourage your students to be creative, but also help them to be realistic with the time available. These plans will be checked and modified often throughout Project Olympics to keep everyone on track. 9
Go!Starting out Once your Project Olympics teams begin their project work, your role as the teacher is to support and encourage your students. This section will tell you how……. THE INPUT SESSIONS When you know what projects your class will be completing, your next job is to decide on input sessions: When to include them and what to teach. Some suggested lessons are provided in the final part of this book, which can be added into your Project Olympics. It is very much up to you as the teacher whether you would rather include all of the language input at the beginning of the project, or to disperse it throughout the course. The teaching notes in the final section of the book give an indication as to whether they are more designed to be used towards the beginning of Project Olympics, or at any time. As part of the planning stage, you will have asked students what language they think they will need to successfully complete their project and it’s vital that you address this in your lessons. You will probably find that the language needs of the students will change throughout Project Olympics. This might be something that they pick up on when reflecting on the work they’ve done or thinking about something they want to do, or it may be something that you pick up on in their work. It’s up to you whether you decide to deal with these new language needs through a formal input session to the whole class, or to address the group/individual separately. Encourage students to review their own language needs throughout Project Olympics and always make sure you address any concerns they flag up. THE PROJECT SESSIONS Before each project session it’s a good idea for the students to get used to using their planners to help them decide what they want to achieve in that specific lesson. Then, at the end of each session they should briefly reflect on what they have achieved, and what they need to do next time. WHOLE GROUP SESSIONS The whole group sessions are designed to allow whole class collaboration. Each group shares what they have done, any difficulties they’ve encountered and at least one really useful thing they have found. These sessions are used for a number of reasons, firstly to keep the students working hard, so they have something new to share at each session, secondly to instil that this is not a competition; to make it clear all the groups can and should help each other, thirdly to encourage reflection on the process and to show that mistakes and problems are OK, and can be very useful if you and others learn from them. Finally the sessions give the students a break from being in their teams, which can be useful if any problems have begun to arise. Until the students get used to these sessions, your job as the teacher will be to really encourage meaningful discussion. One way to do this will be to make sure you know exactly where each team is up to, and ask direct questions to get the discussion started. You can show how different groups are doing similar things, and how others are different, and ask them to talk about how they are finding the process. Once the discussion has ended, the groups should work together to see what they have learnt from the session. 10
It’s a Marathon not a SprintKeeping the momentum Once the initial excitement of being in charge of their own learning passes, or when the groups encounter problems with their projects, enthusiasm for Project Olympics may begin to wane. Don’t panic! This is normal, but by following the tips on this page, you’ll be able to keep the momentum going and motivation and enjoyment high. COLLECTING DATA & INFORMATION When it comes to the students collecting the data they need for their project, this could take many forms. They might need to used questionnaires, surveys or interviews to collect primary data, they might need to watch news clips or the actual Olympic events to find out about current events, or read newspapers, and they will more than likely need to use the internet for finding out extra information. The further reading section of this guide lists various books relating to The Olympics which if made available could also be useful for information gathering. CURRENT INFORMATION The beauty of Project Olympics is that it is completely up to date and relevant to this summer, which makes a refreshing change If possible, provide your class with various newspapers and magazines that are up to date. You can either clip the articles relating to the Olympics, or leave this task to the students. You can watch the news in your classroom from a source such as the BBC website, and you can keep a tally of a medals table if your Project Olympics is taking place when the games are running. A good way to encourage students to keep a look out for what is happening with The Games is to set a mini homework task each day relating to an event or race that is taking place between your lessons. These activities can be completed in either their Project teams, or in different teams that you assign, and points can be awarded each day for the teams that find out the information you asked for. E.g. Who came third in the men’s 5000m butterfly semi final? THE INTERNET When students have internet time, it’s even more important that they have specific tasks, that will hopefully be self set by the group, but in certain situations you may have to set them to ensure they stay on task. When setting rules at the beginning of the course, ensure there is a rule relating to proper internet usage to minimise the risks of students using this time as their own free time. Whenever students are on the internet, they should be closely monitored. The website gives a number of links to help you to help your students have a more meaningful time when searching for information online. Remind the students that the internet is a great resource for their use, but it will have to be removed if they abuse computer time. The amount of time allowed for researching on the internet should be carefully considered, students will happily spend hours copy and pasting reams of information, but it’s up to you to ensure they have thought about how exactly this will help them. How you set up internet time will depend on the resources available to you. If you have computers in your classroom, it might be best to let different groups use the internet at different times, however you may have to take your whole class to an IT lab. If this is the case, make sure all groups have something to do in this time. If a group don’t need the computers for their projects, ensure they take other work with them, and don’t use the session as free internet time. 11
The Final LapKeeping on track to the end As Project Olympics draws to a close, timing and planning is even more important. This section will show you how to help keep your students on track right until the end, and to get them ready to present their end product. PREVENTING PANIC STATIONS! This will be much easier if you’ve helped your learners to stay on track throughout the project. By using the printable planners on pages 28, 29 & 30 throughout the projects, your students should hopefully be in control by this point! If things aren’t quite going to plan, it’s a good idea to add a session into your lesson where the students work in their groups to look back at what they first proposed as their project, and decide exactly what they need to do to achieve it. If this isn’t attainable in the time left, help them to come up with a positive solution . Agree with them which parts of the original idea they can omit but still leave themselves with a final product to be proud of. ART WORK ISN’T KEY This should already be apparent to the learners, but this won’t stop some students from wanting to focus on the art/costumes and similar non-linguistic elements of the final product at this stage. A way around this could be to agree on a set of judging/marking criteria with the students, and ensuring none of this relate purely to the presentation of the products. Reminding the learners specifically of the language covered in the lesson parts of the course will also help to focus them back towards the most crucial parts of Project Olympics. This of course doesn’t mean that you can’t allow any time at all to the artistic side of things. As long as the English elements of the project have been covered, there’s nothing wrong with learners taking pride in the way their work looks. PREPARING TO PRESENT You will need to help the students decide exactly how they will present their final product. This may have already come up in the planning stage, but for certain project ideas may not have yet been discussed. If students are acting then the means of presenting will take care of itself. But, for the groups whose projects are more materials based, you will have to ensure they understand and get ready to orally present their final product in some way. This could mean: • Advertising their product • A descriptive presentation • Explaining why they chose their idea • Talking about the process of reaching the final product • Evaluating their product TEACHER CONSIDERATIONS Before the day of presenting the products comes, you will need to consider certain factors: • Where to hold the presentations • To grade the final products or not • To grade the presentations or not • To encourage questions • Who to invite to watch the presentations • To video the presentations to upload onto the wiki or not • To allow students to rate each others work • What equipment will you need on the day? 12
Crossing the Finish Line & BeyondRounding things off Your students have just spent a lot of time and exuded a lot of effort on their projects. This makes it really important that they’re encouraged to feel proud and show off their hard work. This section will give you ideas on how your students can present their work, and on giving each other feedback. PRESENTATION DAY Remember that your students have spent the last week or probably longer working towards this day, and if Project Olympics has created the classroom environment that is intended, there should be lots of excitement and nerves centred around presentation day. Although this is absolutely fine, it’s important it’s kept in check. Remind the students that the presentations are meant to be fun, and they certainly don’t need to worry. Make sure that you are organised and calm but keen, and this well help to instil a similar attitude in your learners. GRADING TIPS Your students and your relationship with them may well be the deciding factor on if/how you decide to grade the presentations. This decision may also be set by your organisation. There are a variety of different ways to grade, and the choice is yours! Consider: • Giving a formal grade and written feedback after the presentation day. • Giving oral feedback with or without a mark straight after each presentation. • Letting the audience judge by clapping/cheering the different acts. • Invite a panel of judges (known to the students ) to come and judge in an ‘X-factor’ manner. PEER FEEDBACK Peer feedback can be an ideal way to continue the student-centrednessof the Project cycle and also to keep the audience engaged during the performances. It’s important to lay down ground rules so that this feedback is given in a friendly and supportive way. This may mean insisting only good things can be discussed. Although with mature and supportive classes, it may be possible to allow the students give constructive criticism, make sure it really is constructive! They can only criticise if they can offer a solution, idea or improvement! Whether or not you decide to grade the performances explicitly, you should make detailed notes of what each team presents, as this will help to inform your reports or grades for the students, if this is a requirement of your organisation. TALENT SHOWS & EVENING EVENTS Depending on your organisation, there may be an opportunity or a requirement for your class to have an act in a talent show or another evening event. If this is the case, it’s a great place for the students to showcase their project work and will give them lots more motivation to think of an interesting and eye catching way to present their work. Often knowing their peers will be watching what they are doing is the only inspiration students need to try that little bit harder and ensure they create something special. It’s your job to find out as soon as possible if this is applicable to your camp. 13
Evaluating Project Olympics COURSE EVALUATION A vital part of Project Olympics is allowing the students to evaluate the learning process. STUDENTS’ FEEDBACK For many of the students, it may have been the first time that they have studied in such a way. By asking the students to evaluate the course, you are providing validity to it as a genuine learning process. Evaluation allows the students to reflect on what they learnt, both linguistically but also much more generally. As well as letting students reflect on their own learning, the feedback is vital in evaluating the success of the course and informing changes that should be made before the course is used again in the future. TEACHER’S FEEDBACK You should also give your feedback on the course to the administrators. If they don’t ask for this from you explicitly. It would still be a good idea for you to pass on your main points about the course. HOW TO EVALUATE? Evaluation could take the form of a questionnaire, an essay or a discussion. By now, you will know your students well, and have a really good idea of how they prefer to work, so this will help you to decide how to collect their feedback. Remember, Project Olympics feedback can be additional to any generic camp feedback. WHAT HAPPENS TO THE FEEDBACK? It’s important that once feedback has been given, you use it. By paying attention to the students’ comments, you’re likely to learn things about your own teaching, as well as how to improve when teaching through projects in the future. EVALUATING STUDENTS If your organisation asks for reports to be written to evaluate student performance in their English lessons, make sure that you take into account the varied nature of the project course when writing them. The students have spent their time using all four skills, using team work, negotiating meaning, planning, analysing and presenting information. They have been involved in time keeping and decision making, they have become more culturally aware and they have taken ownership of their own learning. So, don’t be tempted when it comes to report writing to only talk about the more traditional aspects of English class, you won’t be doing your students justice! When giving feedback to parents about the work that their children have produced and the gains that they have made both with their language but also with other ‘life’ skills, it’s a great idea to direct the parents to the Wiki, which by this time should be full of interesting things for them to really get a clear idea of what their children got up to on camp. This is another reason why it is extra nice to upload videos of the final performances and even take photos of the final products and add them here, so that every student and their families have a permanent record of what they achieved on camp. 14
Project Olympics on the Web The internet has begun to play a major part in all of our lives over the past few years & this is even more true for adolescents who are true ‘digital natives’ and don’t know a life without the web. With this in mind, the internet plays a crucial role in Project Olympics. There are two main elements of multimedia to support Project Olympics. The website and the wiki. The Website The website is primarily intended as a teachers’ resource. It is packed with links to news articles, blogs and information on both London 2012 and The Olympics more generally. These links have been organised into sections to allow easy navigation and to help you be as knowledgeable as you can be on all aspects of the Olympics, no matter what course the projects in your class take. There is an option for you to give the web address to the students to use it as their way to find out information too. But, before you do this, think about if you’d rather they had to do their own searching first. If you give them the address, will they miss out on doing their own researching? If you don’t, will they spend too much time searching in the wrong places? Only you can make the choice! The web address is: www.wix.com/howcroftkate/projectolympics Please go and dive in and use it to teach you all about The Olympics! One idea could be to give the web address to your students at the end of the course, so they can keep their interest in the Olympics alive once they return home! Keep checking back for updates to the website as The Olympics are underway! The next page gives instructions of how to use The Wiki, but first: What is a Wiki? A Wiki takes the collaborative elements of Project Olympics and puts it on the internet. It’s a website that allows its users, in this case, your class, to edit it, add to it and comment on the work of others. Why use a Wiki? The Wiki is just another tool to help to encourage the learners to be excited about Project Olympics. If students have a negative association with the traditional classroom notebook, giving them a chance to use a Wiki removes them from that, just as using project based learning removes them from the traditional learning environment. The Wiki also provides students with a way to share ideas and continue working in their own time, and is a great place for you, the teacher to upload feedback that they will then be able to access in the future, even when they have returned home. The Wiki can be used to upload final projects, or videos of final presentations. It can be used to chat, to share links and information and to generally keep things together. The wiki address is: http://projectolympics.wikispaces.com/ As with all elements of Project Olympics, the Wiki is optional. But, if you’re put off because you are not familiar with wikis, don’t worry, there is more information of how it all works right over the page! 15
The Wiki http://projectolympics.wikispaces.com/ STARTING OUT WITH THE WIKI! If you’ve used Wikis before, please follow the URL above and get stuck in! There are some hints and tips in the opposite column to help you to get the most out of the Project Olympics Wiki, but it really is yours to take as far as you would like! If you haven’t used a Wiki before, don’t worry! Firstly, this is an optional part of Project Olympics, so if you would rather not use it, that is fine. But, why not take a look? As soon as you enter the above URL you’ll find yourself on the front page, and from there all you need to do is to click onto the ‘teachers tab’ and you’ll find virtual user guides as well as links and written instructions to help you get started. BEFORE THE COURSE It’s a good idea to familiarise yourself with the Wiki before the course. You can also change the layout and design if you wish, and add any extra information that you would like to be on there for your learners. For example, you may want to put some links to the organisation , or to places the students will be visiting on excursions and any information about the school and town in which they are based. It’s also useful to use the time before they students arrive to familiarise yourself with how much IT time you will have in class time, and where the IT labs are and how they are set out and other things. This information will help you when deciding how much you will plan to use the Wiki. Finally, find out how much free time and computer time the students will have outside of your lessons, as this will have a baring on how much independent work you can set for the students. DURING THE COURSE You can keep adding to the Wiki as you see fit. Again, more guidance is supplied in the teacher’s section. The Wiki can be a good place to set tasks that are not directly related to the projects the students are working on, and you may choose to have different Wiki and Project teams, but ensure all work on the Wiki will indirectly help with the Project Work. It may be useful to offer prizes or set competitions to encourage students to use the Wiki and to talk to each other on it and offer feedback. On a summer course like this one though, it’s important not to expect too much from your students in terms of how much work they do between classes. Their schedule is very busy and they will have very little time on a day to day basis to continue work outside of the classroom. One thing to consider if the Wiki is well received by the students, is to dedicate some of your lesson time as wiki time, and give the students tasks to do and upload and then peer correct and comment upon. AFTER THE COURSE The Wiki can be left available once the course is finished and students can use it once they return home to keep in touch with each other and show family and friends what they did on camp. Do make sure that this is in compliance with any policies your organisation may have. 16
Further Reading & Resources The books listed on this page are from a variety of publishers and cover a variety of topics that may be helpful to you and your Project Olympics. Diana Fried-Booth’s book Project Work published in 2002 by Oxford University Press ISBN 0-19-437225-1 has a very useful first section with tips on how to organise and run your project, and includes photocopiable resources to help you keep on track. The rest of the book details a number of different projects, although they are not Olympic themed, they do offer a variety of possibilities for end products. Wright, Betteridge & Buckbys’ handbook ‘Games for Language Learning’ published in 2006 by Cambridge University Press ISBN: 978-0-521-61822-9 has a huge number of game ideas that can be used to supplement project work, as warmers or end of class activities or as ways to reinforce troublesome language points as they arise. Ur & Wrights’ resource book ‘Five-Minute Activities’ originally published in 1992 with many updates by Cambridge University Press ISBN: 0-521-39781-2 is really useful to have at hand to use for warmers, to bring the class back together after group work or to change the mood at different times throughout the course. Lewis’s resource book ‘Teenagers’ published in 2007 by Oxford University Press ISBN: 978-0-19-442577-3 includes tips on teaching teens as well as lots of activities for language awareness, creative & critical think and teenager topics and can be used to create input sessions or to create mini projects and activities to run along side the main project to help develop skills needed for the Project Olympics. Polley’s The British Olympics: Britain’s Olympic Heritage 1612-2012 published by English Heritage in 2011 ISBN 978-1-84802-058-0 offers a lovely timeline of the Olympics past with great photographs. Brassey’sThe Story of the Olympics published in 2011 by Orion Children’s ISBN 978-1444000481 offers a lowdown on everything to do with the Modern Olympics in a fun way. Hart’s The Official Countdown to the London 2012 Games (Olympic and Paralympic Games) published by Carlton Books ISBN 978-1847327055 gives all the information about the different sports that make up the games. Timms’sMeetWenlock & Mandeville published in 2011 by Carlton Books, ISBN 978-1847324955 tells the story of the Olympic Mascots and puts a completely different spin on the Olympics and may offer inspiration to those students not interested in the sporting aspect of the games. Macmillan Collocations Dictionary & Phrasal Verbs Plus offer useful references to both of these features. They can be used as a reference for both teachers and students. By giving the students to look up and understand language independently, you’re helping them to really remember and process. ISBN 978-02307-2403-7 & 978-1-4050-6390-6. Swan’s Practical English Usage published by Oxford University Press in 2005 is another great reference book for teachers and students alike. ISBN – 978019442098-3 17
Teaching Notes & Printables This section of the Teachers’ book gives you ideas of lessons that may be used to supplement your students’ projects. The suggested timeline on page 7 shows one possible way to incorporate the lessons into your project time. LINKING LESSONS & PROJECT WORK It’s key to remember to make sure the students understand HOW the lesson elements of the course will help them to complete their projects. Start each lesson by introducing the specific aims, and ask each group to decide how those aims might be useful for their own project. It’s important you have an idea how your lesson is relevant to each group, so that if they can’t come up with anything, you can help them to see its relevance. At the end of each lesson, get your students back in their project teams and give them time to work together on how the lesson can help their project. TEAMWORK & COLLABORATION Just as with project work, the lesson elements of the course involve lots of opportunities for group work. It’s a good idea that when forming teams for the lessons, that they are different from the project teams, and different from lesson to lesson. This will mean that students get to interact with more people, share different ideas and will help if any problems being to form in project teams. These groups could be selected by the students themselves, by a game or by you to benefit from certain personality or ability mixes. Because the Project teams are designed to be fixed throughout the course, it can be a good idea to mix up the input teams from activity to activity to allow the maximum opportunity for mixing. THE TEACHING NOTES The teaching notes compromise various sections: • Info box Gives you any extra information that will be useful for you when delivering the lesson. Remember, the website is also there to provide lots and lots of links to help when planning lessons. • Lesson Purpose Explains what the lesson is designed to achieve, and where it might be best to position it in in your schedule. • Lesson Steps A suggestion of how you could choose to deliver the lesson in the classroom. However, all of the lessons have been designed with flexibility in mind. • Teaching Notes A section full of useful hints and tips to help you to understand what the lesson hopes to achieve. This section also explains any language/grammar points and explains methodology choices where relevant. THE PRINTABLES A number of printable resources that are designed to help the project teams plan and keep on track. These can be filled in by each member of the team, or one per team. It’s a good idea that the teacher takes a copy of each plan and files them away in case the team loses theirs. As always with the flexible design of Project Olympics, it is up to you which of the printables you use, and you may even want to adapt or substitute them, that’s fine! 18
Teaching Notes:Class Rules & The Olympic Values INFO BOX The Olympic Values Respect – fair play; knowing one’s own limits; and taking care of one’s health and the environment Excellence– how to give the best of oneself, on the field of play or in life; taking part; and progressing according to one’s own objectives Friendship– how, through sport, to understand each other despite any differences http://getset.london2012.com/en/resources/educators/the-olympic-and-paralympic-values LESSON PURPOSE This lesson is designed to happen close to the beginning of the course. It helps to build class morale, begins the process of negotiation and allows the student-centredness and team working aspects of the class to begin. The lesson also introduces another aspect of The Olympics, showing that Olympics doesn’t have to equal sport. LESSON STEPS • Begin the lesson with a class discussion about the need for rules in society. What would life be like without rules? Where and when do the students have to adhere to rules? What do they think about them? • Continue to a group activity. You could let the students use the internet to find out what The Olympic Values are, you could ask groups to guess the values, you could use a running dictation or jigsaw reading exercise to help the students discover what the rules are. • Pair work. In pairs, students work to decide how these rules are relevant to the athletes and if they would add anymore to the list. Do they think they are useful? Why or why not? • Class Discussion about how the rules could relate to their class, and come up with their own list of class rules. Students must think why the rule is needed and all agree to it. Also, what will the consequences be? NOTE – It’s important that the teacher also follows the rules once they are set. • Students either write up the rules in their books, or on paper and sign a ‘contract’. • Students now have the choice to make roleplays about the rules and share them with the class, to make posters and present them. • TEACHING NOTES • You will notice that this lesson already begins to show the importance of team work, pair work and group work. By beginning with this style of teaching from the start, you are helping the students to be ready for it when they begin their project. • Student choice should also be introduced at this stage. Please use your own initiative and understanding of your class to decide how much choice and freedom will be beneficial at this stage. • Once the rules are agreed upon and set, it’s vital that they are not forgotten. This is a genuinely meaningful activity, as long as the rules are used and stuck to. • Use these discussions to gauge student abilities where possible. It can also be a good opportunity to agree with the class when and how you (or they) will correct mistakes. • Start noting group dynamics, to give you a better idea of how you will organise splitting the class into teams in the near future. 19
Teaching Notes:Successful Team Talk INFO BOX This lesson will teach students about language that they can then use throughout the group parts of Project Olympics. The functions taught are inline with The Common European Framework’s B1 guidelines, see page 4 for more information. • LESSON PURPOSE • To equip the students with a bank of useful phrases to help them communicate more effectively in their groups. • To make students aware of levels of formality and approporiacy in discussion and debate. • To build students’ confidence that they can communicate with each other in English, something which may be quite alien to many. • To teach skills that can be used outside of the classroom. • To let students practise discussing in a controlled classroom activity before working independently. LESSON STEPS BEFORE THE LESSON Photocopy and cut out the phrases on the next page. You’ll need enough sets for there to be one set between 3 or 4 students. IN CLASS • Introduce the aims of the lesson, and ask students to briefly discuss how these kind of language functions will help with their project work. • Write up the following on the board as column headings ‘agreeing’, ‘disagreeing’, ‘interrupting/getting involved in the discussion’, ‘asking for clarification’ & ‘giving clarification’. • Discuss what each one means and elicit an example of each, from the students to check understanding. • Get the class into groups of 3 or 4 and give each group a set of the phrase cards. Ask them to sort the cards into the 5 categories. Set a time limit to make this quick. • Check by getting students to take it in turns to stick the phrases in the correct columns. • Ask the students to write down 5 statements they hope will get a reaction from each other. Give examples e.g. Manchester United are the best football team in the world. Encourage students to respond, some will agree and others disagree to show both are acceptable. • Put the students in pairs. Students take it in turns to read out their own phrases and their partner must react using one of the phrases. You should circulate and assist where needed. • Have a class discussion using a topic you think will be interesting. Introduce the topic, and give students time to decide whether they agree or disagree and then why. You can start the discussion, but encourage all of the students to participate and use the function phrases. • TEACHING NOTES • The first column of the phrases on page 21 are simpler, more appropriate phrases for the context of classroom discussion. With weaker classes, just use these. The right hand column however has more challenging phrases, if you include these also think about including a section on the strength of meaning and appropriacy and politeness into your lesson. • The topic discussion in stage 8 of the lesson could be Olympics related or not, depending on how you believe the Olympic theme to be viewed by your class. If you think they would benefit a break, pick something else. • Remember to continue to encourage the use of the phrases covered in this lesson in the future when the students are back in their teams. 20
This table should be photocopied for use with the lesson – Successful Team Talk PROJECT OLYMPICS 2012 21
Teaching Notes:Talking Olympics INFO BOX Collocation is a word used to describe words that appear together with more than average frequency. There are a number of collocations with Olympic connections on the next page, including definitions. It’s important when teaching collocation not just to teach the phrase/chunk and definition, but also to show learners how to use it, and talk about register/formality of the phrase. • LESSON PURPOSE • To make students aware of collocation and the benefits of learning words in chunks. • To increase the students’ Olympic related vocabulary to help them with their projects. • To practise reading and listening skills. • To equip the students with a new word bank that they can go on and notice outside of the classroom. TEACHING STEPS *There are many ways to tackle this lesson using the collocations on the next page. This is just one suggested procedure you may choose to follow* • Write the sentences including the collocations on the next page up on the board, but leave out the collocation. You could also read them out. • Ask the students to try to fill in the gaps, tell them there will be more than one word needed. • Fill in the blanks with the students help. • Explain these are collocations, words that appear together at a higher than average frequency. • Play run and place. Stick the definitions around the room, where the students can’t read them from their places. Split the class into pairs and ask each pair to write down the collocations on small pieces of paper. When you say go, one student from each team can run and read one of the definitions, and come back and tell the other student what it said. The students then work together to work out which of the words it describes, and then run and place their answer paper at the definition. Next, the other student runs to another definition and the process is repeated. Ensure students put their papers facedown so that there is no cheating. When the first team has put all of their definitions down, the game stops and the answers are checked. If the team got them all right, they win, if not the other teams continue playing. • Get students to write the collocations and their own sentences using them in their books. It might be useful to discuss how to change the tense and number of the words before asking them to do this. • Students check their sentences with their partner before handing them in for teacher marking. • Next, students get back into their Project Olympic teams, and go through the data they have collected looking out for the collocations, and share the sentences and contexts that they are used in. • Students can also use this opportunity to ask about any other words and collocations they aren’t sure of, tis way the whole class gets to help out and learn more new words. • Students think how they can use at least a couple of the new words in their final products. • TEACHING NOTES • This lesson should take place after the students have had the chance to collect some data if you are going to follow steps 8, 9 & 10. Alternatively, you could provide them with an article that includes lots of collocations for them to find. 22
Teaching Materials:The Olympic Schedule & Me INFO BOX The actual Olympic schedule can be found here: http://www.london2012.com/schedule-and-results/index.html (27th July - 12th August) And Paralympic schedule here: http://www.london2012.com/paralympics/schedule-and-results/ (29th Aug – 9th Sept) Remember to pick events that are in the future for the comparisons. • LESSON PURPOSE • To revise the future tenses. • To practice using the future continuous to compare things that haven’t happened yet. • To practise saying dates and times in English. • To give the students more insight into the Olympic and Paralympic schedules and to encourage students to imagine life as an Olympic athlete. • To continue building up the students language to help with their final presentations. LESSON STEPS • Ask ‘What will you be doing at 2 O’clock tomorrow?’ to the class. You will probably get an answer using the future continuous, e.g. I will be playing cricket. Take a couple more responses and write them up on the board and elicit the structure from the class. (pronoun + will + be + verb + ing +______). • Ask students when and why we use this structure. There is a high chance you’ll have at least some of the class who know grammar rules well. See the Teachers Notes box below for more ideas for the language presentation. • Show the Olympic schedule on the IWB if available, or hand out copies on paper. • You say sentences such as, “When Jessica Ennis is competing in the second day of the Heptathlon, what will you be doing?’ Students need to study the schedule, find when the event is, work out what they’re likely to be doing and answer (hopefully using the future continuous). E.g. I will be visiting Nottingham. • Write the question and answer on the board, and elicit a contrast sentence from the class ‘When Jessica Ennis is competing Claudia will be visiting Nottingham.’ help the students to notice the two different tenses. • Ask them to ask and answer similar questions in pairs to practice the new structure. • Talk about other circumstances that allow the use of present continuous for talking about the future. • Bring the class back together, and as always discuss when else you might use this structure and how it could be useful in their own Projects. • TEACHING • Present Continuous for the future • Used when the time of the future event is known • Usually used with a time phrase to make this clear • Can be used for near or distant future events as long as the event is certain as opposed to a prediction. • e.g. Brazil is hosting the 2016 Olympics • Present continuous is commonly used to talk about people’s arrangements and certain plans. • Future Continuous • Used to talk about routine future events • Used to talk about event s that will have already started but not yet finished in the future. • NOTES • How much or little emphasis you put on the grammar rules and explanations will depend on both your teaching style and beliefs, as well as the expectations of your learners. • The lesson above encourages students to notice how the grammar is used, and then goes on to try and elicit the reasons from them before then trying to offer a variety of speaking and writing practice to check the point can be used accurately and with confidence. 24
Teaching Notes:What the Games Mean For London INFO BOX Depending on where your students come from, they may or may not be used to there being negativity around holding The Olympics. Use the links from the website www.wix.com/howcroft kate/projectolympics to find up to date articles that will be interesting for your learners for the discussion element of this lesson. • LESSON PURPOSE • To use discourse markers and connecting words to talk about the effect the games have on London, both positive and negative and to contrast different opinions. • e.g. As a result of The Olympics coming to London, many jobs have been created. • To give the students an insight into the other side of London 2012. • To encourage discussion and fluency practice. LESSON STEPS • Write up a table on the board, with the headings positives and negatives. Ask students to begin to name positive and negatives for London as the host city. • Encourage this process to lead to discussion around different points that are brought up. Note down any discourse markers you hear, or any times in the conversation when they could have been used. • When the list is complete, with the help of the students, try to think of the reasons why the problems are problems. You can remove the positives now, and explain that we are spending most of the Project focussing on these, but for today we’re looking at the negatives or controversies. • When the learners name some of the reasons for the problems, ask them how we can link the cause and effect, and introduce some discourse markers (see box below). • Discuss the differences between the discourse markers and get the students to practice using them. • Pass out the article on handshaking, get the students to make cause and effect statements on why they think the handshaking isn’t being allowed and also why they think the handshaking norms of the different countries exist. • Students share their ideas. With each other, and can decide on a class consensus or agree to disagree on the reasons! • Next, either let the students go and find their own problem article and give some cause and effect statements back to the class to report on the problem they found and the reasons for it. • Alternatively, you can provide a variety of articles and the class work on them in groups. • If time permits, use the articles for the students to look carefully at the language and find examples of other points that have previous been taught. TEACHING NOTES DISCOURSE MARKERS - because, since, as, for, so, therefore, consequently, accordingly, hence, thus, for this reason, as a result. Different discourse markers would be used depending on the formality and audience. Make sure students know the word order rules for the different markers. Remember, when you’re teaching and using topics that might cause different reactions from students from different backgrounds, you need to lay down ground rules and sometimes act as referee to ensure everyone’s point of view is heard, and no one feels victimised or unable to share their view. 25
Handshake'ban'forBritishOlympicathletes British athletes are being advised not to shake hands with rivals or VIPs in case they catch a bug that could ruin their chances at the Olympics. The British Olympic Association say a mild bug which could knock athletes off their stride could be picked up in the "quite stressful environment" of the Games. Medical officer Ian McCurdie said, "The greatest threat to performance is illness and possibly injury. "It is all about hand hygiene." A history of handshakes The handshake is thought to have originated as a symbol of peace between soldiers to show that neither was carrying a weapon. Archaeological ruins show handshaking could have been practiced in ancient Greece as early as 5th century BC. Different countries have different handshake traditions. In Austria you should shake hands with everyone on meeting, including children. In China it's polite to shake the hand lightly, sometimes for as long as 10 seconds. In South Korea, a senior person starts the handshake and a sign of respect is to grasp the right arm with the left hand, too. Former American president John F Kennedy commissioned a survey on hand shaking, to make sure he got it just right when greeting other world leaders. Adapted from www.bbc.co.uk/newsround
Project Planner Use this form to plan what you would like to do each day. You don’t have to fill it in for the whole of your camp to start with, but you should try to keep ahead to help with your planning. Your teacher will tell you when you have input sessions, when you have the opportunity to use the internet and when you’re doing full class sessions. My Project Olympics will be finished by…………………………………..
Project Tracker Use this form to record what you did each day. You can record why you went off plan here too. By being organised you’ll really help your Project Olympics to be a success. You can also record new language you learnt on this form, or useful websites you accessed. My Project Olympics will be finished by…………………………………..
Team Planner My responsibilities: My deadlines: What I’m looking forward to: What I think will be hard: Team Name: Members: Project theme: Project end product: What we need to find out: Project steps:
Project Olympics Your guide to making the most of what is gearing up to be a truly memorable and special summer in The UK.