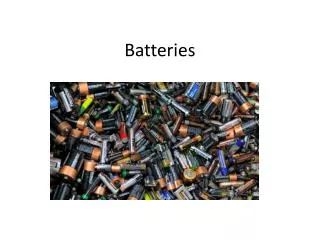
Batteries
Batteries. Consumer Auto Electrical Lecture 2. Batteries. Batteries store electrical energy that we use to power diesel equipment Batteries store electrons chemically They contain lead plates, sulfuric acid, and a plastic case Sulfuric acid reacts with all metals, causing corrosion.

Batteries
E N D
Presentation Transcript
Batteries Consumer Auto Electrical Lecture 2
Batteries • Batteries store electrical energy that we use to power diesel equipment • Batteries store electrons chemically • They contain lead plates, sulfuric acid, and a plastic case • Sulfuric acid reacts with all metals, causing corrosion
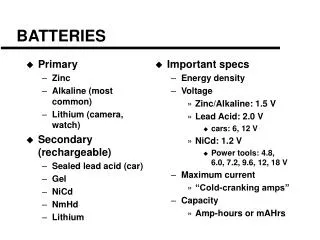
Battery Types • Automotive • Designed to only power motors for a short time (starter), then be recharged • Completely draining will damage them • Deep Cycling • Designed for powering electric motors where they are completely drained then recharged • Stronger design • More expensive
Automotive Battery Types • Lead Acid • Contains 2 types of plates with electrolyte • Lower cost • Most common
Automotive Battery Types • Gell Cell • Has 2 types of lead plates wound in a spiral • Uses an electrolyte in gell form • More expensive than lead acid • More durable than lead acid
Automotive Battery Connections • Post Terminal • Used in older cars • Side Terminal • Used in newer cars • L Terminal • Used in heavy trucks and equipment
Battery Ratings • Batteries are rated 4 ways: • CCA (Cold Cranking Amps) • CA (Cranking Amps) • RC (Reserve Capacity) • AH (Ampere Hour)
CCA • Cold Cranking Amps • Indicates the ability of a battery to deliver a specified current at a low temperature. • It is determined by the amount of current a fully charged battery can supply for 30 seconds at 0°F without the voltage falling below 7.2 Volts
CA • Cranking Amps • This is the same test as the CCA rating, except it is at a higher temperature (32°F instead of 0°F)
RC • Reserve Capacity • It determines the time in minutes a vehicle can be driven after the charging system fails • The length of time a fully charged battery (at 80°F) can supply 25 Amps before the voltage falls below 10.5 Volts
AH • Ampere Hour • The amount of current a fully charged battery (at 80°F) can supply for 20 hours without having the voltage fall below 10.5 Volts
Determining Battery Ratings • Most battery ratings are printed or stamped in the top of the battery • Most have 1 or 2 ratings
Determining Positive and Negative • In a post and L terminal type, the positive (or +) is larger than the negative post (or -) • In the side terminal, it is marked POS or + for positive and NEG or – for negative
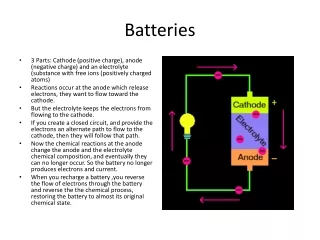
Corrosion • Corrosion causes many battery failures • Corrosion causes a barrier between the battery post and the cable • When there is a barrier, no electrons can flow • Even though the battery is fully charged, current will not flow
Eliminating Corrosion • Wash the top of the battery with hot water until all the corrosion is gone • Remove the negative cable, then the positive cable • Clean the positive post with a battery cleaning brush, then the battery cable • The corrosion is gone when the post and cable are shiny
Eliminating Corrosion 2 • Connect the positive cable to the battery • Clean the negative post and cable until clean • Reconnect the cable to the battery • Many anticorrosion products are available to prevent corrosion
Checking the Battery • If there is an indicator window, look at the color of it • Green indicates good, dark green means it needs a charge, and white or yellow means it needs to be replaced
Checking the Battery 2 • Check the outside of the battery for cracks • Check the hold down for tightness • Check for cracked or broken cables
Checking the Battery 3 • Check the level and condition of the electrolyte
Checking Electrolyte • There should be a mixture of 36% sulfuric acid and 64% water in the battery • You can measure using a hydrometer • It measures the weight of the mixture
Checking Electrolyte 2 • Remove covers from battery (if equipped) • Squeeze the bulb • Lower tube into the electrolyte • Draw into the hydrometer • Record reading • Slowly release electrolyte into battery • Do Not Splash Electrolyte!!!
Hydrometer Measurements • Pure water reads 1.000 on a hydrometer • A reading of 1.270 means the battery is fully charged (36% water, 24% H2SO4) • A dead battery will read 1.100 (less than 15% H2SO4)
Hydrometer Measurements 2 • When you measure the specific gravity (weight) of each cell, they must all be within 50% of each other
Voltage Tests – Open Circuit • Turn on the headlights for 2 minutes • Turn off the headlights and connect a voltmeter to the battery, red lead to positive, black to negative • If the battery is good, it will read above 12.2 volts • If below that, charge the battery
Load Test Connections • Make sure the battery is fully charged • Connect the red lead or the VAT-40 to the positive terminal • Connect the black lead to the negative terminal • Clamp the green clamp over the black lead
Load Testing • Turn the Load Increase control until the ammeter reads 3 times the amp-hour (AH) rating or one-half the cold-cranking ampere (CCA) rating • Hold that reading for 15 seconds • Read voltmeter • A good battery will read at or above 9.6 volts • Battery should be at 70°F
Case Drain Tests • Uses a voltmeter with the black lead hooked to the negative • Use the red lead to touch the case in the middle of the battery • It should read less than 0.5 volts • A larger reading indicates you should clean the top of the battery with hot water and detergent
Parasitic Drain Test • Remove the negative cable • Hook a test light between the negative post and the cable • If the light glows, there is a problem in the electrical system • Look for lights on inside the truck or trailer or the regulator is bad
Cable Corrosion Test • Using a voltmeter, hook the black lead to the negative post, and the red lead to the cable connector while turning on the headlights • Reading should be 0 volts • Do the same with the positive post and cable
Charging the Battery - Precautions • Leave the vent caps in place • Charge in well ventilated areas • Keep sparks and flames away from a charging battery • Disconnect the ground wire to recharge a battery
Charging the Battery • Check electrolyte levels, fill as needed • Disconnect the ground lead • Connect the red lead to positive, the black to negative • Turn on the charger • Make sure it is set to the battery voltage
Disconnecting the Battery Charger • Turn off the charger • Disconnect the charger leads • Reconnect the ground wire
Jumping a Battery • Make sure the vehicles are not touching each other • Make sure when connecting the leads they are clear of any rotating parts
Jumping a Battery – 12 Volts • Connect the red leads to both positive posts • Connect one end of the black lead to the negative terminal, the other to the cars ground • After the car starts, disconnect the black lead from the ground, then the rest of them
Jumping a Truck – 24 Volts • Start by hooking the 12 volt battery in the booster vehicle to a 12 volt battery in the dead vehicle • Switch to the other battery if it does not start • To jump with 24 volts, use a second battery and hook in series with the booster truck