SharpSchool Teacher Training
170 likes | 280 Vues
This comprehensive guide will help teachers navigate the SharpSchool portal effectively. Begin by logging in with your provided credentials and changing your password for security. Learn how to manage your personal profile, edit web pages with ease, and customize your teacher page using the WYSIWYG editor. Save, publish, or cancel changes as needed, and discover how to add images, videos, and hyperlinks to enhance your content. This resource also includes information on using sub-pages and accessing customer support when necessary.

SharpSchool Teacher Training
E N D
Presentation Transcript
SharpSchool Teacher Training
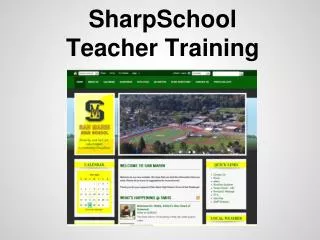
Sharp School Login Go to: http://nusdsmhs.ss4.sharpschool.com
Login page Use the login and password that was given to you today. Change your password once your review your account settings.
Main Screen You should see your name at the top.
Personal Profile and Password Click on your name and you will see your profile page. Select the Edit User tab and add your information. Be sure to change your password. Select Update User to save the setting changes.
Teacher Web Page Management Teachers will know if they have full control of their web pages when a menu bar appears above the site navigation menu. The menu bar will have the following items: Page Properties, Tasks, Advance, Administration, Help and the user name). If you don't see this menu bar, go to Select a School and select your school.
Teacher Pages • Click on Staff Staff Directory and select your Department, then select your name. • To change any component on the page click on the Advanced tab and then click on Switch to Design Mode. You will see red boxes.
Teacher Pages • To change any component on the page click on the Advanced tab and then click on Switch to Design Mode.
Teacher Pages • You will see red boxes.
Teacher Pages - Editing Click on the red edit button to the right of "Hello my name is..."
Page Content This is called WYSIWYG editor-What You See is What You Get. Delete the filler information, and enter your own content here. An example: Ms. Saba's Classroom.
Adding Content To alter any object or add content on the page, click within the page itself. The options/icons are similar to what you will find in word programs. Note: At a later date we can provide you with a link or a handout of Feature Descriptions. Please email us if you would like one.
Saving and Publishing Publish a Teacher Page Once content is added to the page, there are three options available: 1) Save: Selecting Save will save all of the changes but will not publish them live on your site. You may return to this page at a later date to complete it. 2) Publish: By selecting Publish, the changes are instantly made live. 3) Cancel: Cancel will not save any changes. Note: To Edit a published page, simply return to the Page Properties menu and click Check-Out & Edit Page.
Photos Yearbook photos may added in the fall. If you have a photo of yourself that you like, you may upload it to your website. To do this click on the photo icon which is a mountain and the sun. If you experience photo editing difficulties, you may need to resize your image. We suggest using Pixlr Express at http://pixlr.com Here is a how-to tutorial.
Images, Videos, Hyperlinks More training will be provided. Here is a quick guide to help you add images, videos, hyperlinks.
Teacher Content Page Links • Your website comes with four sub-pages. You can add sub-pages or archive sub-pages if you choose. • Archiving is not deleting a link. Think of it as hiding a link. Also, you must archive a link before you delete a link. • Sub-pages are: Calendar, Photo Gallery, Useful Links, and Contact Me. • More types of sub-pages are available.
Still need help? Sign up for Customer Net http://customernet.sharpschool.com Sharp School Representatives are there to help you as well.