Lab1
Lab1. Objectives Get familiar w/ hardware Mote interface board Mote Mote sensor board Get familiar w/ software MoteWorks Programmer’s notepad Setting up environment. Crossbow classroom kit. Hardware Mote interface board (MIB)


Lab1
E N D
Presentation Transcript
Lab1 • Objectives • Get familiar w/ hardware • Mote interface board • Mote • Mote sensor board • Get familiar w/ software • MoteWorks • Programmer’s notepad • Setting up environment
Crossbow classroom kit • Hardware • Mote interface board (MIB) • a.k.a. programmer, gateway, programming board, PC interface board • Mote processor/radio board • a.k.a. mote • tiny computer w/ radio communication • Mote sensor board • a.k.a. Data acquisition board (DAQ board) • Temperature, light, humidity, … • Software • MoteWorks
Crossbow hardware • Mote Interface Board (“MIB”) • MIB510 • MIB520 • MIB600 • Mote • 433MHz Mica2 • 868/916MHz Mica2 (MPR400CB) • 2.4GHz MicaZ • Sensor board • MTS/MDA series • MDA100CB • PC
Hardware we’ll use Mote Interface Board (“MIB”) MIB520 868/916MHz Mica2 Sensor MDA100CB PC
MoteWorks Orientation Objectives: Review directory structure MakeXbowlocal and environment customization Lab Blink make command Compiling using Programmer’s Notepad WSN Training: MW Orientation and Configuration
Development Environment Cygwin -- Alternative UI to view and compile code; Programmers Notepad is the main UI MoteConfig 2.0 and OTAP XSniffer Programmer’s Notepad 2 GraphViz 2.6 PuTTY Utilities WinMerge 2.4.6.0 Compilers nesC 1.2 AVR-GCC compiler for Atmel Atmega128 microcontroller GDB debugger and AVR Insight What SW Packages Are Provided by MoteWorks?
Directory Structures Typical default directory: C:\Crossbow\cygwin\opt\MoteWorks doc folder is not there initially. You will create this later.
Directory Structures C:\Crossbow\cygwin\opt\MoteWorks\apps
Directory Structures C:\Crossbow\cygwin\opt\MoteWorks\tools
Directory Structures C:\Crossbow\cygwin\opt\MoteWorks\tos
MoteWorks Orientation Objectives Review directory structure MakeXbowlocal and environment customization Lab Blink make command Compiling using Cygwin or Programmer’s Notepad WSN Training: MW Orientation and Configuration
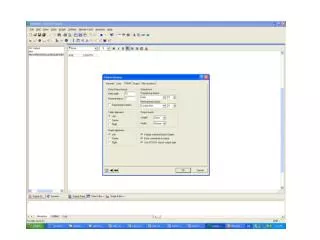
Customization: MakeXbowlocal What is MakeXbowlocal? • A file that contains common settings to minimize keyboard entry and typos during compiling and downloading What will be used to edit the MakeXbowlocal file? • Programmers Notepad 2 Where is it? • <Install_Drive>:\Crossbow\cygwin\opt\MoteWorks\apps Open a Programmers Notepad 2 window now
Customization: MakeXbowlocal What can be defined in MakeXbowlocal? • Programming board settings • COM port (MIB510 or MIB520) or • IP address (MIB600) of the programming board • Radio settings • Frequency band AND channel • Radio transmit (TX) output power • Group ID • Nodes must share a common group ID in order to network with each other
Review: What MIB Board Do I Have? MIB510 MIB600 MIB520
MakeXbowlocal: Programming Board • Uncomment one of the following lines • Line 14 if using a MIB510 • Line 15 if using a MIB520 • Line 16 if using a MIB600 (a.k.a., eprb) • Uncomment and edit for COM port of the MIB510/MIB520 or IP address of the MIB600
MakeXbowlocal: MIB520 configuration Must install the MIB520’s USB driver prior to use • FTDI will install 4 different drivers…be patient • Run FTClean prior to driver’s installation (see next slide) Example definition (in the MakeXbowlocal file) for MIB520 #DEFAULT_PROGRAM=mib510 DEFAULT_PROGRAM=mib520 #DEFAULT_PROGRAM=eprb #MIB510=COM1 MIB520=com6 #EPRB=10.1.1.238 15 This number is the lower of the two COM ports assigned to the MIB520 18 Lines 14 through 19 of Makexbowlocal NOTE: you should write com6 (instead of COM6)
MIB520 Notes (Review) USB port drivers (from FTDI) are in the MoteWorks CD The MIB520 USB drivers creates two sequentially numbered virtual COM ports • COM<#> is for programming and downloading code in the Mote • COM<#+1> is for PC to MIB520 data communications such as when running MoteView If the USB driver installed virtual COM port drivers greater than 16, you should uninstall and clean the COM port registries • Use the FTClean utility on the MoteWorks CD
Group ID versus Node ID? 915 MICA2 Channel 00 Group ID = 12 915 MICA2 Channel 00 Group ID = 13 3 4 1 5 2 5 2 4 Node ID 1 3
MakeXbowlocal: Group and Node IDs Nodes communicate only within a common group ID • Values can be in either decimal or hexadecimal • Default value is 0x7D (that is, decimal 125) Nodes can be assigned almost any 2-byte number (that is, from 0 to 65535) Exceptions: Don’t use the reserved broadcast or node addresses • Broadcast: 0xFFFF (65535) • UART Channel: 0x007E (126)
MakeXbowlocal: Group ID Editing Example: Line 30 shown uncommented and edited with group ID = 12
What RF Band is My Mote? Look at the number on the label with units in “MHZ” or “GHZ” 433 MHz Mica2 2.4 GHz MicaZ 868/916 MHz Mica2
Editing the Makexbowlocal File (2 of 2) For MICA2 users, check three settings • RADIO_CLASS and RADIO_CHANNEL • Uncomment one of 55, 93, 110, or 128 • RADIO_CHANNEL • Uncomment one of the RADIO_CHANNEL lines in the appropriate RADIO_CLASS section • Radio TX Power • Uncomment one line between 153 and 158
Setting the Channel for the MICA2 in the 902 MHz to 928 MHz band Example: Note lines 55 and 57
MakeXbowlocal: MICA2, RF Transmit Power TX output power options for 868/916 MHz band MICA2 TX output power options for 433 MHz band MICA2 Example: MICA2 set to transmit at RADIO_POWER=0x02 or -20 dBm
Before We Go On Make sure that the changes in the MakeXbowlocal file are based on your • Group ID • Type of Mote Interface Board (MIB510, MIB520, or MIB600) • COM port • Mote (Mica2 or MicaZ). • RADIO CLASS, RF CHANNEL, TX POWER All other lines else should be comment out with a #symbol
MoteWorks Orientation Objectives Review directory structure MakeXbowlocal and environment customization Lab Blink make command Compiling using Programmer’s Notepad 2 (PN2 on your desktop) WSN Training: MW Orientation and Configuration
Lab 1: Compile and Installing Firmware to a Mote Objectives Build and install your first MoteWorks application Verify your MoteWorks compiler tools and programming environment Get a little more familiar with the hardware WSN Training: MW Orientation and Configuration
Lab 1 – Materials Needed Mote (“MPR4x0” or “MPR2400”) • One MICA2, MICAz with batteries installed Mote Interface Board (“MIB”) • One of MIB510, MIB520, or MIB600 • All associated cabling for data and power • IP or COM port settings determined • Appropriate drivers installed (if needed) Your PC with MoteWorks installed
Lab 1: Setup Gateway and Mote • Connect your MIB to your PC with the appropriate cabling. Check that the MIB is powered. 2. When using a MIB520, power is supplied from PC USB port. Turn the power switch on mote to OFF.
Step 2b: Attaching Mote to MIB520 Board USB cable – power and communication MICA2/z Mote NOTE: mote should be firmly seated in MIB520.
Lab: Compile and Download with Programmers Notepad • Open a Programmers Notepad window and navigate to the Blink directory: /opt/MoteWorks/apps/general/Blink • Click on the Blink.nc or BlinkM.nc file 5. If MICA2: Select tools > make mica2 • To install, click on tools > shell. In the dialog box type make <platform> reinstall <platform>iseithermica2 or micaz
2. View compiler output Programmers Notepad 2 Interface 1. Choose shell then type in make <platform> command then hit “Enter” After compile, click on Tools > shell then type in the appropriate make command (see previous slide)
TinyOS make Command (1 of 3) To build an TinyOS application we use make to • Configure top-level nesC application with user specific options • To find options and their syntax, look under the C:\Crossbow\cygwin\opt\MoteWorks\make\avr subdirectory • Run the nesC precompiler to convert nesC configurations and modules to C. • Compile C code to executable binary for target platform • Install code into Mote The make command can be typed or issued from Programmers Notepad 2 • Can also be issued from the same location within a Cygwin window
TinyOS make Command (2 of 3) TinyOS application source files make <platform> install … Makerulesin MoteWorks\make\scripts Makefile in MoteWorks\make\scripts MakeXbowlocal Makedefaults ncc nesC precompiler avr-gcc C cross compiler-linker UISP upload code to Mote TinyOS code image in Mote
TinyOS make Command (3 of 3) makecommand summary make<platform> re|install,<n><programmer>,<com#orIP_Addr> IP address as determined or assigned by using the Lantronix’s DeviceInstaller software mib510, or mib520, or eprb (= mib600) mica2, or micaz, or mica2dot com# where # = COM port where your MIB510 is attached or the lower of the two virtual COM ports assigned by the MIB520 USB driver reinstall,<n>= Download code that is already compiled with node ID = n install,<n>= compile then download code to the Mote with node ID = n Example: make mica2 install,1 mib520,com6
In PN2 click on Tools > shell Type make <platform>docs Open a Web UI (Internet Explorer, Mozilla Firefox) Browse to the folder in C:\crossbow\cygwin\opt\MoteWorks\docs\nesdoc\<platform> Open allfiles_f.html. Select Components. Click on the Blink hyperlink Lab Step 3: Compile for nescdoc
GraphViz Help A requires interface I, B provides I, and A and B are wired together. C and D both require or both provide J. The direction of the arrow indicates that the original wiring is "C = D". E requires function f, and F provides function
What you need to do • Familiarize yourself with hardware • Review directory structure of MoteWorks • Familiarize yourself with Programmers Notepad • Using Programmer’s Notepad to • Customize MakeXbowlocal (use the same PC for the rest of the semester) • Compile & download Blink • Make sure Blink works • Finish lab1 report