Lab1
Lab1. Objectives Get familiar w/ hardware Mote interface board Mote Mote sensor board Get familiar w/ software MoteWorks Programmers notepad Setting up environment. Crossbow classroom kit. Hardware Mote interface board (MIB)


Lab1
E N D
Presentation Transcript
Lab1 • Objectives • Get familiar w/ hardware • Mote interface board • Mote • Mote sensor board • Get familiar w/ software • MoteWorks • Programmers notepad • Setting up environment
Crossbow classroom kit • Hardware • Mote interface board (MIB) • a.k.a. programmer, gateway, programming board, PC interface board • Mote processor/radio board • a.k.a. mote • tiny computer w/ radio communication • Mote sensor board • a.k.a. Data acquisition board (DAQ board) • Temperature, light, humidity, … • Software • MoteWorks
Crossbow hardware • Mote Interface Board (“MIB”) • MIB510 • MIB520 • MIB600 • Mote • 433MHz Mica2 • 868/916MHz Mica2 (MPR400CB) • 2.4GHz MicaZ • Sensor board • MTS/MDA series • MDA100CB • PC
Hardware we’ll use Mote Interface Board (“MIB”) MIB520 868/916MHz Mica2 Sensor MDA100CB PC
MoteWorks Orientation Objectives: Review directory structure MakeXbowlocal and environment customization Lab Blink make command Compiling using Programmer’s Notepad WSN Training: MW Orientation and Configuration
Development Environment Cygwin -- Alternative UI to view and compile code; Programmers Notepad is the main UI MoteConfig 2.0 and OTAP -- Separate tutorial XSniffer -- Part of a Day 2 lab Programmer’s Notepad 2 -- Used throughout training GraphViz 2.6 -- Briefly used TortoiseCVS 1.8.22 -- Not used in training PuTTY Utilities -- Not used in training WinMerge 2.4.6.0 -- Briefly used in training Compilers nesC 1.2 AVR-GCC compiler for Atmel Atmega128 microcontroller GDB debugger and AVR Insight MoteWorks and TinyOS code Mote Tier XServe Tiers MoteView a separate installation What SW Packages Are Provided by MoteWorks?
Directory Structures • Typical default directory: C:\Crossbow\cygwin\opt\MoteWorks doc folder is not there initially. You will create this later.
Directory Structures • C:\Crossbow\cygwin\opt\MoteWorks\apps
Directory Structures • C:\Crossbow\cygwin\opt\MoteWorks\tools
Directory Structures • C:\Crossbow\cygwin\opt\MoteWorks\tos
MoteWorks Orientation Objectives Review directory structure MakeXbowlocal and environment customization Lab Blink make command Compiling using Cygwin or Programmer’s Notepad WSN Training: MW Orientation and Configuration
Customization: MakeXbowlocal • What is MakeXbowlocal? • A file that contains common settings to minimize keyboard entry and typos during compiling and downloading • What will be used to edit the MakeXbowlocal file? • Programmers Notepad 2 • Where is it? • <Install_Drive>:\Crossbow\cygwin\opt\MoteWorks\apps • Open a Programmers Notepad 2 window now
Customization: MakeXbowlocal • What can be defined in MakeXbowlocal? • Programming board settings • COM port (MIB510 or MIB520) or • IP address (MIB600) of the programming board • Radio settings • Frequency band AND channel • Radio transmit (TX) output power • Group ID • Nodes must share a common group ID in order to network with each other • What is your group ID? It is on your name badge
Review: What MIB Board Do I Have? MIB510 MIB600 MIB520
MakeXbowlocal: Programming Board • Uncomment one of the following lines • Line 14 if using a MIB510 • Line 15 if using a MIB520 • Line 16 if using a MIB600 (a.k.a., eprb) • Uncomment and edit for COM port of the MIB510/MIB520 or IP address of the MIB600
MakeXbowlocal: MIB510 configuration • For users of USB to RS232 serial converters, you must know port (COM) number assigned to the USB device. • Check under start > Control Panel > System > Hardware > Device Manager > Ports • Example definition (in the MakeXbowlocal file) for MIB510 14 DEFAULT_PROGRAM=mib510 #DEFAULT_PROGRAM=mib520 #DEFAULT_PROGRAM=eprb MIB510=COM1 #MIB520=/dev/ttyS4 #EPRB=10.1.1.238 17 Note: Build system ignores lines which begin with the “#” character
MakeXbowlocal: MIB520 configuration • Must install the MIB520’s USB driver prior to use • FTDI will install 4 different drivers…be patient • Run FTClean prior to driver’s installation (see next slide) • Example definition (in the MakeXbowlocal file) for MIB520 #DEFAULT_PROGRAM=mib510 DEFAULT_PROGRAM=mib520 #DEFAULT_PROGRAM=eprb #MIB510=COM1 MIB520=com6 #EPRB=10.1.1.238 15 This number is the lower of the two COM ports assigned to the MIB520 18 Lines 14 through 19 of Makexbowlocal NOTE: you should write com6 (instead of COM6)
MIB520 Notes (Review) • USB port drivers (from FTDI) are in the MoteWorks CD • The MIB520 USB drivers creates two sequentially numbered virtual COM ports • COM<#> is for programming and downloading code in the Mote • COM<#+1> is for PC to MIB520 data communications such as when running MoteView • If the USB driver installed virtual COM port drivers greater than 16, you should uninstall and clean the COM port registries • Use the FTClean utility on the MoteWorks CD
MakeXbowlocal: MIB600 configuration • Connection methods to a PC • (W)LAN • Ethernet hub • Crossover Ethernet cable (to directly connect to PC) • Example definition (in the MakeXbowlocal file) for MIB600 #DEFAULT_PROGRAM=mib510 #DEFAULT_PROGRAM=mib520 DEFAULT_PROGRAM=eprb #MIB510=COM1 #MIB520=COM7 EPRB=10.1.1.238 16 19 Lines 14 through 19 of Makexbowlocal
Group ID versus Node ID? 915 MICA2 Channel 00 Group ID = 12 915 MICA2 Channel 00 Group ID = 13 3 4 1 5 2 5 2 4 Node ID 1 3
MakeXbowlocal: Group and Node IDs • Nodes communicate only within a common group ID • Values can be in either decimal or hexadecimal • Default value is 0x7D (that is, decimal 125), but please use your Group ID that’s on your name badge • Nodes can be assigned almost any 2-byte number (that is, from 0 to 65535) • Exceptions: Don’t use the reserved broadcast or node addresses • Broadcast: 0xFFFF (65535) • UART Channel: 0x007E (126)
MakeXbowlocal: Group ID Editing Example: Line 30 shown uncommented and edited with group ID = 12
What RF Band is My Mote? Look at the number on the label with units in “MHZ” or “GHZ” 433 MHz Mica2 2.4 GHz MicaZ 868/916 MHz Mica2
Editing the Makexbowlocal File (2 of 2) • For MICA2 users, check three settings • RADIO_CLASS and RADIO_CHANNEL • Uncomment one of 55, 93, 110, or 128 • RADIO_CHANNEL • Uncomment one of the RADIO_CHANNEL lines in the appropriate RADIO_CLASS section • Radio TX Power • Uncomment one line between 153 and 158 • For MICAz users, check two settings • RADIO_CHANNEL • Uncomment one line between 173 and 188 • Radio TX Power • Uncomment one line between 207 and 214
Setting the Channel for the MICA2 in the 902 MHz to 928 MHz band Example: Note lines 55 and 57
Setting the Channel for the MICA2 in the 433 MHz Band 902-928 MHz MICA2 can also operate in 868-870 MHz band Example: Note lines 110 and 114
MakeXbowlocal: MICA2, RF Transmit Power TX output power options for 868/916 MHz band MICA2 TX output power options for 433 MHz band MICA2 Example: MICA2 set to transmit at RADIO_POWER=0x02 or -20 dBm
MakeXbowlocal: MICAz, 2.4 GHz, Channel 25 Example: Note lines 187 and 212 Example: Setting power to -15 dBm
Before We Go On • Make sure that the changes in the MakeXbowlocal file are based on your • Group ID • Type of Mote Interface Board (MIB510, MIB520, or MIB600) • COM port or IP Address • Mote (Mica2 or MicaZ). • RADIO CLASS, RF CHANNEL, TX POWER • All other lines else should be comment out with a #symbol
MoteWorks Orientation Objectives Review directory structure MakeXbowlocal and environment customization Lab Blink make command Compiling using Programmer’s Notepad 2 (PN2 on your desktop) WSN Training: MW Orientation and Configuration
Lab 1: Compile and Installing Firmware to a Mote Objectives Build and install your first MoteWorks application Verify your MoteWorks compiler tools and programming environment Get a little more familiar with the hardware WSN Training: MW Orientation and Configuration
Lab 1 – Materials Needed • Mote (“MPR4x0” or “MPR2400”) • One MICA2, MICAz with batteries installed • Mote Interface Board (“MIB”) • One of MIB510, MIB520, or MIB600 • All associated cabling for data and power • IP or COM port settings determined • Appropriate drivers installed (if needed) • Your PC with MoteWorks installed
Lab 1: Setup Gateway and Mote • Connect your MIB to your PC with the appropriate cabling. Check that the MIB is powered. • Attach a MICA2 or MICAz to an MIB via the white board-to-board connector (see next slides for pictures) • If the MIB510 is powered, switch the MICA’s power switch to off • If using a MIB520, power is supplied from PC USB port. Turn the power switch on mote to OFF. • Make sure that the red PWR LED is on and green PWR LED is not blinking.
Step 2a: Attached Mote to MIB510 • Cables • Power • Wired Comms • Mote + Gateway Board = Base Station • MICA2/z Mote • MIB510 Shown with sensor board attached to bottom connector which is not required for programming Antenna is missing and needs to be there for good RF communication
Step 2b: Attaching Mote to MIB520 Board USB cable – power and communication MICA2/z Mote NOTE: mote should be firmly seated in MIB520.
Step 2c: Attaching Mote to MIB600 Board MICA2/z Mote Ethernet cable to LAN or hub 5 VDC wall power supply (POE switch to “5V”)
Lab: Compile and Download with Programmers Notepad • Open a Programmers Notepad window and navigate to the Blink directory: /opt/MoteWorks/apps/general/Blink • Click on the Blink.nc or BlinkM.nc file 5a. If MICA2: Select tools > make mica2 5b. If MICAz: Select tools > make micaz • To install, click on tools > shell. In the dialog box type make <platform> reinstall <platform>iseithermica2 or micaz
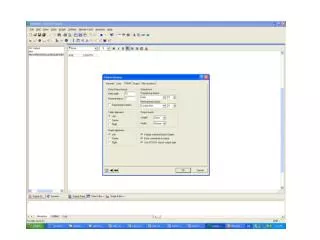
2. View compiler output Programmers Notepad 2 Interface 1. Choose shell then type in make <platform> command then hit “Enter” After compile, click on Tools > shell then type in the appropriate make command (see previous slide)
TinyOS make Command (1 of 3) • To build an TinyOS application we use make to • Configure top-level nesC application with user specific options • To find options and their syntax, look under the C:\Crossbow\cygwin\opt\MoteWorks\make\avr subdirectory • Run the nesC precompiler to convert nesC configurations and modules to C. • Compile C code to executable binary for target platform • Install code into Mote • The make command can be typed or issued from Programmers Notepad 2 • Can also be issued from the same location within a Cygwin window
TinyOS make Command (2 of 3) TinyOS application source files make <platform> install … Makerulesin MoteWorks\make\scripts Makefile in MoteWorks\make\scripts MakeXbowlocal Makedefaults ncc nesC precompiler avr-gcc C cross compiler-linker UISP upload code to Mote TinyOS code image in Mote
TinyOS make Command (3 of 3) • makecommand summary • make<platform> re|install,<n><programmer>,<com#orIP_Addr> IP address as determined or assigned by using the Lantronix’s DeviceInstaller software mib510, or mib520, or eprb (= mib600) mica2, or micaz, or mica2dot com# where # = COM port where your MIB510 is attached or the lower of the two virtual COM ports assigned by the MIB520 USB driver reinstall,<n>= Download code that is already compiled with node ID = n install,<n>= compile then download code to the Mote with node ID = n Example: make mica2 install,1 mib520,com6
In PN2 click on Tools > shell Type make <platform>docs Open a Web UI (Internet Explorer, Mozilla Firefox) Browse to the folder in C:\crossbow\cygwin\opt\MoteWorks\docs\nesdoc\<platform> Open allfiles_f.html. Select Components. Click on the Blink hyperlink Lab Step 3: Compile for nescdoc
GraphViz Help A requires interface I, B provides I, and A and B are wired together. C and D both require or both provide J. The direction of the arrow indicates that the original wiring is "C = D". E requires function f, and F provides function
What you need to do • Familiarize yourself with hardware • Review directory structure of MoteWorks • Familiarize yourself with Programmers Notepad • Using Programmer’s Notepad to • Customize MakeXbowlocal (use the same PC for the rest of the semester) • Compile & download Blink • Make sure Blink works • Finish lab1 report, due by 8pm 2/3, Tuesday