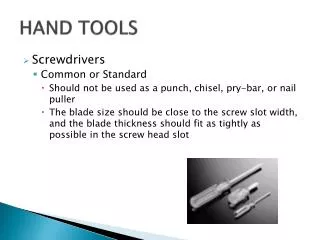
Hand Tools
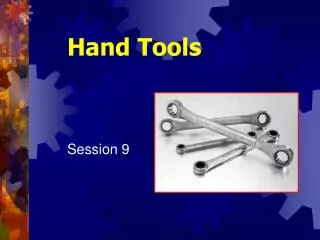
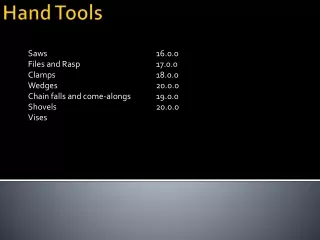
Saws 16.0.0 Files and Rasp 17.0.0 Clamps 18.0.0 Wedges 20.0.0 Chain falls and come-alongs 19.0.0 Shovels 20.0.0 Vises. Hand Tools. Saws 16.0.0. Using the right saw for the job makes cutting easy The main difference between saws is: Shape Number of teeth

Hand Tools
E N D
Presentation Transcript
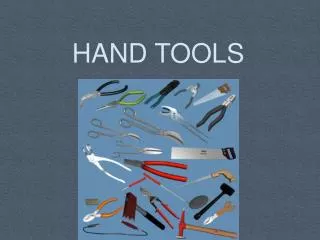
Saws 16.0.0 Files and Rasp 17.0.0 Clamps 18.0.0 Wedges 20.0.0 Chain falls and come-alongs 19.0.0 Shovels 20.0.0 Vises Hand Tools
Saws 16.0.0 • Using the right saw for the job makes cutting easy • The main difference between saws is: • Shape • Number of teeth • Pitch of teeth • The fewer the teeth the faster the cut • Several different types of saws include • Backsaw • Compass (key hole) saw • Coping Saw • Drywall Saw • Hacksaw • Handsaw (crosscut or rip saw)
Backsaw • 8” to 14” long • 11 to 14 tpi • Has broad flat blade • Has reinforced back edge • Used cut miter joints and tenons
Compass • Also called Keyhole saw • Standard blade is 12” to 14” • 7 to 8 tpi • Cuts curves in wood quickly • Fit in tight places • Cuts on push stroke only
Coping • Has narrow blade • 6 ¾” flexible blade • Attached to curved frame • Can be rotated to cut at angles • Blades range from 10 to 20 tpi • Blade can be adjusted to cut on the pull or push stroke
Dovetail • A small backsaw • Blade is 10” • 16 to 20 tpi • Used for cutting fine work • Used for cutting dove tail joints
Hacksaw • Blade sizes ranges from 8” to 16” • 14 to 32 tpi • Sturdy frame with pistol grip handle • Blade tightened with wing nut • Used for cutting through metal • Designed to cut on push stroke
Handsaws 16.1.0 • Also called a crosscut or ripsaw • Standard blade is 26” • 8 to 14 tpi for crosscut • 5 to 9 tpi for ripsaw • Made of tempered steel • Crosscut saw designed to cut across the grain • Ripsaw designed to cut with grain • Cut edge is called kerf
How to use a saw 14.1.1 • Mark the place to be cut with a measuring tool • Support the piece (both ends) to preventing splitting of the kerf • Place the saw teeth on the edge farthest away from you on outside edge of mark • Start the cut with the part of the blade closest to the handle • Use the thumb of the hand that is not cutting to guide the saw so it stays vertical to the work • Place the saw at about a 45 degree angle to the wood, then pull the saw to make a small groove • Start sawing slowly, increasing the length of the stroke as the kerf deepens
How to use a Ripsaw 16.1.2 • Start the cut as with a crosscut saw • Once you started the kerf make the angle steeper-about 60 degrees
Safety Maintenance 16.2.0 • Clean your saw blade with a fine emery cloth • Apply a thin coat of oil • Always lay a saw down gently • Have your saw sharpened by an experienced sharpener • Brace yourself so you won’t be thrown off balance on the last stroke • Don’t let saw teeth come in contact with stone, concrete, or metal
Files and Rasps 17.0.0 • Used to: • Cut • Smooth • Shape • Files have slanting rows of teeth • Rasps have individual teeth • Made from hard tempered steel • Sized by length minus the handle • Available in square, flat, round, half-round, and triangular shapes • Files for soft material have very sharp teeth for hard materials they are more blunt and closer together • Never use a file without a handle • Files classified by the cut of their teeth • Single-cut and double cut • Rasp-cut • Curved teeth
File identification of parts 1 Point Belly Heel Length Tang These are parts common to almost all files 2 3 4 5
Various Files and Rasps • Number 1 is a rasp • Other three are files • Handles are shown At the bottom of page 1 2
How to use of file or rasp 17.1.0 • Mount piece to be filed in a vise@ comfortable height • Don’t lean over your work • Hold file with handle in right hand (if right-handed) • For average work place thumb on top and two finger underneath. For heavy work use full hand on point of file • Apply pressure on forward stroke only • Raise the file of piece or backstroke to prevent damage to the file or rasp • Clean file by lightly tapping point after each stroke
Safety and maintenance 17.2.0 • Use the correct file for the material being worked • Always put a handle on a file before using it • Brush the filing from between the teeth with a wire brush, pushing in the same direction as the line of teeth after each use • Store files in a dry place and keep them separated to prevent chipping and breaking • Don’t let material vibrate in the vise, it will dull the teeth
Clamps 18.0.0 • Many types and sizes of clamps each designed to solve a different holding problem • Come in sizes from 1” to 24” • Common clamps include • C-clamp • Locking C-clamp • Spring clamp • Bar clamp • Pipe clamps • Hand-screw clamp • Web clamp • Ratchet strap • Quick Grip bar clamp Locking C-Clamp Spring Clamp C-Clamp Bar Clamp
How to use a clamp 18.1.0 • When clamping wood or other soft material place pads or thin blocks of wood between the work piece and clamp to protect work • Tighten the clamp’s pressure mechanism • Don’t force it • Don’t over-tighten it (this can spring the clamp)
Safety and Maintenance 18.2.0 • Store clamps by clamping them to a rack • Use pads or thin wood blocks when clamping wood or other soft materials • Don’t over tighten • Never use a pipe or wrench on handle for leverage • Clean and oil threads • Make certain swivel on end turns freely • Don’t use a clamp for hoisting or pulling work • Don’t use a clamp with a bent frame (discard)
Chain Falls and Come-Alongs 19.0.0 • Used to move heavy loads safely • Chain hoist/block and tackle: • Fitted to an endless chain • Used for lifting heavy loads • Usually suspended from an overhead track • Come alongs: • Is used to move loads horizontally over the ground for short distances
Chain Falls 19.1.0 • Has an automatic brake that holds the load • Brake holds until the lowering chain is pulled • Steel hanging hook is larger than the lifting hook and allows the chain fall to hang • Geared to allow for easy lifting • Hand chain is a continuous loop • Load chain used to lift the load • Attach the load to the hook (safety latch must be in place to prevent loss of load)
Come-Alongs 19.2.0 • As called cable pullers • Use ratchet handle to position load (not to be used for lifting) • Can support loads of 1 to 6 tons • Some use chains and others use cables
Safety and Maintenance 19.3.0 • Follow manufacturer’s recommendations for lubrication of the chain fall or come-along • Inspect before each use • Try out on a small load first • Have a qualified person to ensure you are fastened to a support strong enough to do the job • Don’t lubricate the clutches • Never put your hand near pinch points on chain • Never stand under a load
Shovels 20.0.0 • Almost every craft uses shovels when doing construction • Digging ditches for wiring or plumbing • Digging footings for concrete work of form building • Clean up trash, scrap or slag from welds • Three basic blades • Round-for digging holes or remove large amounts of dirt • Square-move gravel or clean up construction debris • Spade-for moving large amounts of dirt or digging trenches • May have wooden, fiberglass, or even metal • A long handle is 47 to 48 inches and short handle is 27 inches
How to use a shovel 20.1.0 • Select the proper shovel for the job • Place the tip of the shovel or spade at the point where you will begin digging or removing soil • With one foot balanced on the turned step press down and cut into the soil with the blade For Square shovel-Place the leading edge of the shovel blade against the gravel or construction debris and push until the shovel is loaded
Safety and Maintenance 20.2.0 • Always check the handle before using a shovel. There should be no cracks or splits • Use proper PPE including gloves, safety glasses and steel toed boots when digging trenches • Don’t let dirt or debris build up on blade of the shovel • Always rinse of the shovel blade after using it
Pick 21.0.0 • A swing tool similar to an ax • Has a wooden handle 36-45 inches long • Forged steel head • Weighs 2-3 pounds • Long handle picks • Used for digging holes • Short handle picks • Breaking concrete
How to use 21.2.0 • Select to correct pick • Place one hand at the end of the handle and your dominant hand about 2/3 of the way up the handle • For short handle (hard strikes) raise the pick over your head like an ax • For Long handled (normal strikes) raise the pick up to chest height then swing it toward the ground.
Safety and Maintenance 21.2.0 • Make certain head is secure in handle • Make certain no one is in swing path • Use appropriate size pick for job • Use over the head swing only when necessary • Wear eye protection
Wedges • Made from hard rubber, plastic, wood, or steel that is tapered to a thin edge • Used to lift or separate objects How to use a wedge • Choose a wedge that won’t scratch or damage the material • Choose one of proper size • Place wedge at the edge of the object • Check to be sure object is well supported • Strike the heel of the wedge with a hammer
Safety and Maintenance • A wedge can be dangerous if used without proper caution • Wear appropriate PPE including safety glasses and a face shield • Keep your hands away from the heel of the wedge when you are striking it.
Wire Brushes • One of the most common tools in the construction industry • Many different styles of brushes • Carpenters use stainless bristles for cleaning tools • Welders use carbon steel to clean welds • Brass often used for heavy jobs • Do not use a brush for finishing work it will scratch the surface • Keep them clean
Bench Vises • Used for griping and holding tools • Proper use • Place object in the open clamp of the vise • Turn T-handle clockwise to tighten • To loosen object turn handle counter-clockwise
Bench Vise Safety • Fasten vise securely to the bench • Clamp work evenly in the vise • Support the ends of long pieces • Work as close to vise as possible • Keep threaded parts clean • Don’t use the jaws of the vise as a pounding surface • Don’t place hands in vise • Never use a hammer or a pipe as leverage to tighten the vise