Microsoft PowerPoint Topics
Microsoft PowerPoint Topics. Menu Bar Options Create a New Presentation Themes Format Background Slides and Layouts Custom Layout Speaker Notes Content Placeholder Icon Insert Options Drawing Tools Animation – Slide vs. Custom Package the Presentation.

Microsoft PowerPoint Topics
E N D
Presentation Transcript
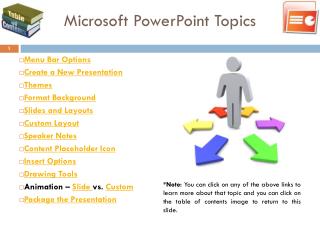
Microsoft PowerPoint Topics • Menu Bar Options • Create a New Presentation • Themes • Format Background • Slides and Layouts • Custom Layout • Speaker Notes • Content Placeholder Icon • Insert Options • Drawing Tools • Animation – Slide vs. Custom • Package the Presentation *Note: You can click on any of the above links to learn more about that topic and you can click on the table of contents image to return to this slide.
Menu Bar Options • Home – Clipboard, Slides, Font, Paragraph, Drawing, and Editing • Insert – Tables, Illustrations, Links, Text, and Media Clips • Design – Page Setup, Themes, and Background • Animations – Preview, Animations, and Transition to This Slide • Slide Show – Start Slide Show, Set Up (Record Narration), and Monitors • Review – Proofing, Comments, and Protect • View – Presentation Views, Show/Hide, Zoom, Color/Grayscale, Window, and Macros • Nuance PDF – PDF Converter 6 • Format – Insert Shapes, Shape Styles, WordArt Styles, Arrange, and Size
Create a New Presentation • Click Start All Programs Microsoft Office Microsoft Office PowerPoint. • Click the Microsoft Office Button which is located at the top left corner and click New. • In New Presentation window, select from available options and templates. *Note: Create option is visible if the template is already on the computer. Download option appears when the template is available for download.
Themes • Click Design tab. • Select and click theme. *Note: Right-click theme for more options. • Click Colors, Fonts, or Effects down arrow and select from available options or Create New… • Click Background Styles down arrow and select from available options or Format Background… *Note: Customize and create new theme by clicking Save Current Theme…
Format Background… • To apply your own background, click Format Background. • Select from options under Insert from: • File… • Clipboard • Clip Art… • Make adjustments to the following: • Fill – Solid/Gradient/Texture/Picture Fill, Stretch options, and Transparency • Picture – Color, Brightness, and Contrast
Slides and Layouts • Click Home tab • Click New Slide down arrow • Select and click one of the available layout options to insert a new slide with the layout that was selected. • Title Slide • Title and Content • Section Header • Two Content • Comparison • Title Only • Blank • Content with Caption • Picture with Caption • 1_Title Slide Click Layout to change layout of existing slide(s).
Slides and Layouts Reuse Slides • Click New Slide • Select Reuse Slides… • Click Browse to locate and open file with slides you want to reuse • Browse Slide Library… • Click Browse File… (Use this one) • Click to select slide(s) to reuse *Note: The selected slide(s) will be inserted into the presentation after the active slide. • Repeat Steps 3-4 to locate and add slide(s) from other file(s). • Exit Reuse Slides task pane when complete This is similar to Copy & Paste.
Custom Layout • Click View tab and click Slide Master *Note: Slide Master tab will appear. • Click Insert Layout
Custom Layout • Click Insert Placeholder and select from options • Click and drag to draw outline for placeholder *Repeat Steps 3-4 to insert more placeholders • Select placeholder(s) • Click Format tab • Click Align and select from options • Click Rename • Enter name and click Rename • Click Save As • Enter name for new layout • Select PowerPoint template for Save as type • Click Save
Speaker Notes As you develop the content on your slides, type your notes in the notes pane, below the slide. You can enlarge the notes pane so that it’s easier to work in by dragging the split bar. Your notes are saved in a notes page, which contains a copy of the slide along with the notes. This is the page you print to refer to as you give the presentation. Use speaker notes to elaborate on the points on a slide. Good notes can help you keep your audience engaged and prevent text overload on the slide.
Content Placeholder Icon Insert Table Insert Chart Insert SmartArt Graphic Insert Picture from File Insert Clip Art Insert Media Clip Option 1: Click icon to insert content or click anywhere in the box to add/edit text. Option 2: Click Insert tab to view available options.
Charts • Column • Line • Pie • Bar • Area • X Y (Scatter) • Stock • Surface • Doughnut • Bubble • Radar Option 1: Click icon to insert content. Option 2: Click Insert tab to view available options.
SmartArt Graphics • List • Process • Cycle • Hierarchy • Relationship • Matrix • Pyramid Option 1: Click icon to insert content. Text Pane Option 2: Click Insert tab to view available options. *Note: Use Hierarchy to create an Organizational Chart.
Convert List to SmartArt Sample List • Managing Director • Sales & Marketing Director • Production Director • Factory Manager • Quality Control Manager • Human Resources Director • Finance Director • Management Accountant • Financial Accountant Example: Organizational Chart Try it out… • Create a list of people in your organization • Make sure the textbox with the list is the ‘active’ textbox • On Home tab, click Convert to SmartArt • Select and click Organization Chart
Picture/Clip Art/Media Clip Picture Files Format JPG, JPEG, GIF, TIFF, PNG, BMP, and more Media Clip Files Format MPEG-1, MPEG-2, MPEG-4, AVI, MOV, AVCHD, H.264, MTS, DivX, DivX HD, Xvid HD, MKV, RMVB, WMV9, TS/TP/M2T Option 1: Click icon to insert content. Option 2: Click Insert tab to view available options.
Insert - Options • Tables • Illustrations – Picture, Clip Art, Photo Album, Shapes, SmartArt, and Chart • Links – Hyperlink and Action • Text – Text Box, Header & Footer, WordArt, Date & Time, Slide Number, Symbol, and Object • Media Clips – Movie and Sound Try it out!
Insert Sound • Click Insert tab • Click Sound down arrow • Select Sound from File… • Locate file • Double-click to insert file into slide • Select Sound from Clip Organizer… • Search for sound in Clip Art task pane • Click to insert sound clip into slide *Note: Step 3 and Step 4 are interchangeable. • Select sound icon to enable Sound Tools Options menu bar • Click Animations tab to select Custom Animation Look and listen for your options. Enjoy! Before the sound is inserted, you’re prompted on how you want it to start. The sound appears as a sound icon on your slide; it plays upon insert. Double-click to double-check if sound works.
Drawing Tools • Click Format tab • View and select from available options • Insert Shapes • Shape Styles • WordArt Styles • Arrange • Size Insert Shapes Shape Styles WordArt Styles Rotate Flip Vertical Send to Back
Slide Animation • Click Animations tab • Click to view more options for Transition to This Slide • Hover over an option to preview its animation • Click to select and apply animation to current slide *Note: If you want the same animation for all slides, click Apply To All.
Custom Animation • Click Animations tab • Click Custom Animation • Select content (Table, Chart, SmartArt Graphic, Picture, Clip Art, Media Clip, textbox, text, etc.) • In the Custom Animation pane, click Add Effect • Select from available options (Entrance, Emphasis, Exit, Motion Paths, etc.) • Under Modify effect, select from available options for: • Start • Property • Speed • Repeat Steps 3-6 for other content(s) throughout the presentation • Exit Custom Animation pane upon completion
Package the Presentation • Click the Microsoft Office Button • Point to Publish; select and click Package for CD. • In the dialog box that opens, make selections for what you want to be included in the package, and copy your file or files to either a folder or a CD. *Important: Always save your presentation before packaging it to a folder or CD. The PowerPoint Package for CD feature bundles your presentation file and any other files you need and copies them into one folder or directly to a CD. If you copy your files to a folder, you can burn the folder to a CD later. You can also copy the files to a network server that you have access to from your presenting computer.