Download
1 / 68
780 likes | 1.73k Vues
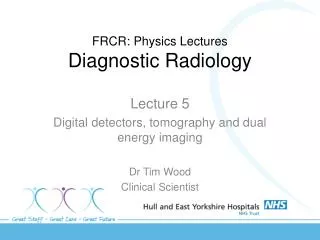
FRCR: Physics Lectures Diagnostic Radiology. Lecture 5 Digital detectors, tomography and dual energy imaging Dr Tim Wood Clinical Scientist. Overview. What is a digital image? The advantages of digital The disadvantages Computed Radiography (CR) The theory of CR

E N D
FRCR: Physics LecturesDiagnostic Radiology Lecture 5 Digital detectors, tomography and dual energy imaging Dr Tim Wood Clinical Scientist
Overview • What is a digital image? • The advantages of digital • The disadvantages • Computed Radiography (CR) • The theory of CR • The advantages and disadvantages • Digital Radiography (DR) • The theory of DR • The advantages and disadvantages • DR vs CR • Tomography • Dual energy imaging
The story so far… • We know how X-rays are made in the X-ray tube and how they interact with the patient • We know how we control the quality and intensity of the X-ray beam, and hence patient dose, with kVp, mAs, filtration and distance • We discussed the main descriptors of image quality • Contrast • Spatial Resolution • Noise • Discussed ways to improve contrast by minimising scatter and using contrast agents • Remember, there is always a balance between patient dose and image quality – fit for the clinical task! • Film is a dying medium for X-ray imaging…
What is a digital image? • A digital image can be thought of as an array of pixels (or voxels in 3D imaging) that each take a discrete value • The value assigned is dependent on the X-ray intensity striking it • Depending on its value, each pixel is assigned a shade of grey • Pixel size may determine the limiting spatial resolution of the system
Why bother with digital? • Film has been used since the beginning, so why are we changing to digital techniques? • Increased latitude and dynamic range • Images can be accessed simultaneously at multiple workstations • Viewing stations can be set up in any location • Uses digital archives rather than film libraries • Images quicker to retrieve and less likely to be lost • Post processing • Softcopy reporting – lower cost if do not print • No need for dangerous processing chemicals
Disadvantages of digital • Initial cost • Problems with interconnectivity • Lack of information and set up of automatic exposure control (AEC) • Lack of link between exposure and brightness • Potential for dose creep (see following slides) • Generally poorer limiting spatial resolution when compared with film
Dynamic Range - Film • With conventional film, too low a dose will results in a ‘thin’ film • Too high a dose results in a very dark film • Fixed and limited dynamic range – must match exposure parameters to the film being used • Gives a measure of control over patient dose!
With digital, too low a dose will still produce a recognisable image (just a bit noisy!) Similarly, too high a dose will produce a recognisable image (but with very little noise!) Consequences: Less retakes = GOOD Dose creep = BAD – must pay special attention to digital imaging to ensure doses are optimised Dynamic Range - Digital
Detector Dose Indicators (DDI) • The restricted latitude of film gives a clear indication of dose • Too dark a film = overexposure • Too light a film = underexposure • Film has ‘in-built’ quality control of exposure • Digital images will be presented with the greyscale optimised no matter what dose is given • Will always see a recognisable image, but the noise will vary • Can result in dose creep • Increased dose (lower noise) is not punished by the detection medium, so tendency to go for slowly increasing image quality – NOT ACCEPTABLE!
DDI • The DDI has been introduced for digital imaging as an indication of the level exposure on a broad region of the detector • Analogous to the OD of film • The definition of DDI is manufacturer specific! • Some manufacturers have high DDI = underexposure • Some the other way round • Some are a function of the log of dose • Some are linear… • Manufacturers will provide an indication of acceptable range of DDI, but local departments must validate these – DRLs and OPTIMISATION • Operators should monitor DDI of patient exposures to ensure doses remain acceptable
Digital Imaging Techniques • Computed Tomography (CT) • Radionuclide imaging • Film scanner • Computed radiography (CR) • Direct digital radiography (DR) • Flat panel fluoroscopy • Electronic portal imaging device (EPID)
Computed Radiography (CR) • The most common technique for producing digital images • Was the first digital technique available commercially • Exploits storage phosphors which emit light that is proportional to the intensity of the X-rays that hit it, when they are stimulated by a laser beam • Primary reason for being the most common technique is that it is the cheapest (at least in the short term) • Old X-ray sets used for film-screen radiography can be used, provided exposure factors and AECs are adjusted for the new type of detector
CR Stage 1: Image Capture • Image receptor is a laser stimulable phosphor, known as an image plate (IP) • Capture image by irradiating an IP in the same way as conventional film • Does not need a new X-ray system when replacing film-screen (just make sure automatic exposure controls are re-calibrated) • Typically ~40% of X ray photons are absorbed • IPs retain majority of absorbed X-ray energy as a pattern of electrons in meta-stable energy states • The spatial distribution of stored electrons is equivalent to the pattern of absorbed x rays – latent image
Electron Trapping • Photon is absorbed by an electron • Electron can move through conduction band • They can then be trapped in Colour Centres which forms our latent image
CR Stage 2: Image Read Out • Electrons are actively stimulated to release their stored energy • This is done by scanning the IP with an intense laser beam
CR Stage 2: Image Read Out • A red Laser is used as this matches the energy gap between Colour Centre and conduction band • Light in the blue end of the visible spectrum is emitted • Hence, optical separation of input and output light photons • Means a colour filter can be used to prevent laser photons contaminating the output signal • Blue light photons are collected via a photomultiplier tube and digital image is produced
Read Out • Stimulation of IPs with laser causes trapped electrons to transfer to conduction band • These then relax to the ground state, emitting blue light photons
How Does CR work? Conduction band Electron traps X Rays are absorbed Valence band
Photo stimulated luminescence Conduction band Red laser light Blue light Valence band
The read/erasure cycle • The image plate is removed from the cassette inside the CR reader • Scanning or laser achieved with a rotating mirror • The light guide (with optical filter) directs the emitted blue light to a photomultiplier tube, which measures the intensity of the light (proportional to the number of X-rays absorbed) • Whilst repeatedly scanning the plate, it is moved through the laser beam • Once scanned, the residual signal is removed by exposing the plate to a very bright light source (erasure cycle) • Takes about 30-45 s to read and erase an image plate
CR Reader cycle Analogue output
Image quality • Pixel size limits spatial resolution in CR • For small plates (detail required) ~5.5 lp/mm • Large plates (detail not essential) ~3.5 lp/mm • (Film-screen ~8-12 lp/mm) • Other limits to resolution in CR; • Scattering of laser light in the phosphor layer results in detected light from a larger area than expected • Divergence of light emitted before detection • Increases with thickness of phosphor • Some phosphors have needle-like structure to guide light (like an optical fibre), but quite brittle so not for general use
Image quality • Image processing (e.g. edge enhancement) may improve visibility of fine detail • Contrast is determined by the image processing and LUT that is applied (and the window/level the user decides upon)
Digital Radiography • Directly acquire the data in digital format (no separate read-out phase like with CR) • Improves throughput of X-ray systems – could be important in chest clinic, mammo, etc • Most expensive method, as it requires complete dedicated X-ray system • Main technologies: • Phosphor coupled to a read out device – Indirect conversion • a-Se/TFT array – Direct conversion flat panels
Detective Quantum Efficiency • DQE reflects the efficiency of photon detection and the noise added • Every photon detected and no noise added, DQE = 100% • DQE for DR ~65% • DQE for CR and film-screen ~30% • In principle, DR could be used with lower patient doses as it is more efficient at using what is available!
Indirect conversion • Indirect conversion involves converting the X-rays into visible light (in a phosphor), and detecting the resulting light photons (akin to film-screen radiography!) • Either amorphous silicon (a-Si) photodiode TFT array, or CCD for readout • Sharpness limited by both pixel pitch of readout array, and spread of light in phosphor • Usually CsI(Tl) needle phosphors to focus light down to the detector (like mini-fibre optics to minimise spread) • Needle phosphors can be thicker (more efficient)
Indirect flat panels • Phosphor => X-ray to light photons • Light photons detected in photodiode array => light photons to electrical charge • Read out by the amorphous silicon TFT array (discussed after direct conversion) • Can be manufactured as a single panel up 45 x 45 cm2, but in practice tend to be made up of four smaller detectors ‘stitched’ together • Tiled detectors • Requires image processing and interpolation to cover the join between panels
CCD detectors • CCD light detectors (like in a camera) can only be manufactured in relatively small sizes • Usually need multiple CCDs to cover image area (‘tiled detector’), or slot scanning technique • Also thicker than flat panels due to the optics between the phosphor and detector
Direct conversion flat panels • Amorphous Selenium (a-Se) is a photoconductor • Converts X-rays directly to electrons • Deposited directly onto amorphous silicon TFT array • No phosphor, hence no light spread • Resolution governed by effective pixel pitch
Flat Panel Physics • X ray photons reach the panel • These are converted to an electrical charge • Either in the phosphor/photodiode arrangement, or photoconductor layer • Charge read-out by the TFT array • An image is instantaneously produced on the computer screen • Grey levels depend on the charge from each sensor and the LUT/window/level settings
The TFT array • Amorphous Silicon thin-film transistor array • Transistors amplify electrical signals • Electrical charge is stored in the TFT array until release by applying a high potential • Each row of detectors is connected to the same activating potential (gate-line control), and each column to a charge measuring device (read-out electronics) • The activating potential is applied row-by-row, so the timing of the detected signal determines the position of the pixel from which it originates • Each pixel ~100 μm
Advantages of DR over CR • Image displayed immediately to operator in room • Faster • Greater throughput of patients as no intermediate read-out phase • Slightly better resolution (CR limited by laser spot size and scatter) • Harder wearing imaging device (as long as you don’t drop it!) • Or at least that’s the theory…
Disadvantages of DR over CR • Much more expensive • Need to refurbish X-ray room • Less flexible? • Originally, DR with fixed detectors, in carefully controlled ambient conditions, wired directly into the system • Now have mobile DR units with wireless detectors • BUT need to make sure you can get the images off to PACS – secure wireless network? Fixed connection points?
And now for something a bit different… Tomography and Dual Energy Imaging
Tomography • Conventional radiography superimposes structures on the film/detector • Results in; • Inability to determine the depth of structures • Limited ability to resolve the shape of structures • Reduction in contrast • Can resolve depth by using orthogonal projections • In other situations conventional or mechanical tomography may be useful (or going full 3D with CT, MRI, etc)
Tomography • In tomography, only structures in a selected plane of the patient, parallel to the film, are imaged sharply – everything else above and below appears blurred to the point they become unrecognisable • Blurring is produced by simultaneous movement of at least two of; • The tube, • The film and/or • The patient • Actively exploit motion unsharpness that we normally wish to minimise!
Linear tomography • The tube and film/detector are linked by an extensible rod, hinged about a pivot • During exposure, the film/detector moves in a straight line (e.g. right-to-left) along rails, whilst the tube moves the other way • Whilst moving, the tube is rotated so that the central ray always points toward the pivot point • Structures that are in the same plane as pivot point (focal plane) will not move when projected onto the film, producing a sharp image • The projections of structures outside the focal plane will move around on the film, and hence are blurred in the final image
Linear tomography Structures in focal plane maintain same position on the film = sharp image
Linear tomography Structures above and below the focal plane will move from one end of the film to the other = blurred image