Download
1 / 6
0 likes | 9 Vues
Learn how to achieve seamless solid surface joints using Corian adhesives with this expert step-by-step guide by Chromalok. From surface prep to final polishing, discover the tools, techniques, and best practices that ensure flawless, long-lasting results on countertops, backsplashes, and wall claddings. Whether you're a DIYer or a professional fabricator, Chromalok's guide offers essential tips to avoid common mistakes and maximize adhesive strength, durability, and visual appeal. Perfect every installation with confidence.

E N D
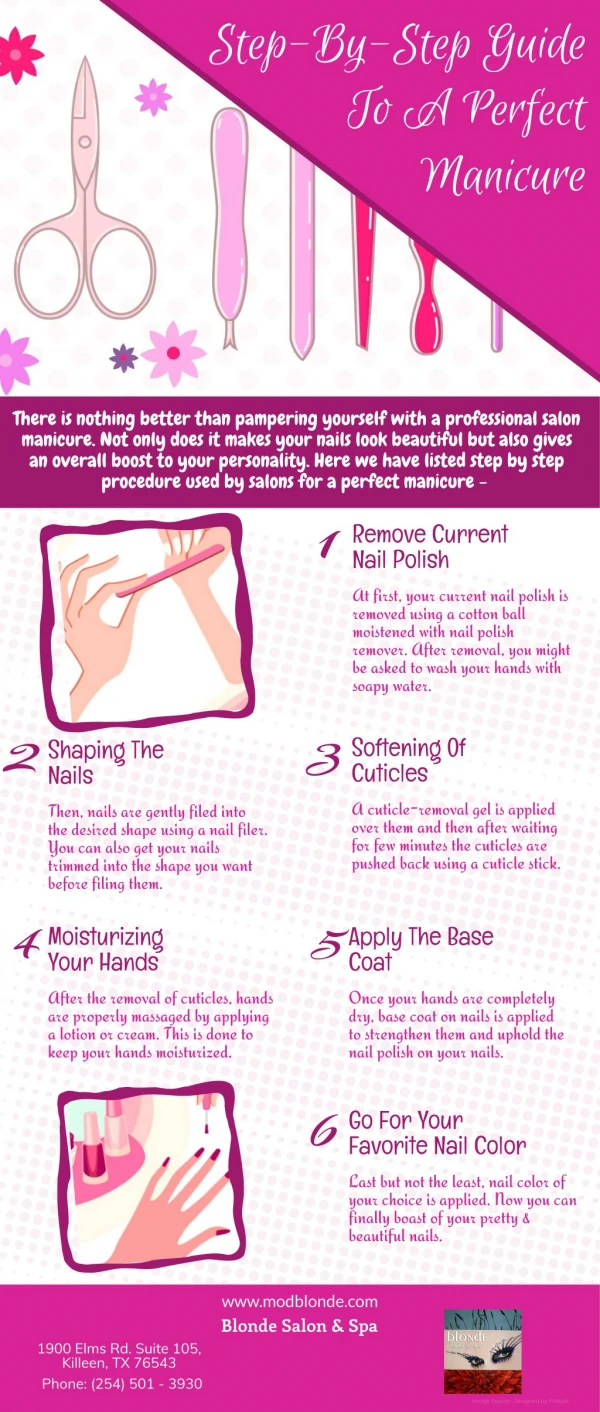
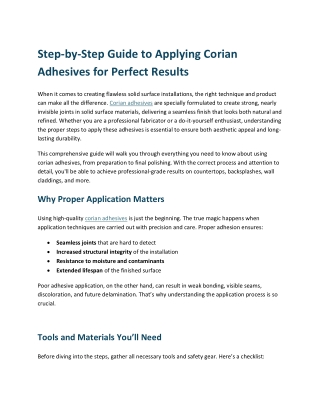
Step-by-Step Guide to Applying Corian Adhesives for Perfect Results When it comes to creating flawless solid surface installations, the right technique and product can make all the difference. Corian adhesives are specially formulated to create strong, nearly invisible joints in solid surface materials, delivering a seamless finish that looks both natural and refined. Whether you are a professional fabricator or a do-it-yourself enthusiast, understanding the proper steps to apply these adhesives is essential to ensure both aesthetic appeal and long- lasting durability. This comprehensive guide will walk you through everything you need to know about using corian adhesives, from preparation to final polishing. With the correct process and attention to detail, you'll be able to achieve professional-grade results on countertops, backsplashes, wall claddings, and more. Why Proper Application Matters Using high-quality corian adhesives is just the beginning. The true magic happens when application techniques are carried out with precision and care. Proper adhesion ensures: Seamless joints that are hard to detect Increased structural integrity of the installation Resistance to moisture and contaminants Extended lifespan of the finished surface Poor adhesive application, on the other hand, can result in weak bonding, visible seams, discoloration, and future delamination. That’s why understanding the application process is so crucial. Tools and Materials You’ll Need Before diving into the steps, gather all necessary tools and safety gear. Here’s a checklist:
Essential Tools: Caulking gun or pneumatic adhesive gun Clamps or vacuum press Masking tape Sandpaper (various grits) Abrasive pads or orbital sander Denatured alcohol or isopropyl alcohol Mixing tips (if using two-part adhesive cartridges) Safety gloves and goggles Materials: Solid surface sheets (Corian or similar) Color-matched corian adhesives Support strips or batons (if needed for stability) Step 1: Prepare the Surface Preparation is key to successful bonding. Start by cleaning and dry-fitting the pieces to ensure proper alignment. Key Actions: Clean all bonding surfaces using alcohol to remove dust, oils, or contaminants. Use fine-grit sandpaper to slightly roughen the edges where the adhesive will be applied. This promotes better mechanical bonding. Dry-fit the parts and mark alignment points using a pencil or non-permanent marker. Apply masking tape on either side of the joint to catch excess adhesive and reduce cleanup time. Step 2: Mix and Load the Adhesive Mostadhesives are two-part systems (resin and hardener) pre-packaged in dual cartridges. These require thorough mixing to activate the bonding agents.
Instructions: Insert the cartridge into the adhesive gun. Attach a new static mixing tip to ensure even distribution of both components. Purge a small amount onto scrap material to ensure proper mixing consistency. Avoid reusing old mixing tips, as they can contain cured residue and impact performance. Remember to wear gloves and eye protection at this stage, as adhesives can irritate the skin and eyes. Step 3: Apply the Adhesive Generously Once the adhesive is ready, apply it generously to one side of the joint. Techniques: Create a continuous bead, making sure it fully covers the bonding area. Apply slightly more than what you think is necessary. Excess can be sanded off, but insufficient adhesive can weaken the bond. Immediately join the two surfaces and press them together firmly. The adhesive should slightly ooze out of the seam, indicating full coverage. Step 4: Clamp for a Secure Bond To ensure the pieces stay in perfect alignment while curing, use clamps or a vacuum press to secure the surfaces. Tips: Position clamps evenly across the joint to distribute pressure. Use wood blocks or soft pads to prevent denting or scratching the surface. Keep the clamping pressure steady and leave the assembly undisturbed during curing. Cure times vary by product and environmental conditions, but most adhesives require 30–45 minutes to set and 24 hours for a full cure.
Step 5: Remove Excess and Sand the Seam Once the adhesive has fully cured, it’s time to focus on finishing. Instructions: Carefully scrape off any large excess adhesive with a plastic scraper. Begin sanding with medium grit (e.g., 120) and gradually move to finer grits (220, 320) for a smooth surface. Use an orbital sander or sanding block to blend the seam into the surrounding surface. The goal is to create a joint that’s virtually invisible to the naked eye. Step 6: Final Polish and Inspection Finish off the process with a thorough inspection and polishing of the bonded area. Final Touches: Wipe the surface clean with a damp cloth to remove any dust or residue. Use a fine abrasive pad or buffing tool for a soft matte or gloss finish, depending on the desired look. Double-check the seam for uniformity, strength, and color matching. At this stage, the joint should be barely noticeable, if visible at all. Best Practices for Long-Lasting Results To get the most out of your corian adhesives, follow these ongoing tips: 1. Store Adhesives Properly Keep cartridges in a cool, dry place. Always check expiration dates before use.
2. Maintain Clean Tools Contaminated tools can interfere with adhesion. Clean your caulking gun and other tools after every use. 3. Work Within Temperature Guidelines Ideal ambient temperature for adhesive application is typically between 60°F and 80°F. Avoid working in extreme conditions unless the product specifically allows it. 4. Minimize Waste Only mix what you need for each project. Once the resin and hardener are combined, they begin curing immediately. 5. Conduct Regular Training If you're managing a team of fabricators, offer routine training to keep everyone up-to-date with best practices. Common Mistakes to Avoid While applying corian adhesives is fairly straightforward, a few common pitfalls can affect the outcome. Avoid these to ensure quality work every time: Skipping surface prep: Even a small amount of residue can prevent proper bonding. Using expired adhesive: Old products may not cure properly or deliver full strength. Inadequate clamping: Weak or uneven pressure can lead to misaligned seams. Ignoring cure times: Rushing to finish the job can compromise durability. Improper mixing: Always use a fresh mixing tip and follow purging instructions to activate the adhesive fully.
Applications Beyond Countertops Though countertops are the most common application, corian adhesives are used in a wide range of projects: Wall claddings in commercial spaces Integrated sinks and basins Shower walls and wet areas Retail display units Custom furniture and fixtures Thanks to their bonding strength and seamless finish, these adhesives offer unmatched flexibility in design. Conclusion Achieving flawless solid surface installations is entirely possible with the right approach, products, and techniques. Whether you're working on a kitchen, bathroom, or commercial space, corian adhesives provide a powerful solution for seamless bonding. By following this step-by-step guide—from preparation and mixing to application and finishing—you can produce strong, beautiful, and long-lasting joints that meet professional standards. Keep your tools clean, follow product instructions, and never underestimate the power of surface preparation. With a little patience and precision, perfect results are well within reach.