QuickBooks Online Banking Internal Support Training
QuickBooks Windows 2009/2010 Online Banking. QuickBooks Online Banking Internal Support Training. Course Agenda. Course Objective : This training course is designed to familiarize you with Online Banking features and functionality within QuickBooks Windows 2009. Module Outline:

QuickBooks Online Banking Internal Support Training
E N D
Presentation Transcript
QuickBooks Windows 2009/2010 Online Banking QuickBooks Online BankingInternal Support Training
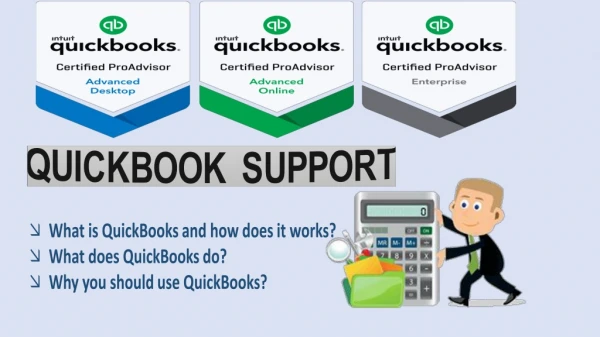
Course Agenda • Course Objective: This training course is designed to familiarize you with Online Banking features and functionality within QuickBooks Windows 2009. • Module Outline: • Getting Started with QuickBooks Online Banking • Online Banking Center • Online Banking Workflow • OFX Introduction
1. Getting Started with QuickBooks Online Banking • Information that is needed to Get Started • Setting Up Online Account Access • Keeping QuickBooks Accounts Up-to-date • Sending Online Payments – Setting Up Bill Pay
a) Information that is needed to Get Started Before a customer can enable QuickBooks account transactions and make online payments they will need the following information: • Customer ID • Personal Identification Number (PIN) /Password If the customer does not have this information they will need to contact their financial institution to obtain it. Note: There is no online transaction download capability with the QuickBooks 2009 Simple Start edition.
b) Setting Up Online Account Access via Direct Connect /Web Connect Once QuickBooks Windows 2009 is installed successfully and a data file is created the following steps can be followed to set up Online Account Access. • Go to the Banking drop down menu Online Banking Setup Account for Online Access. • You will be prompted to close all QuickBooks windows, click YES to continue. • After clicking YES the Set Up Account for Online Service window will appear click the drop down arrow for options to choose from or create a new account click next to continue.
Setting Up Online Account Access via Direct Connect /Web Connectcontinued… • Select your financial institution click Next • If the financial institution support both Direct Connect and Web Connect downloads within QuickBooks, a prompt will appear asking “ How do you want to connect to …(financial institution)” To learn more and compare these options QuickBooks provides a link for detailed information or the financial institution can be contacted.
Setting Up Online Account Access via Direct Connect If the customer does not have this information they will need to contact their financial institution to obtain it. • If you selected Direct Connect and have your Customer ID and Password, if not please contact your financial institution click Sign In to continue. • QuickBooks will retrieve a list of accounts available for you to download select the account you want to download and follow the remaining on-screen instructions. • When the first download completes successfully your account setup is complete click Finish QuickBooks will now launch the Online Banking Center.
Setting Up Online Account Access via Direct Connectcontinued… If your financial institution supports Online Bill Payment, check the Activate Online Bill Payment box below to enable the service within QuickBooks. If the customer does not wish to activate Online Bill Payment at the time of set up, they can choose to activate it at a later date.
Setting Up Online Account Access via Web Connect If Web Connect was selected as the preferred method of connection, the customer will see the window provided Click on Go to My Bank’s Web site QuickBooks will launch a web browser directly to the financial institution’s website. Once at the financial institutions website, follow instructions to upload information into QuickBooks If the customer needs more information on the Web Connect process QuickBooks provides a link for Detailed Instructions.
c) Keeping QuickBooks Accounts Up-to-Date • Once in the Online Banking Center (Banking drop down menu Online Banking Online Banking Center), transactions can be downloaded to keep you QuickBooks accounts up-to-date. • Click the Send/Receive Transactions Enter PIN to download transactions from the financial institution. • Once transactions are downloaded from the financial institution they can be added to QuickBooks by clicking the Add Transactions to QuickBooks button. • The Add Transactions to QuickBooks window will appear, with a summary of transactions downloaded from the financial institution.
Keeping QuickBooks Accounts Up-to-Date continued… • Click on the transaction(s) you wish to add to QuickBooks follow the prompts to insure accuracy click Add to QuickBooks.
d) Keeping QuickBooks Accounts Up-to-Date continued… The online banking center within the QuickBooks 2009 product, is much different than the prior versions. With much feedback from end users our Product Development Team has developed and released an update that allows end users to change the interface of the Online Banking Center. This mode can be accessed from within the QuickBooks Preferences: Edit > Preferences > Checking > Online Banking Click on What’s the difference for more details
Keeping QuickBooks Accounts Up-to-Date continued… Switching to the mode used in prior versions will provide Online Banking customers a “register mode” view when matching and accepting transactions into QuickBooks. This mode is available in QuickBooks Windows version 2009 R8 and current (2010)
d) Setting Up Bill Pay If your financial institution supports Online Bill Payment and you have enabled the service within your QuickBooks, you can create online payments directly from your check register. To get to your Check Register go to the Banking dropdown menu click Use Register • Once at the check register enter the payment date with sufficient lead time (if unsure of how much time is needed contact your financial institution) for the transaction Type type “S” for SEND, which will auto-populate.
Setting Up Bill Pay continued… • Enter the Payee (if it is a new Payee select <Add New> and follow the steps to add the payee to QuickBooks). • Enter Payment amount, Account the payment should post to, and any other information needed for accuracy click Record. • To send your online payment, go to the Online Banking Center you will see the queued payments listed under Items To Send Click Send/Receive Transaction enter your PIN to send the payment.
2. QuickBooks Online Banking Center The Online Banking Center has been updated in QuickBooks 2009. All online banking tasks can be managed from within the Online Banking Center.
QuickBooks Online Banking Centera) Features and Functionality View account information such as, account type and balance. Go online to Send/Receive Transaction. View a list of all transfers, checks, payments, and messages that are waiting to be sent. Write checks, transfer funds, pay bills all from within the Online Banking Center. Click to Add Transactions to QuickBooks.
QuickBooks Online Banking Centerb) Navigation Navigation Online Banking Center access points • QuickBooks Icon Bar • Banking drop down menu Online Banking Online Banking Center
QuickBooks Online Banking Centerc) Video Tutorial Online Banking Video Tutorial There are two Video Tutorials located within QuickBooks Windows 2009 • Click on Video Tutorial for Online Banking • Click on Add Transactions to QuickBooks at the bottom of the Online Banking
3. Online Banking Workflow Items Ready to Send Items Received Send/Receive Transactions Add Transactions to QuickBooks
Online Banking Workflow continued… a) Items Ready to Send Items to Send shows the instructions and messages waiting to be sent to the financial institution, such as: • Online Vendor Payments • Online Transfer of funds • Bill payments • Payment Inquiries Write checks, transfer funds, pay bills all from within the Online Banking Center. View a list of all transfers, checks, payments, and messages that are waiting to be sent.
Online Banking Workflow continued… b) Items Received Items Received list shows the items received from your financial institution, such as • Downloaded transactions • Payments due on your credit card • Replies to your messages • You can view downloaded transactions and match them to the ones in QuickBooks. • You can view and delete the messages and other items. (Some cannot be deleted until you have done the requested action.) Notification of Items Received to be added into QuickBooks Hyperlink to view items downloaded for more detail View QuickBooks and Online Balance
Online Banking Workflow continued.. c) Send/Receive TransactionsAdd Transactions to QuickBooks Send/Receive Transactions • Pay Vendors • Transfer funds • Pay Bills • Download transactions from the FI • Receive FI notifications Add Transactions to QuickBooks • Add transactions downloaded from FI • Delete transactions • Match transactions that are in QB’s
4. OFX What is OFX? • OFX is a standard which describes how financial data is exchanged between financial institutions and their customers over the internet. Why does QuickBooks use OFX? • OFX supports a wide range of financial activities • Consumer and Small Business Banking • Consumer and Small Business Bill Payment • Bill Presentment • Investments, including stocks, bonds and mutual funds • Consumer and small business Loans • Tax download, including W-2, 1098 and 1099 How does OFX work? • OFX sends messages in text format. It uses widely accepted data formatting standards such as SGML and XML, connectivity standards like TCP/IP and HTTP, and security standards like SSL. • OFX features full data synchronization and complete error recovery.
OFX continued… <header goes here…> <OFX> <SIGNONMSGSRQV1> <SONRQ> <DTCLIENT>20080628170000[-4:EDT] <USERID>myUserID <USERPASS>mypass <LANGUAGE>ENG <FI> <ORG>ICH <FID>1002 </FI> <APPID>QWIN <APPVER>1600 </SONRQ> </SIGNONMSGSRQV1> <BANKMSGSRQV1> <STMTTRNRQ> <TRNUID>1001 <STMTRQ> <BANKACCTFROM> <BANKID>999999999 <ACCTID>1000CH <ACCTTYPE>CHECKING </BANKACCTFROM> <INCTRAN> <INCLUDE>Y </INCTRAN> </STMTRQ> </STMTTRNRQ> </BANKMSGSRQV1> </OFX>
OFX continued…Where to locate the OFX file for QuickBooks CONNLOG.TXT Can be located where the company data file has been saved. The default location is C:\Documents and Settings\All Users\Documents\Intuit\QuickBooks\Company Files QBWIN32.dll (ofxlog.txt equivalent for QuickBooks) Is also located where the company file data has been saved. The files are encrypted for the customer’s privacy and security. Use the OFXLogDeob Tool that can be located at http://fi.intuit.com/support/logfileslocation.cfm