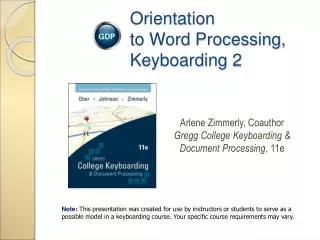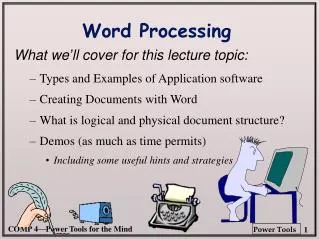
ORIENTATION TO WORD PROCESSING
ORIENTATION TO WORD PROCESSING. East Clarendon High School. Microsoft Word Screen. Microsoft Word is a powerful word processing program used to create documents that contain tables, artwork, and decorative fonts. Title Bar. Menu Bar. Standard Tool Bar. Formatting Tool Bar.

ORIENTATION TO WORD PROCESSING
E N D
Presentation Transcript
ORIENTATION TO WORD PROCESSING East Clarendon High School
Microsoft Word Screen Microsoft Word is a powerful word processing program used to create documents that contain tables, artwork, and decorative fonts.
Title Bar Menu Bar Standard Tool Bar Formatting Tool Bar Horizontal Ruler
Scroll Bar Insertion Point Status Bar
Vocabulary • Title bar – displays the name of the document. Word automatically assigns the name Document 1, Document 2, and so on when a new file is created. When you save the document, you can assign an appropriate file name. • Menu bar – displays a row of available items. When accessed, each menu displays the list of options, and if available, the keystrokes that can be used to access an option
Standard toolbar – displays buttons that you can click to perform common task such as saving or printing a file. • Formatting toolbar – displays a row of buttons you can click to change the appearance of a document as well as information about current formats. • ScreenTips – short descriptions of the toolbar buttons that appear when the mouse pointer rests on the button. • Horizontal ruler – displays page margins, tabs, and paragraph indentions.
Insertion Point – the blinking vertical bar that shows where text will appear when you key. • Status bar – displays information about the current document on screen such as the page number, section number, distance from the top of the page, and so on. • Mouse pointer – shows where the mouse is located on the screen. Its shape changes with the tasks being performed.
End-of-document marker – indicates the point where the document ends. • Scroll bars – are used to move through a document quickly and to display parts of the document not currently visible on the screen.
Opening A File • Click on the Open button on the standard toolbar. It is the round circle at the top. • Click Open. The names of the last four documents you opened are displayed at the bottom of the drop-down File menu. To open one of these files, simply click the document name.
When you click Open your screen will look like the above picture.
If your file is on a disk in a drive, for example a removable disk, click the down arrow in the Look in box and select the drive. Then choose Open or double click on the file name.
You must open either an existing document or create a new document. To create a new document: On the standard toolbar click New. A task pane window appears on the right side of the document . From the task pain, choose New, Blank document
Closing A File Word Close Doc Close Task Pane Close Button Ctrl F4 If the file is a new document or changes have been made a dialog box will appear asking if you want to save changes
Moving In a File With the Mouse: Click to move insertion point. With Keyboard: Use arrow keys, Page Up, Page Down, Press Home, Press End, Press Ctrl + Home, Ctrl + End. Ctrl + G or F5 Backspacing Spelling and Grammar Check (F7)
Using The Spelling and Grammar Check • Word has a tool to help check your document for spelling, grammar, and writing style errors. When it finds a word that it does not recognize, it stops, highlights the word, and waits for you either to correct the word or leave it as it is
To use Spelling and Grammar Check • Move the insertion point to the top of the document. • Click the Review tab on the standard toolbar • Click the ABC button
When the Spelling and Grammar tool stops on a word, you must decide whether to: • Change the word to one of the spelling and grammar check’s suggestions • Make necessary changes if the spelling and grammar check’s suggestions are not correct • Choose to ignore the change because the word is spelled correctly • Add the word to the custom dictionary • When the message that the spelling and grammar check is complete appears, choose OK
Word checks for mistakes as you key text. It places a red, wavy underline beneath words it does not recognize, and you can stop to check the spelling immediately or wait until you finish your document. • Place the mouse pointer on the word with the red, wavy underline, and right click the mouse. You will see a list of suggested words at the top of the box along with the choices to Ignore All, Add to Dictionary, or start the Spelling and Grammar Check. • Click the correct spelling of the word to change it, or click outside the box to close it • Move to the next word and repeat the process
This is how the box will look once the Spelling and Grammar Check tool is used.
Saving A File • Save button on Standard toolbar • Click File, Save AS • Ctrl + S • F12
Naming a File • Can be from 1 to 250 characters • Can use letters A to Z • Cannot contain angel brackets < >, asterisk *, backslash\, colon:, question mark ? Or slash /.
Changing Fonts and Font Sizes • The height of a font is measured in points. • One point (pt) is 1/72 of an inch.
Previewing A Document • To save both time and paper, you should always preview your document before you print. • This shows how your document will look when it is printed. • Click print preview on standard toolbar • Click File, Print preview • Ctrl + F2 • Mouse pointer turns into a magnifying glass icon.
Printing A Document • Always save first • Click print button on Standard tool bar • Click file, print • Press Ctrl + P
Selecting Text • Text must be highlighted first • Methods of Selecting Text • Point and drag over text • One word, double-click word • One Line, click area to left of line • One sentence, hold down Ctrlclick anywhere in sentence • One paragraph, double click in the area left of the paragraph or triple-click anywhere in paragraph • Entire Document, triple-click anywhere in area left of document or click edit, select All or Ctrl A • Deselect text, click anywhere on screen or press any arrow key.
Alignment • Left Ctrl L • Right Ctrl R • Center Ctrl E • Justified Ctrl J • Non-Printing Characters • Click show/Hide button • Click tools, Options, View tab and all under formatting marks and OK • Ctrl +Shift+8
Using Help • Provides information about any topic • Click Help button and Show Office Assistance. • Key a word or phrase describing what you want to do and click search.