Download
1 / 80
830 likes | 1.24k Vues
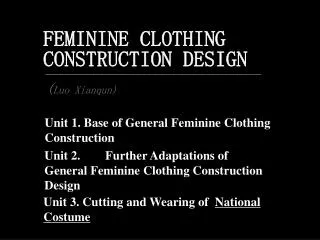
FEMININE CLOTHING CONSTRUCTION DESIGN. ( Luo Xianqun). Unit 1. Base of General Feminine Clothing Construction. Unit 2. Further Adaptations of General Feminine Clothing Construction Design. Unit 3. Cutting and Wearing of National Costume.

E N D
FEMININE CLOTHING CONSTRUCTION DESIGN (Luo Xianqun) Unit 1. Base of General Feminine Clothing Construction Unit 2. Further Adaptations of General Feminine Clothing Construction Design Unit 3. Cutting and Wearing of National Costume
Unit 1. Base of General Feminine Clothing Construction 1.1 The Basic Bodice Blocks (2,3 kinds of Drafting ways) 1.2 Pattern of Feminine Clothing from Good Brand 1.3 Comparison Between Trousers and Jeans Cutting
1.1 The Basic Bodice Blocks (2, 3 kinds ofcutting ways) →Dialectic. →Get down to the cutting ways of general blocks. →Ease (feel close and easy fitting clothing against one’s body). 1.1.1 Bunka Prototype⑴ Drafting of A Bodice Blocka.The nape to waist and the bust girth 20.6 38.5
?S.N.P to breast B/5. ?X-chest, x-back, scye, from body’ measurements. b. The S.N.P to the breast and the x- back, x-chest 24.9 17.8 16.6
?Relation-ship between back and shoulder. ? Chinese houcuo is less than 1.5cm. ? The back opening is wider than the front opening. c.The front and the back and the neck and the shoulder slope, shoulder width 6.9 7.1 2.4- 22° 18° 7.4 1.8 2.6 (? 1/4+0.7)
d. The back dart on the shoulder line and the breast dart on the armhole ?Effect of dart laid in different positions. ?Calcula-tion of dart width. ? Relation-ship between the bust girth and the breast. 1.5 1.8 8 10 18.3° 9
[Discussion 1] Subject: Relationship between the bust girth and the breast. → The breast is comparatively flatter when the bust girth is about 84 cm. → The breast is comparatively higher when the bust girth is about 83 cm. ⑴The Photographs Show the Scanning Women Bodies by SYMCAD Bust girth 84 cm Bust girth 83 cm
⑵ Scatter Graph and Correlation of the Difference and the Bust Girth A scatter graph shows the relationship between two quantities. If two quantities are closely related, the points of their scatter graph will lie roughly along a straight line. and changes in one are accompanied by changes in the other. The differences (Difference = Outline measurement – Linear measurement) and the bust girths of 20 persons measured by body scanner [TC]2 are recorded in the table below. (The interviewees are chosen in an unbiased way).
(Contd) These values can be plotted as points to make the scatter graph shown opposite. Weak, positive correlation: The points are not very close to the line of best fit. This graph shows not that, the greater a person’ bust girth, the greater their breast high. And that span of the person’s differences are large, as graph above, the difference is 0.4, 1, 1.5, 2.5, 4 cm and more when bust girth are about 84 cm. And the majority of persons are in middle size.
e. The armhole and the darts on the waist line → Consult about the classic waist shaping in the forepart. →69+6=75, 37.5. →83+12=95, 47.5. →47.5-37.5=10.
Brief Summary →First of all learn these numerical values by heart. 6.9 2 7.1 1.5, 1.8 8 11 2.4 18° 12.3 7.4 12.3+1.8 22° 2.9 20.5 8 17.8 10 16.6 21.5 2.6,. 5.8 18.3° 2.6 2.3 20.6 9 10.5, 17.5 38.5 47.5 1.4/2 1.1 1.5,1.5 1.8 3.5 1.4
(Contd) →1st, center piece of upper part on front panel. →2nd, side piece of upper part on front panel. →3rd,center piece of lower part on front panel. →4th, side piece of lower part on front panel. →5th, center piece of upper part on back panel. →6th, side piece of upper Part on back panel. →7th, center piece of lower part on back panel. →8th, side piece of lower Part on back panel. →9th, underarm piece close to front part. →10th, underarm piece close to back part. 5th 6th 2nd 1st 8th 4th 3rd 7th 9th 10th
(Contd) →Place a armhole depth line around one’s body. → Measure from C to A for the armhole depth on the front. → Measure from B to A for the armhole depth on the back. → Measure from C to E or G, H for the length of the second half on the front. → Measure from B to D or F for the length of the second half on the back. A C B J G E I F H D
(Contd) →CA minus JA is l1, which is a quasi dart on the side piece of upper part of front panel. →CE (or CG, CH ) minus JI is l2 , which is a quasi dart on the side piece of lower part of front panel. →BA minus JA is l3 , which is a quasi dart on the side piece of upper part of back panel. →BD (or BF ) minus JI is l4 , which is a quasi dart on the side piece of lower part of back panel. l3 l1 l2 l4
→Find out these materials about sleeve cutting: • Shanghai Garment Headgear and Footwear Corporation /Garment Cutting. • Winifred Aldrich/Metric Pattern Cutting. • Academy of Cutting of Paris Compile “Ways of Men’s Clothing Cutting”, • З.К. Амирова, О.В.Сакулина/Конструирование Одежды” ⑵ Drafting of One-Piece Sleeve Blocka. Relationship between the body and the sleeve
? A sleeve must correspond with its bodice, the close sleeve from the close bodice,the easy sleeve from the easy bodice. → When the bodice are postulated, the sleeve is first considered to give a x-cap. (Cap girth = Finished bust girth / 3 ± a ). b. The y-cap (armhole depth on the sleeve ) Armhole Depth on Sleeve=5/6 of the average of actual armhole depth in the plane. In this example, armhole depth on sleeve is about 14.5cm.
c. The sleeve width and the straight lines to draw the cap curves
d. Marking points to draw cap curve F.A.H /4 Point of inflection A 1 Point of inflection B 1
d. The outline of sleeve head and the balance points
Brief Summary →First of all learn these Numerical values by heart.
1. Draft a basic bodice block to a scale of 1:1. (Preserve) 2. Measure the body of one’s own upper part about 30 Figures. (Preserve). 3. Try to make a sample garment. 4. Find out 3~5 materials about bodice block cutting (British, Russian , Singaporean and Chinese). 5. Go to garment factory to consult blouse cutting.
1.2 Pattern of Feminine Clothing from Good brand →As a covering, material has thickness itself. clothing should be longer than one’s part covered. →In direction of length, it needs to add ease, too. ? Relationship between the figure and the clothing length. → 38.5 it will be 39, 40, 41, even more after stretching,. 1.2.1 The Tailored Jacket Pattern from Good brand.⑴ Bodice Block of tailored Jacketa. The clothing length and width (shoulder, bust girth, waist girth, hip girth, chest width and back width) 3 1
b. The Parts of bodice block (shoulder slope, shoulder breadth, shoulder line, panel style line, scye, neckline) →Shoulder breadth and form of pattern of western-style cloths. →Widen breast dart on the armhole to shape clothing more well-balance →Separate into Center piece, side piece, and underarm piece from the front part or the back part even if it was one-piece one. 8.5
→Draw the panel (A mellifluence figure loomed up through the pieces). Front: Transfer breast dart on armhole to side seam. Sketch style lines of panels. Close the dart on the side seam to open panel dart on armhole. Shape the panel lines into a mellifluence figure from figure to numerical value.
→Pucker 9cm dart on the waist line. Back part is more than 60%, about 5.5cm, and the front part is 3.5cm. →Hip girth of finished product is about 98cm or 100cm, and hip girth in one side of bodice is about 2.5cm bigger than breast girth of finished product. These are solved in the front part. →The whole armhole is a little more than 45.5cm: About 21.5cm in the front part, and the back armhole is about 24cm.
⑵ Collar of tailored Jacket ( Rever With concealed stand) a. The working sketch of the collar →Before drafting a collar, mark button position, buttonholes, button stand. → 1.5, 2, 2.5, 3.
c. The back part of the collar →Rectangle l=8.5, w =8. →Trapezium b1= 8.5, b2=11, h= 8. Roll line Stand 2.5 3.5 4.5 11 Sewing line Fall Style line
d. The fall of the collar (overlap, splay or make dart) →Fall height 4.5+1 (tucked-in selvage). →Shorten 0.6cm on the side of roll line of the fall. → 9, 3 / 4, -0.2, -0.2, -0.2; +0.4, +0.4, +0.4; -0.6 (in three quarters distance half neck measurement). (-Winifred Aldrich \Metric pattern cutting)
e. The stand of the collar → Mandarin collar: Draw rectangle, l=19, w =4. Divide into three sections, cut out. Then overlap 0.3, 0.3cm. →Shorten the side of roll line by making darts.
⑴ (B.Z, J.P/ Basic pattern skills for fashion design.) →The length of collar outline is shorten when shoulder points are overlapped . Then the collar will move upward along neck. →Stand height is one quarter of collar height as shoulder points are overlapped approx.5cm. 5cm
⑵ →Stand height is one third of collar height as shoulder points are overlapped approx.10cm. 10CM
⑶ →Many collar styles can be based on the method. → Shaping at collar as shown below. ? fit ? figure
(A.J/ Modern pattern design) → Head dimension: Head breadth approx. 15cm. Head length approx. 18cm. Nape to top approx. 24cm. Head girth approx. 56cm. ⑷
⑶ Tow-piece Sleeve block a. x-cap, y-cap, sleeve length, cuff size, elbow line →Winifred Aldrich/ Metric pattern cutting. →X-capgirth =B’/ 3+1.5cm 95+2.4-1.4=96 96/3+1.5=33.5 →Draw Y-cap by a half AH as shown in diagram. 22.75+()=22.75 →F, 1/4. B, 2/3 -1.5 → Sleeve length will be longer or shorter than one’s subject. 15.5- B 8.7 16.8 4 22.75 56 30 F 3.8
b. Sleeve head (A-F, F-C, C-B, B-A) → Armhole length 45.5cm (21.5, 24): A-F 7.3, F-C 14.3, C-B 11.5, B-A 12.6. → Cap 48- A-F (), F-C 14.3, (0), 15.2. C-B 11.8 (+0.3), 12.3. B-A 12.3, (-0.3), 13.
Brief Summary →First of all learn these Numerical values by heart.
1. Measure detailed dimensions of each part of feminine clothing in more than 3 pieces whose respective sizes are easy, close, and in-between. 2. Measure detailed dimensions of each part of feminine clothing from good brand. 3. Make the datasheet of dimensions from measuring clothing (Preserve). 4. Make 2~3 types of collar, and give an experiment report. 5. Go to garment factory to consult a tailored jacket cutting.
1.3 Pattern of Feminine Trousers 1.3.1 The Basic Trouser Block ⑴ Figure which links terms and locations ?Crotch extension ?Crease line → Crotch depth, waist girth. 1.5
⑵ To complete the front sections and the back sections ?The line about pleat is deflective ? Length of arc (l-r) 2π, h= (l2-r2)1/2, θ =( 2 π l – 2 π r) * 360°/2π l. ?Back crotch line is lower. → Figure, balance, smoothly.
1.3.2 The Jeans block (Close Fitting Trousers) →Winifred Aldrich/ Metric Pattern cutting. →Helen Joseph Armstrong/ Pattern making for fashion design.
→For a personal fit, the front and back crotch level should measure from 2.5 to 4cm more than the upper thigh measurement. → Measure front and back crotch length, spread centre back to increase the measurement to amount needed.
Brief Summary →First of all learn these Numerical values by heart.
1. Study 3~5 methods of trousers pattern (including Chinese style pants (slacks) etc); 2. Draft pattern of feminine trouser (1:1). 3. Compare, and make a jeans (3-5 popular brands of jeans). 4. Draft pattern about culotte, baggy pant, high-waist pant, hip-hugger pant, jumpsuit, leotard (1:1).
Unit 2. Further Adaptations of General Feminine Clothing Construction Design 2.1. A Way of Raglan Sleeve Cutting. 2.2 A Way of Gusset Cutting. 2.3 Changes of Dart and Drape. • Change of Dart • British Practice to the Drape • American Practice to the Drape
2.1.1 The Back of The Raglan Sleeve a. 2.1 A Way of Raglan Sleeve Cutting →B’/4 ±0.5 →Shape, first of all is beautiful
→(B’/3+2.5) /2±1 →Curve of armpit →Curve of cap →Consider to move center line of sleeve cap 2cm forward in the position of sleeve opening b.
2.1.2 The Front of The Raglan Sleeve ?Stretching out ?An angle of Forty five degrees →Length →Smooth →Beautiful shape
1.Make and analyze the sample of raglan sleeve (1:1); and try to cut a raglan sleeve like the form of sleeve of western-style clothes. 2. Collect and summarize the good examples of raglan sleeve designs ( Pay attention to aspect of dimension). (Preserve). 3. Make 1, 2 kinds of designs (1:1), considering raglan sleeve cutting.
2.2 A Way of Gusset Cutting →To enlarge the bust and the depth of the scye. →X-cap (B’/3+4cm) →Line 2, draw an arc of radius AH line →Cut the red line of the gusset from the point of Intersection 2.2.1 The Back of The Gusset a.