Visuals
Visuals. Parent Information CAPSTAR PROJECT Comprehensive Autism Program using Strategies for Teaching Autism Research. Visual Teaching Strategies.

Visuals
E N D
Presentation Transcript
Parent InformationCAPSTAR PROJECTComprehensive Autism Program usingStrategies for Teaching Autism Research
Visual TeachingStrategies Visual Supports are things we see that help us understand our environment. Visual strategies are specifically designed to supplement verbal, social and other environmental cues which are difficult for people with autism to understand. They enable people with autism to get the information they need to understand other people, function independently and behave appropriately. Visual Supports Include: Objects Pictures Written Words Symbols Arrangement of these cues to clarify and give meaning to particular aspects of the environment. We all use visual strategies to get information and organize our lives. We depend on calendars, lists, written reminders, signs, maps and other cues everyday. People with autism simply need more detailed visual information to help them make sense of their surroundings. CAPSTAR
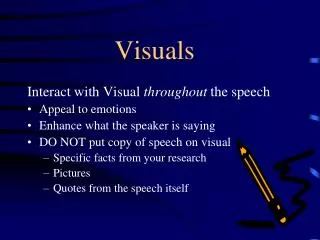
How Do Visual Strategies Help? • The visual remains present (spoken words disappear!), giving the child time to focus attention and get the meaning. • Clear visual cues draw to the person’s attention to what is important, helping him filter out irrelevant distractions. • Visual cue ensures the message is received and processed. • The child can look at the visual cue as many times as he needs, making it possible to remember the information. But will the Child become Dependant on the Visuals, Instead Of Learning to Understand Language? • No! Visual strategies help give your child support while he is learning language. • Visual strategies give the child a concrete association for the words, instead of associating language with sheer confusion. After using visual strategies for a while, many children seek out the materials or become very attached to the cues. This is a testament to how important visual Strategies are to people with autism, and how much they appreciate those supports in their daily lives. CAPSTAR
Daily Schedules Daily Schedules help a child with autism know what is happening during his or her day. There are different types of schedules that can be designed based on the needs of the child. Examples of daily schedules can be found on the following pages. Choosing Schedule Cues • Schedules can be different types of cues such as objects, drawings, photos, or written words, depending on your child’s level of understanding. • Children can “graduate” to differentkinds of schedules as they progress. Example: objects to pictures when they learn that pictures have meaning, pictures to written words when they begin to read. Using schedules will make your child more flexible, not less! It gives him A chance to see and prepare for what is going to happen, instead of changes being Sudden and scary. If there are still upsets, they are easier to deal with at the schedule rather than when you are ready to go! CAPSTAR
Sequence Schedule –Preschool, Early Intervention & Kindergarten Preschool & Early Childhood Kindergarten
Daily Schedule- High School Color coded for different schedule days during the week
Schedule Cues The “Check Your Schedule “ Cue • The child uses a picture or object that indicates ”check your schedule.” The child carries this cue to his schedule, and matches it to a pocket to the left of the schedule. • Suggested check schedule cues: Poker chips, metal lids from frozen juice containers, brightly colored laminate square paper. • A verbal cue “check your schedule” is appropriate for some children, particularly if they are using written schedules or checklists. CAPSTAR
Visual Cues Cue Cards Step Cue Cards Visual Timers
Choosing Schedule Formats: Cues- Which Ones Work Best Traveling Cues (child takes it with him) • For early learners, it is often important to carry the cue with him. Carrying the cue reminds him where he is going, and keeps him from getting distracted along the way. For places like the store where you can’t post a permanent pocket, carry a pocket with you and present it when you arrive, for him to match the cue. Stationary Cues (stay in one place) • For children who can’t retain information you can use formats where that cues do not travel. Consider these formats only for children who can follow some one-step directions consistently, including going a specific room or location when told. For long transitions, such as between home and community locations, you can carry a schedule with you in the car or use an additional mini schedule. How Many Cues Should be Used? • Ideally, show the whole day on the schedule, but this may be too much information at first. Using one cue at a time for individual transitions may be necessary to begin teaching the meaning of the cues and smoothing out individual transitions. • Short chunks of a schedule (2-5) cues help the child get used to the first- then sequence, while not overwhelming him. • When using only a few cues, make sure the last cue is something fun or a reward. This will keep him motivated to get through the transitions, and increase his attention to the schedule! CAPSTAR
Critical Elements of a Schedule • Usable for the child. The child needs to be able to move, check off, or manipulate some aspect of the schedule himself. The schedule should not be just an adult showing him the pictures and pointing to what is next. • Indication of what is happening “now.” Example: the cue is matched to the pocket in the activity area, there is a “now” box on the schedule, “now” is the first item on the written list that has not been checked off yet. • Indication of what is “all done” or “finished.” Example: the cue is gone, because it has been taken off the schedule, and matched to a pocket, the box is checked off on a written schedule, the cue is covered with a flap, or turned over, etc. • Indication of what is happening next or later. Sequences, the longer the better, should be presented as early as possible in the teaching process. Enough cues are used to give preparation for anxiety-provoking activities and to show when preferred activities will occur again. Using Schedules to Make Life Easier by Alternating Favored and Non- Favored Activities • Even though it is easy to transition to play times, show it on the schedule so he knows it is coming! • Follow the most dreaded activities with something rewarding. By looking at the schedule, he can see that he can’t get to the fun stuff until he does this first! • Give lots of warning for dreaded activities. If you are not using a full day schedule, make sure things the child dislikes are shown well in advance so he has time to get used to the idea, instead of it being a sudden and horrible surprise.
Preferred Non-Preferred Schedules Pre School & Kindergarten Elementary
Goal Charts Goal charts are sometimes used as a support system to help the student move through his schedule throughout the day. The goal chart is set up to encourage the student to successfully complete a task and work toward a preferred activity. Each time the student completes the required task he is given a reward for his goal chart. The reward can be anything ( a sticker, check mark, icon, star, etc.) The goal of the reward chart is to keep the student motivated and positive while he completes his daily tasks as he works towards an activity of his choice. This activity can be anything like: reading a book of his choice for 5 minutes, a sensory break, computer time, etc. Goal Chart s Used for Schedule Supports
Goal Chart Examples Check marks are used to check off completed tasks Icons are used to check off completed task
Reward Schedule As each task is completed, the student is given a sticker as a reward for completing the task.
Use Schedules to Build in Flexibility by Placing New and Unexpected Items on the Schedule • Use a “wild card” for the unexpected/ new activities or places. • Paper cue of a distinguishing color or shape. • Picture or star, or other generic shape. • The word “surprise”, or “something different” • Teach “wildcard” purposefully by putting it on the new schedule and transitioning the child somewhere new. Bring a reward or comforting toy so it is a calm experience. Use the “wild card” frequently until it is no big deal to go somewhere new. • When you need to change the schedule, let your child see. Use a consistent verbal phrase, such as “It’s a change.” On picture or object schedules, move the cues. On written schedules, cross out and rewrite change, or use a post-its to add an activity or to cover the activity being replaced. Possible formats for daily schedules are endless…. start with one basic format and then refine it to suit your own child’s abilities.
Communicating “Later” In a Schedule Example: Using a visual to Communicate “Later” The schedule as it was originally set up… but the child repeatedly asks for pretzels before it is snack time. The pretzel picture is paired with the snack cue to show him “pretzels later”.
Mini Schedules Min-schedules can be used for difficult portions of the day or for particular tasks. Following is an example that describes A scenario where a mini schedule was used: Scenario: An example of a Good Use of a Mini-Schedule Sometimes Mom stops at Dairy Queen for a milkshake after They go to the park or library, but she does not want to go to Dairy Queen every time. If they don’t stop, Cindy throws a tantrum in the backseat of the car As they drive past Dairy Queen. Mom uses a mini-schedule in the car. Sometimes it says “library...car…Dairy Queen…home”. Other times it indicates “library…car…home…watch video”. Cindy knows in advance what is going to happen, and though she still is not happy, she can tolerate the disappointment since she knows she can watch a video when she gets home.
Mini Schedules A mini-schedule for a child who hated to leave the TV and come to the dinner table it indicates “eat at table” then “watch movie.” When it was first used, it only indicated “eat at table’ then “watch movie.” “clear table was added later as the child became used to the expectations. Examples: A mini-schedule for use in the car. Each activity card is placed on a key ring for easy access. If the routine changes, the parents can simply change out the Pictures for different ones. This particular schedule shows “car,” “library,” “home,” and “watch T.V.”
A mini-schedule for transitioning to the bus. The child likes that bus, and likes to go to school and home. The transition was overwhelming though, and he had meltdowns every day. This schedule breaks down the individual steps and makes it less scary for him. As he completes each step, a flap is pulled down to cover the picture. When he gets a smiley face, he earns a potato chip. It is used by the teachers and parents to get him on to the bus. Flaps fold down as child completes task
Mini-Schedules for Routines A mini-schedule for morning grooming at home. This was used for a child who could pretty much do each part of the task by herself, but once she got to the sink, tended to wander around the bathroom not knowing what to do next. Routine Schedule
Examples of Schedules Schedule with completed tasks in “finished” slot Book Schedules Flip Fold Schedule
Examples of Mini-Schedules Flip Book Mini Mini Strip Schedules Flip Ring
Calendars As daily schedules or mini schedules give information about immediate events, calendars give information about events farther in the future. • Indicators that calendars might be helpful • Does your child often ask or worry about upcoming events? • Is he mad to go to school some mornings, or does he grab his book bag and lunch box on weekends? • Is he happier when there is something fun to look forward to, such as vacations or weekend outings? • Is he obsessed with holidays, and does he get wound up looking forward to them. • Use calendars with big squares big enough to contain a picture or written information. • Make pictures to indicate special events, home, and school. • Bus for school, generic house for home. • Photos of special places. • Commercially available calendars can be bought at toy stores or teacher supply stores, and have many pre-made symbols. • Set up calendar with special events of the month. • At about the same time every evening, indicate another day is done. Cross out the box, remove the picture, or cover the box with a post-it. • Count the days until the special event, or days left of school in the week..
A calendar indicating school days and weekends. A picture is removed for each day that passes, around bedtime every night. When a special event is coming up, parents can use a post-it drawing to indicate the event, such as going to basketball game. This particular calendar started with only one week showing. The entire month/several weeks were added as the child began to obsess about the holidays and other events that were weeks away.
Calendar used for visually showing the number of days until the child’s father returns home. An icon is removed at the end of each day showing the child that his father will be home soon.
Even sloppy drawings and simple figures on a plain calendar can be effective visual communication. The b us indicates school days, and the house indicates days to stay home. Additional events include a doctor’s appointment, swimming, library, a trip to Aunt Jenny’s for Thanksgiving and Dad’s birthday. Every evening a day is crossed off, and parents talk about events coming tomorrow.
Choice Boards Choice Boards are posters or small boards with pictures of choices for particular situations such as: • Toys to play with • Foods at meal time • Songs to sing To make a choice board, you simply make pictures of possible choices, and then stick them to a poster board. You may need one general board, or separate ones for different situations or categories of items. For children who cannot handle too much information, only use a few pictures. How to Use Choice Boards: • Choice boards enable you to ask the child what she wants. Choice boards assist you in redirecting her during a behavior situation. “You can’t do this, but you can make a choice.” Choice boards can assist you in directing independent play. Instead of saying ”go do something” you have a tool for presenting concrete ideas and helping the child settle into an activity.
Choice Board Example A choice board for directing a variety of play activities. This board is made with simple photographs of the child’s preferred toys and activities.
A choice board made specifically for meeting sensory needs that might otherwise lead to behavior issues. It helps the child choose a positive alternative to aggressive behaviors.
The Picture Exchange Communication Systems also known as PECS are another form of choice boards. The PECS allow the child to initiate a communicative interaction by exchanging, or giving a visual icon or picture to the person he is trying to communicate with.
This choice board was designed for meal times. Here it is being used to help the child communicate which breakfast item she would like. To encourage more communication, small portions can be given-this way the child will have more practice requesting each time she is ready for more.
How To Make a A Schedule Getting Started! • 1. Gather Materials such as scissors, glue stick, poster board, clear contact • paper, Velcro, pictures (photographs, pictures from magazines, computer • programs, food labels, etc.). • 2. Choose pictures for the schedule you wish to create. Keep in mind that a • visual schedule helps children anticipate transitions and activities. It may • outline parts of a day, half-day or an entire day. • 3. Cut your pictures. Mount (glue) on same size poster board or manila folder • for durability. Keep in mind your child’s developmental level. • 4. Laminate or cover the pictures with clear contact paper. • 5. Put a small piece of Velcro on the back center of each picture. Use the same • type of Velcro for the back of the pictures and the opposite type for the • schedule board. • 6. Create a strip/board to hold the pictures using poster board. Make it long • enough to hold pictures for several activities. Laminate and put a Velcro strip • across or down the center. Put Velcro on the backs of the pictures to attach • to the strip on the schedule. If needed add a pocket at the end that • represents “finished” or “all done.” Otherwise pictures can be turned over to • indicate “all done.” In this case, a piece of Velcro goes on the front of the • picture and on the back. TIP: The schedule may be vertical or horizontal. • 7. Velcro the pictures to the schedule in the order activities occur. Depending • on the child, use only a few pictures at a time (e.g., part of a day) OR • individually present the pictures to the child by pulling them off of the • schedule to show them. • 8. Show the schedule to the child. Orient the child to the schedule and model • by hand-over-hand, touching, or pulling off the pictures. Remove pictures • with the child at the end of each activity and place in pocket or turn them • over. • 9. Use the schedule! Keep the schedule near the child and at eye level. Use the • schedule as part of the class routine. Praise child for following the schedule • appropriately. • Lentini,
PhotographTips • 1. Children communicate and understand at different symbolic levels. First, • determine your child’s “visual stage” (or combination of): • Symbolic Level Description of Symbolic • Object Stage: use of actual objects to communicate • Photograph Stage: use of real photographs (photo, digital, • scanned, magazines, catalogs, coupon • adds, etc.) for communication needs • Picture Symbolic Stage: use of colored line drawings (hand • drawn or commercially produced) for • communication needs • Line Drawing Stage: use of black and white line drawings • (hand drawn or commercially • produced) for communication needs • Text Stage: use written form of words and/or • numbers for communication • 2. Add text to photographs, pictures, and line drawings to promote reading. • Text also helps adults use the same language for a particular item. • 3. Present visuals from left to right if your child scans horizontally or top to • bottom for vertical scanners. The orientation depends on how the child • scans. • 4. Photographing tips: • Place item or object on a solid/high contrasting background when • taking photo. Note: If you want to communicate, “go potty” take a • photograph of the toilet; to help the child focus on the main item avoid • including other items in the picture. • Try to take the photograph from the child’s perspective. • 5. Preparing the picture visuals: • Make the “picture” sturdy, easy to handle, and durable by using • cardstock, or glue to a manila file folder, then cover with contact paper or • laminate. • 6. Pictures can be obtained from a variety of places: • Photographs: camera, digital, computer scanning, magazines, catalogs, • coupons, advertisements, Izone Camera, internet sites, commercial • computer programs… • Picture Symbols & Line Drawings: computer scanning, magazines, • catalogs, coupon adds, internet sites, commercial computer programs, • coloring books and dittoes, hand drawn pictures, etc. • Lentini,