Download
1 / 16
160 likes | 314 Vues
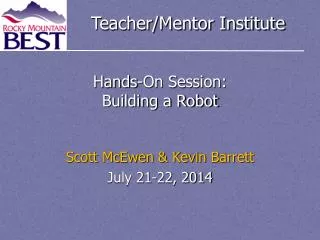
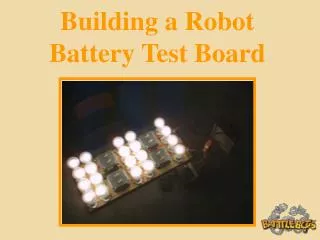
Building a Robot Battery Test Board. First Things First……. …..Build the Light Board. Acquire These Tools. Wire Strippers, Crimps and Solderless Connectors. Necessary Hardware. Connectors 10 gauge eyelets (200) 6 gauge eyelets (8 to 10) Fasteners # 10 Sheet Metal Screws (Box 100)

E N D
First Things First…… …..Build the Light Board
Acquire These Tools Wire Strippers, Crimps and Solderless Connectors
Necessary Hardware Connectors 10 gauge eyelets (200) 6 gauge eyelets (8 to 10) Fasteners # 10 Sheet Metal Screws (Box 100) ¼-20 x 1” Machine Screws, Nuts, Washers (25 to 30) 4” x 1.5” x 0.057” Copper Sheet (2) 4’ x 1’ x 0.75” Particle Board
Necessary Electrical Parts • 12 20A/120V Wall Switches • 6 4” x 4” metal wall boxes • 20 GE 12V/50W Incandescent Light Bulbs • 250V/660W Free-Standing Light Sockets • 150Amp/ 50mV Shunt and Meter • Anderson 6326-G1 175 Amp Double Pole • Battery Connectors for use with #4 Ga wire. • Heavy Duty Barrier Strips
Wiring #4 gauge wire #6 gauge wire (6ft.) #10 gauge wire (15ft.) (red) #10 gauge wire (15ft.) (black) #18* gauge wire (5ft.) *Optional for Shunt/Amp Meter wiring.
Instrumentation This Fluke Clamp on Meter is Available from Radio Shack. It Measure up to 1000 Amperes DC!
This is a Handy Tool for BattleBot Builders The Meter is Easy, Accurate and SAFE!
Light Board Wiring Schematic 12Volt Bulbs And Sockets #6 Wire Double Pole Connector #10 Wire Typ. #4 Wire #4 Wire Copper Terminal Strips #10 Wire #6 Wire #10 Wire Typ. 20A/120V Switches Barrier Strip
Some Detail Pictures Socket Wiring with Solderless Terminals Of the Subassemblies
If This is Your First Time Using Crimps and Solderless Connectors Refer to the Tools and Techniques Chapter to Learn How
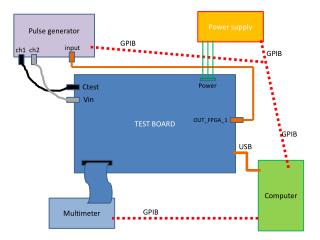
Build the Test Circuit The board you build does not have to look like this to work well.
A Finished Setup Anderson 6326-G 175 Amp Double Pole Battery Connectors 150Amp/ 50mV Shunt and Meter
Using Meters and Shunts Clamp on Ammeters that measure Kilo-amperes are expensive. Lesson 3 of Battery Basics explains how to select and construct components to build an affordable shunt/meter combination like the one on the left. KTA services is a vendor that can supply the parts and know how that will enable you to measure high amperages with low bucks! www.kta-ev.com
Technical Notes A well designed battery test board will perform these functions: • Provide consistent, repeatable current draws • Allow for adjustable current draws • Withstand repeated use without malfunction • Draw heavy currents safely and reliably • Be constructed from readily available parts
Good luck building the Battery Test Board And we hope you enjoy using it