Download
1 / 84
850 likes | 893 Vues
Explore the Revolutionary War, from soldier’s life to fighting tactics, naval forces, espionage, and military strategies. Learn about the weapons used, key battles fought, and the impactful Treaty of Paris.

E N D
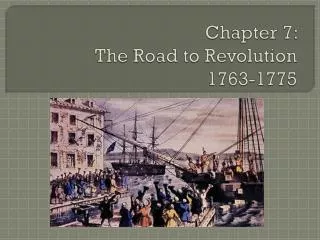
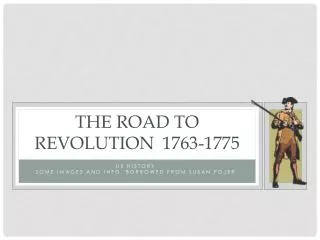
The American Revolution: 1775-1783
Revolutionary War Information Soldier’s Life Espionage Treaty of Paris Washington’s Problem Fighting Tactics Military Strategies Exports and Imports • Force Comparison • Causes of the Revolutionary War • Loyalist Areas • Weapons • Naval Forces • Battles
Naval Forces American British Fifth Rate Ship-of-the-Line Example: HMS Serapis Armament: 20 – 18 lb. Cannons, 22 – 12 lb. Cannons Crew Members: 280 people Displacement: 879 tons Length:140 feet • Brigantine • Example: USS Baltimore • Armament: 12 – 3 lb. Cannons • Crew Members: 8 – 18 people • Displacement: 129 – 144 tons • Length: 88 – 113 feet • Sloop-of-War • Example: USS Enterprise • Armament: 12 – 4 lb. Cannons, 10 Swivel Cannons • Crew Members: 50 people • Displacement: 70 tons • Length: 68 – 75 feet • Third Rate Ship-of-the-Line • Example: HMS Ardent • Armament: 26 – 24 lb. Cannons, 26 – 18 lb. Cannons • Crew Members: 500 people • Displacement: 1379 tons • Length:160 feet • Frigate • Example: USS Bonhomme Richard • Armament: 28 – 12 lb. Cannons, 6 – 18 lb. Cannons • Crew Members:380 • Displacement: 998 tons • Length: 152 feet
Weapons (Small Arms) American British Flintlock Musket “Brown Bess” Weight: 9 lbs. Length: 5 feet Ammunition: ¾” lead ball Range: 50 – 100 yards Rate of Fire: 3 to 4 shots / minute • Pennsylvania - Kentucky Long Rifle • Weight: 7 – 10 lbs • Length: 54 – 70 inches • Ammunition: ½ - ¾ inch lead ball • Range: 100 – 200 yards • Rate of Fire: 2 – 4 shots per minute • Flintlock Pistol • Weight: 2½ lbs. • Length: 19 inches • Ammunition: ¾” lead ball • Range: 1 – 15 yards • Rate of Fire: 2 to 3 shots / minute • Flintlock Pistol • Weight: 2½ lbs. • Length: 19 inches • Ammunition: ¾” lead ball • Range: 1 – 15 yards • Rate of Fire: 2 to 3 shots / minute • Bayonet • Length: 15 inches • Bayonet • Length: 15 inches • Saber • Overall : 30 inches long • Blade: 24 inches long • Weight: 2½ lbs • Saber • Overall: 30 inches long • Blade: 24 inches long • Weight: 2½ lbs
Pennsylvania-Kentucky Long Rifle Weight: 7 – 10 lbs Length: 54 – 70 inches Ammunition: ½ - ¾ inch lead ball Range: 100 – 200 yards Rate of Fire: 2 – 4 shots per minute
British “Brown Bess” Weight: 9 lbs. Length: 5 feet Ammunition: ¾” lead ball Range: 50 – 100 yards Rate of Fire: 3 to 4 shots / minute
FlintlockPistol Weight: 2½ lbs. Length: 19 inches Ammunition: ¾” lead ball Range: 1 – 15 yards Rate of Fire: 2 to 3 shots / minute
Bayonet Length: 15 inches
Saber Length: Overall – 30 inches, Blade – 24 inches Weight: 2½ lbs
Weapons (Cannons) Both Sides • Gun (Cannon) • Weight: 4,660 lbs • Length: 9 feet • Ammunition: 3 – 42 lb. solid shot, Grape Shot • Range: Up to 3,200 yards • Rate of Fire: 3 shots per minute • Crew: 5 – 6 people • Mortar • Weight: 84 to 112 lbs. • Length: 13¼ - 16½ inches • Ammunition: Explosive Shells • Range: 800 – 1,000 yards • Rate of Fire: 2 – 3 shots per minute • Crew: 2 – 3 people • Howitzer • Weight: 3,500 lbs • Length: 50 inches • Ammunition: 8 – 10 inch Round Explosive Shells • Range: 750 – 1,300 yards • Rate of Fire: 2 – 3 shots per minute • Crew: 4 – 5 people
Gun (Cannon) Weight: 4,660 lbs Length: 9 feet Ammunition: 3 – 42 lb. Solid Shot, Grape Shot Range: Up to 3,200 yards Rate of Fire: 3 shots per minute Crew: 5 - 6 people
Howitzer Weight: 3,500 lbs Length: 50 inches Ammunition: 8 – 10 inch Round Explosive Shells Range: 750 – 1,300 yards Rate of Fire: 2 – 3 shots per minute Crew: 4 – 5 people
Mortar Weight: 84 to 112 lbs. Length: 13¼ - 16½ inches Ammunition: Explosive Shells Range: 800 – 1,000 yards Rate of Fire: 2 – 3 shots per minute Crew: 2 – 3 people
Win by Not Losing • We were fighting for our independence, we already declared it. As long as we were not defeated and had an army in the field, we had a chance to win. • We wanted to make them lose the will to fight and give up since the outcome would have very little impact on the life of the average British soldier.
Fighting Tactics American British Large Scale Battles Occupation of Cities Split and Divide the US Southern Strategy • Win by not losing? • Strategic Battles • Fight just enough • Explain/Explain/Explain • Guerilla Warfare
Split and Divide the US • The British hoped to divide the colonies in half and isolate the areas of strongest resistance to the King. They wanted to divide and conquer. In the South, where there was more loyalist support, they hoped that support would help them keep control of the South. Then, they could focus on the other areas of the Colonies and take them over one by one.
Occupation of Cities • Since the British had superior forces, they were able to occupy many key northern cities like New York, Boston, and Philadelphia at various times in the war. This hurt the colonists, but ultimately would prolong the war for the British.
Large Scale Battle • The British almost always had the advantage in terms of numbers of soldiers. So, they would try to engage the Colonial Army in as many open field large scale battles as they could. When they were able to do this, they were generally successful.
Guerilla Warfare • Successfully utilized by American Generals primarily in the South, this tactic involved hitting a larger superior force quickly with smaller units then breaking off the attack as soon as you could get away. This was designed to inflict a high amount of casualties with a low risk of loss of life for the attacker. Avoid large scale battles, hit and run.
Explain/Explain/Explain • Not as much a fighting tactic as a leadership style. Since the Colonial forces were largely volunteer, they did not always take orders the same way as a British Regular would. They needed to have things explained to them in such a way that would make them want to follow the orders. They needed to know the because part, instead of just carrying out the order.
Strategic Battles • Since the Colonial Army was generally outnumbered, Washington and the other generals would try to attack only when they thought they had an advantage or an equal chance of winning. • This strategy didn’t always work, but it was better than just trying to slug it out with the British in battle after battle.
Fight Just Enough • Washington and his generals had to worry about the morale of their troops. They had to make sure that is did not drop, because the soldiers were volunteers and not regular army like the British soldiers. This was not their life, it was something they did. So, the generals wanted to fight enough battles to keep up the morale, but not too many to where the volunteers would lose interest or heart.
Revolutionary War Battles Vincennes Camden Hannah’s Cowpens Yorktown • Lexington and Concord • Fort Ticonderoga • Bunker(Breed’s) Hill • Invasion of Canada • Battle of Quebec • Invasion of New York • Trenton • Saratoga • Monmouth
British Invasion/Occupation of New York • This takes place over a series of battles including Long Island and Brooklyn Heights in 1776. Washington and his men barely escape capture by the overwhelming British force led by General Howe by rowing to Manhattan and evading capture. Washington loses the largest seaport to the British, but still has an army.
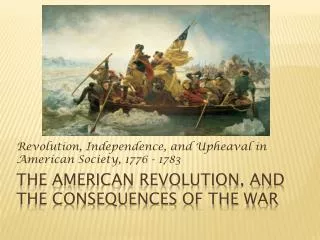
Washington Crossing the Delaware Painted by Emanuel Leutze, 1851
BATTLE OF TRENTON • General Washington crossed the Delaware River in the middle of the night and was able to sneak up on the German Hessians and take the city of Trenton with very little loss. This allowed the Colonial Army to gain much needed supplies and to improve their morale.
Vincennes • Clark and his men faced a grueling march to recapture Vincennes from the English. They were facing a British officer that was not liked by the locals. Clark was able to sneak up on the fort and make it appear that he had more than 1000 men. He laid siege to the fort and eventually Hamilton surrendered. Hamilton supposedly had tears in his eyes when he realized he surrendered to an inferior force.
Monmouth • The last major engagement between the Colonial Army and the British in the North. • Despite Lee’s efforts to lose this battle, Washington is able to salvage victory. • Washington attacks the rear of General Clinton’s men and flank and is able to inflict a lot of damage. • Patriot Victory
Saratoga A modern-day re-enactment
Saratoga • General Burgoyne lead a demoralized and tired group of soldiers against Gen. Gates’ Army that had dug in. • Burgoyne was defeated and forced to surrender. • The Americans proved to the world that they could stand up to the British and defeat them • The French started to provide aid to the Patriots.
Battle of Quebec • The hope was that by taking Quebec, the Canadians would join forces with the Colonists against Britain. • Carleton told any resident that wouldn’t help fight the Americans that they would be forced to leave • Arnold/Montgomery/Morgan were unsuccessful in taking the city and many were killed or captured including Montgomery and Morgan.
Bunker (Breed’s) Hill The British suffered over 40% casualties.
Bunker (Breed’s) Hill • First battle of the Revolutionary War. Prescott dug the Colonials in at Breed’s Hill. He “gave” the command to not fire until they saw the whites of the British eyes. They had limited supplies, and this would make each bullet count. They repulsed two British assaults, but lost the hill after a third assault. However, they showed that they could stand up to the British and the war would not be quick.