Essentials of Wireless Communications and Java Platforms
Explore the world of wireless communications and Java platforms with an in-depth overview of technologies and specifications. Learn about local and wide-area wireless devices, and understand the nuances of Java 2 Platform's three elements. Discover the configurations, profiles, and optional packages in Java 2 Micro Edition (J2ME) for small devices like pagers and mobile phones. Stay updated on the J2ME Universe and its branches based on various configurations. Dive into JSR 185 and the Java Technology created for the Wireless Industry. Enhance your knowledge of the wireless and Java realms with this informative guide.

Essentials of Wireless Communications and Java Platforms
E N D
Presentation Transcript
Introduction to Mobility Java Technology Mobile and Wireless Networks
Overview of Wireless Communications • wireless communications can be split into two types: • Local areaAll of these devices operate over short distances, typically just a few meters. A local device is similar to a key fob with a button that unlocks a car, a 900 MHz cordless phone, a radio control toy, or a Bluetooth network. • Wide areaWide area wireless devices operate effectively over a much greater area. A pager or mobile phone is a good example
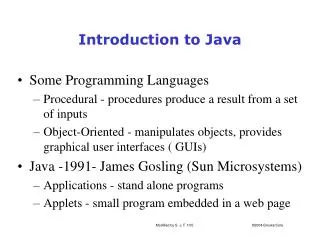
Overview of the Java 2 Platform • The Java 2 Platform comprises three elements: • The Java programming language • A virtual machine forms the foundation of the Java platform. • an extensive set of standard application programming interfaces (APIs) rounds out the Java platform. • The Java Community Process (JCP) • Specifications for J2SE, J2EE, and J2ME are developed under the aegis of the Java Community Process (JCP). A specification begins life as a Java Specification Request (JSR). An expert group consisting of representatives from interested companies is formed to create the specification. The JSR then passes through various stages in the JCP before it is finished. Every JSR is assigned a number. J2ME specifications are commonly referred to by their JSR number.
Overview of the Java 2 Platform • the Java platform comes in three flavors: • Java 2, Standard Edition (J2SE) is designed for desktop computers. Most often it runs on top of OS X, Linux, Solaris, or Microsoft Windows • Java 2, Enterprise Edition (J2EE) is a comprehensive platform for multiuser, enterprise-wide applications. It is based on J2SE and adds APIs for server-side computing. • Java 2, Micro Edition (J2ME) is a set of technologies and specifications developed for small devices like pagers, mobile phones, and set-top boxes. J2ME uses subsets of J2SE components, such as smaller virtual machines and leaner APIs.
Overview of J2ME • J2ME is a platform, a collection of technologies and specifications that are designed for different parts of the small device market. J2ME, therefore, is divided into configurations, profiles, and optional packages. • Configurations are specifications that detail a virtual machine and a base set of APIs that can be used with a certain class of device. A configuration, for example, might be designed for devices that have less than 512 KB of memory and an intermittent network connection. The virtual machine is either a full Java Virtual Machine (as described in the specification) or some subset of the full JVM. The set of APIs is customarily a subset of the J2SE APIs. • A profile builds on a configuration but adds more specific APIs to make a complete environment for building applications. While a configuration describes a JVM and a basic set of APIs, it does not by itself specify enough detail to enable you to build complete applications. Profiles usually include APIs for application life cycle, user interface, and persistent storage. • An optional package provides functionality that may not be associated with a specific configuration or profile. One example of an optional package is the Bluetooth API (JSR 82), which provides a standardized API for using Bluetooth networking. This optional package could be implemented alongside virtually any combination of configurations and profiles.
The J2ME Universe Today • J2ME has two main branches. The first is based on the Connected, Limited Device Configuration (CLDC). This configuration is for small wireless devices with intermittent network connections, like pagers, mobile phones, and Personal Digital Assistants (PDAs). The Mobile Information Device Profile (MIDP), which is based on CLDC, was the first finished profile and thus the first finished J2ME application environment. MIDP-compliant devices are widely available. • The other major branch of the J2ME tree is based on the Connected Device Configuration (CDC). This configuration is for larger devices (in terms of memory and processing power) with robust network connections. Set-top boxes and internet appliances are good examples of CDC devices, although high-end PDAs like the Sharp Zaurus also fit this configuration well. The Foundation Profile extends CDC and serves as the basis for several other profiles. It provides fundamental APIs gleaned from J2SE, including classes and interfaces from java.lang, java.io, java.security, java.util, and more. For a list of J2ME terms and definitions, see our glossary.
About Stacks and JSR 185 • Devices implement a complete software stack, which usually consists of a configuration, a profile, and optional APIs. • JSR 185, Java Technology for the Wireless Industry, addresses this question by assembling other building blocks into a complete application environment. JSR 185 mandates CLDC 1.0 or 1.1, MIDP 2.0, and WMA. Support for MMAPI is optional. This helps nail things down for developers; on a JTWI device, the developer has a clear understanding of what APIs will be available. The following figure shows a JSR 185 stack:
The Scope of Wireless Java Technology • That said, some common misconceptions about wireless Java technology need clearing up: • Wireless Java technology and J2ME are not the same thing. On the one hand, J2ME encompasses more than just wireless devices. While some parts of J2ME are expressly designed for wireless devices, other parts are not--CDC devices are likely to have standard Ethernet connections. On the flip side, wireless Java technology is not confined to J2ME alone. You could have a laptop or palmtop computer running J2SE applications, connecting to other computers via an 802.11 LAN. • MIDP is not all of J2ME. MIDP is the first finished profile and has the first installed base of devices out in the world, so people sometimes assume that you are talking about MIDP whenever you talk about J2ME. As you can see from the diagram above, though, J2ME has many facets; MIDP just happened to cross the finish line first. • MIDP is not all of wireless Java technology. The Java platform offers plenty of choices for wireless programming: Personal Profile, J2SE
Why Use the Java Platform for Wireless Development? • The Java platform is safe. Java code always executes within the confines of the Java Virtual Machine1, which provides a safe environment for executing downloaded code. A binary application could freeze a device or crash it (imagine a blue screen on your mobile phone!) By contrast, at worst a Java applications can bring down only the Virtual Machine, not the device itself. • The Java language encourages robust programming. The garbage collector saves programmers countless hours of hunting down memory leaks. Likewise, the Java language's exception mechanisms encourage programmers to create robust applications. • Portability is a big win for wireless Java technology. A single executable can run on multiple devices. For example, when you write a MIDlet (a MIDP application) it will run on any device that implements the MIDP specification. Given the dizzying profusion of wireless devices, not having to maintain a plethora of implementations is a big advantage. Even if a Java application makes use of vendor specific APIs, applications written using the Java programming language are inherently easier to modify for another device than applications written in C or C++. A second benefit of portability is the ease of delivering applications to a device over the wireless network (sometimes called Over-the-air, or OTA, provisioning). Binary applications can be moved from a server onto a device, too, but not safely. Because Java code runs inside the Java Virtual Machine1, code that is downloaded from the network can be run safely. Binary code cannot be contained at execution time and is much less safe.
What You Need • MIDP development tools are widely available for Windows, Linux, OS X, and Solaris. In this article, you'll assemble a development environment based on three pieces of software: Local area • Java 2 Standard Edition (J2SE) SDK version 1.3 or higher. • J2ME Wireless Toolkit. This is a package of tools for building and testing MIDlets. • Text editor. This can be something as rudimentary as Notepad (on Windows) or something more elaborate like jEdit.
Installing the J2SE SDK • You can download the current version from http://java.sun.com/j2se/. The current version is 1.4.2. The J2SE SDK is available for Linux, Solaris, and Windows. • How does the J2SE SDK help you develop wireless applications? First, it provides the Java platform upon which the J2ME Wireless Toolkit runs. Second, it includes a Java compiler and other tools that the toolkit uses to build your projects.
Installing the J2SE SDK • Once you've finished downloading the J2SE SDK, you'll need to install it. In Windows, run the file you just downloaded. The installer asks you some questions and installs the software. If you accept the defaults, J2SE is installed in a directory like c:\j2sdk1.4.2. You should add the bin subdirectory to your path, either in your autoexec.bat file (Windows 95/98) or in the System Properties (Windows NT/2000). • To test your installation, open up a command prompt. Type java -version and see what happens. Here's the output on my computer:
Overview of Wireless Communications • wireless communications can be split into two types: • Local area: All of these devices operate over short distances, typically just a few meters. A local device is similar to a key fob with a button that unlocks a car, a 900 MHz cordless phone, a radio control toy, or a Bluetooth network. • Wide area: Wide area wireless devices operate effectively over a much greater area. A pager or mobile phone is a good example
Installing the J2ME Wireless Toolkit • The next step is to install the J2ME Wireless Toolkit, a set of tools that make it easy to build and test MIDP applications. (You can think of the toolkit as a miniature IDE; it automates several of the tasks related to building MIDP applications.) • Begin by downloading the J2ME Wireless Toolkit from http://java.sun.com/products/j2mewtoolkit/ . Execute the installation file. The installer tries to locate your J2SE SDK; if it's having trouble, make sure you are pointing it to the directory where you installed the J2SE SDK. You will also need to specify whether the toolkit will run by itself (standalone) or be integrated with an IDE. This article assumes you will be running the toolkit in standalone mode. The files for the toolkit will go into c:\WTK20 unless you specify a different directory, and the installer creates shortcuts for various parts of the toolkit.
Installing the J2ME Wireless Toolkit • To run the toolkit itself, select the KToolbar shortcut. You should see the following screen.
Installing the J2ME Wireless Toolkit • The J2ME Wireless Toolkit works with projects, where the end result of each project is one MIDlet suite. The toolkit works with one project at a time. You can change properties of the current project, build the project, and run the project in a device emulator. Several example projects come installed with the toolkit; we'll look at these later. • Let's jump right in the water by creating a new project. Click on New Project in the button bar. The toolkit prompts you for a project name and the name of a MIDlet class in the project. Fill in HelloSuite and HelloMIDlet as shown below.
Create a MIDlet mport javax.microedition.lcdui.*; import javax.microedition.midlet.*; public class HelloMIDlet extends MIDlet implements CommandListener { private Form mMainForm; public HelloMIDlet() { mMainForm = new Form("HelloMIDlet"); mMainForm.append(new StringItem(null, "Hello, MIDP!")); mMainForm.addCommand(new Command("Exit", Command.EXIT, 0)); mMainForm.setCommandListener(this); } public void startApp() { Display.getDisplay(this).setCurrent(mMainForm); } public void pauseApp() {} public void destroyApp(boolean unconditional) {} public void commandAction(Command c, Displayable s) { notifyDestroyed(); } }
Create a MIDlet • Save this code as HelloMIDlet.java in the src directory of your project. On my computer, this file is saved in c:\WTK20\apps\HelloSuite\src\HelloMIDlet.java. • Next, press the Build button in KToolbar. The toolkit will attempt to compile your project. If there are any compiler errors, you'll see them in the text output area of KToolbar. Fix the errors until the project builds successfully. • Now you're ready to test your MIDlet suite. Click on the Run button. You should see a mobile phone emulator pop up:
Create a MIDlet • The emulator is showing a list of MIDlets in the MIDlet suite. This example shows only one MIDlet. Although the name you see here is HelloSuite, the class that will be run is HelloMIDlet. To see where this mapping occurs, go to KToolbar and select Settings.... Then click on the MIDlets tab to see a list of the MIDlets in the project. • Back in the emulator, click on the soft button below Launch to start up the MIDlet. It will display a simple screen like the one below. Click on Exit to leave the MIDlet. Close the emulator window or hit the Escape key to end the emulator session.