Download
1 / 86
860 likes | 881 Vues
Discover new hands-on builds and programming opportunities with the Autopilot robot. Build the robot to drive on a designated path through a sequence of movements. Explore its capabilities and use your engineering skills to solve everyday problems.

E N D
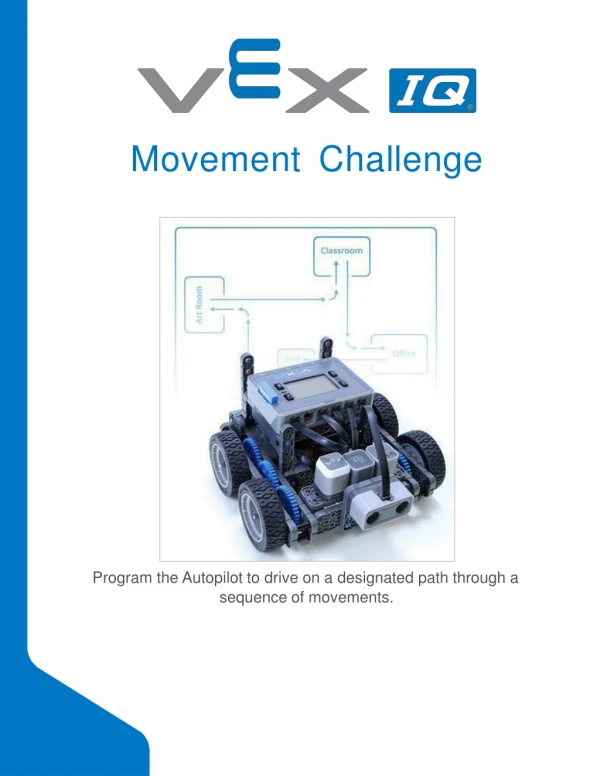
MovementChallenge Program the Autopilot to drive on a designated path through a sequence of movements.
Discover new hands-on builds and programming opportunities to further your understanding of a subjectmatter.
The Completed Look of the Build The completed Autopilot robotbuild. This robot is designed so that it can be built quickly and drive around either autonomously or with the Controller in a short amount oftime.
Steps 1-6 will be repeated for steps 7–12, so it’s possible to make both at once. Count all pieces before starting your build and have them readilyavailable.
When adding the 4x Pitch Shaft, twist the pitch shaft to check for tension while turning. If it spins freely, it is not properly inserted into the motor.
Make sure the gears fit together properly before locking the Beam inplace.
After attaching the wheels, twist the wheel that has the shaft going into the motor. If the wheel spins freely and without tension, the 4x Pitch Shaft has slipped out of place. When adding the 4x Pitch Shaft, twist the pitch shaft to check for tension while turning. If it spins freely, it is not properly inserted into the motor.
Make sure the gears fit together properly before locking the Beam inplace.
After attaching the wheels, twist the wheel that has the shaft going into the motor. If the wheel spins freely and without tension, the 4x Pitch Shaft has slipped out of place.
The orange arrows indicate to turn the assemblyaround. The highlighted blue numbers placed in gear shapes represent the assemblies completed from those specific steps.
Ensure the Smart Radio and Robot Battery are inserted before attaching the Brain to the rest of theassembly. Steps 29-30, when you attach the Smart Cables, make sure they are tucked away so as to not block the Smart Sensors. The orange arrows indicate to turn the robotaround.
Exploration • Now that the build is finished, explore and see what it can do. Then answer these questions in your engineeringnotebook. • How would you use Autopilot in your daily life? What tasks could the robotaccomplish? • Think about the different sensors on the Autopilot and explain how these sensors could help solve a problem in your daily life. (Example: The distance sensor could help find walls in my apartment when it’svacuuming). • Think back to constructing Autopilot, what advice would you give to someone that is starting thebuild? • Think about a place you go in our school everyday. Write down 3-5 steps to get you to that place from here, as if you were explaining it to afriend.
Test your build, observe how itfunctions, and fuel your logic and reasoning skills through imaginative, creativeplay.
RecycleRobotRun Programming Specificity—Putting a design towork Humans are able to read their environment using a combination of sensory information, decisions, inferences, and memories, all of which allow us to create mental maps which are largely qualitative (based on description, rather than measurement). However, robots can only do exactly what you tell them to do—and can only do it correctly—if they are given specific, quantitative (measurable) instructions. These instructions create robot behaviors: the ways that robots act, that range from basic to complex, depending on how the robot is built orprogrammed. As expert direction followers, the more detailed your directions, the better the robot willbe
able to accomplish your goal. In order to accomplish this, you, as the programmer, must design a plan which includes directions with measurement. These measurement-based directions create a blueprint for your robot tofollow. Imagine a Robot HelperScenario... Robots can help humans to do jobs more efficiently and easily. For instance, imagine a school where every afternoon someone has to come around to all of the classrooms to collect the recycling. While a student or a teacher could do this, that would take away from time they could be doing something else. We are going to design a plan and create a project so that a “Recycling Robot” could take on this task for us. The robot will travel to multiple classrooms, then take the recycling to a specific location, and come back to thebeginning. Where to begin? How the design process gets itsstart… When architects are asked to build a new building, they don’t pick up a hammer and start banging away. Before a tool is ever picked up by a contractor or construction worker, the architects spend a lot of time and energy on creating the plans for the building. They have to think about spaces and how they connect and relate to one another. This kind of thinking is called spatialreasoning. First, architects need to know what the purpose of the building is, and how it is going to be used—the functionality. Then they think about the many, many different ways they could achieve that functionality, and what it could look like. Architects create sketches, lists, and design plans that they think might work. They work with others involved in the building, and those plans get revised, and eventually turn into blueprints—the specific, measured directions that will be used to build that particularbuilding.
When you begin to think about a design plan for a robot, you will begin in much the same way. First, you have to know the functionality—what do you want the robot to do? In this case, we want the robot to help us collect recycling. It has to travel around the school, and pick things up, so you need to think about the spaces it is going to travel in and how those hallways and rooms connect to each other. Next, we can think about the many ways to map a path around your school—using sketches or lists to show your ideas helps others that you work with to see and better understand your thinking. Your group might take ideas from several plans and put them together into one. Then, when your group decides on a design plan, you can create the blueprint—the specific instructions that you want the robot tofollow.
OpenEndedSTEMLab Exploration: Design The Builder in each group should get the hardware required. The Recorder should get the group’s engineering notebook. The Programmer should open VEXcode IQBlocks. Hardware/SoftwareRequired: • What will be in yourproject? • You will be creating a plan, or blueprint, for your Recycle Robot and then create a project to execute it. While your robot will not really be going around your school, creating a plan at a smaller scale still requires precision. In order to do this, each plan and project should include thefollowing: • Your classroom is “home base”, where it will leave and returnto • The robot must enter and exit 3classrooms • The project must include the four commands: drive forward, drive reverse, turn left, and turn right. (A successful project will include several of each of thesecommands.)
An indicator that recycling has been picked up (i.e. Touch LED turns on; wait 3 seconds; etc.) • When your group is working on your design plan together, the Builder and Recorder should make sure that all of these requirements are being met by the path youdesign. 1. Map out a Solution—Spatial Thinking inAction • Now that you know the requirements and parameters, sketch out a map in your engineering notebook to show the three stops your robot will make to pick up recycling in theschool. • Be sure to mark the start and end points, and label the classrooms or places that are important. • Use arrows to show the direction and order that the robot will travel. • Use the example sketch as a guide. Remember, this is a plan, so it doesn’t need to be exact, but you may want to add notes or reminders for yourself to help when you begin coding. • Check in with your teacher when you have a completed map in your notebook. The Recorder should have the final version to share with the teacher, and to base your large map off of. • When your teacher approves your sketched map, use the large paper, markers, and rulers to transfer that map to a larger scale that the robot can drive on. Remember to measure the distances that you draw to match the parameters and units discussed. That way, your code will match your map, to help your robot drivesuccessfully.
OpenEndedSTEMLab Exploration: Code 1. Preparing toCode Tutorials and Help can found at the top of the VEXcode IQ Blocksinterface Remember, you can always look to the tutorials for more information about blocks, sequences, and troubleshooting. Use the Help section when you want to know about what a specific block does or how to useit. Using Blocks with Specificity To move a specific distance, use the drive forblock, and change the direction and distance travelled by adjusting the parameters in theblock. Toturneitherrightor leftin anydegreeincrement,use theturnforblock.Again,you can adjust the parameters to suit your designneeds. Open a NewProject The Programmer should start a new project with the Autopilot (Drivetrain) template, name, and save it. Since we will be creating a path for a recycle robot, rename your project “RecycleRun.” For reminders on how to get started see the tutorials or refer to the example programs for reference.
2. Create a List of Steps Using the CommentBlocks What AreComments? Comments are usually added to projects to explain what a programmer wanted parts of the project to do. So they are helpful when collaborating andtroubleshooting. In this case, we are going to use them to help us make a general list of the steps the robot needs to do to complete itstask. What is the First Thing the Robot is Going ToDo? In the project, use the comment blocks to create a basic sequence in your group. The Recorder or Programmer should list the first 10 steps in VEXcode IQ Blocks, with acomment block for each step. See the examplehere. The text in the block does not have to be as specific as the blocks themselves, as this is just a guide to follow when you begin to create the actual codingsequence. • 3. Create the CodingSequence • Now, it’s time to translate those steps into a block sequence. • Your robot should begin the path facing forward, so drag and drop the drive forblock and set the parameters to match the first step in yourpath. • Look for the next step, and drop the turn for block and set the parameters to match the next step in yourpath. • When you get into a room, add an indicator block (like set Touch LED coloror play
sound). Because the Autopilot cannot actually pick things up, the indicator represents the robot picking up the recycling before movingon. • Keep dragging and dropping blocks and setting parameters until you have finished the path for your Recycle Robot. 4. Preparing to Run YourProject • Before you run the project, do you have each of these items ready? The Builder should check each of thefollowing: • Are all the motors and sensors plugged into the correctport? • Are the smart cables fully inserted into all of the motors andsensors? • Is the Brain turnedon? • Is the batterycharged? • For a review of downloading and running your project, see thetutorials. 5. Test Run yourproject • Now it is time to test out your project! Make sure your Autopilot robot is set up with enough space to be able to run the complete program without falling or bumping into another robot or team. • The Operator should now run the first part of the project on the Autopilot robot by making sure the project is highlighted and then pressing the Checkbutton. • How did your test run go? Did your robot drive the path you thought it would? Follow the troubleshooting chart, and continue to create and check sections of code until you have a completedpath.
OpenEndedSTEMLab Exploration: Share • ReflectionQuestions • Congratulations on your project! Now that you have completed a design and coding experience, take a moment to think about the process you just engaged in. In your engineering notebooks, answer the following questions to help you reflect on your choices and your roles in thegroup: • What did you consider when planning the path for therobot? • What indicator did you choose and why? • What part of the process was your or your group’s biggestsuccess? • What part of the process was your or your group’s biggestchallenge?
Become a 21st century problem solver by applying the core skills andconcepts you learned to otherproblems.
Real World Connection • Italy’s TrashRobot • Today’s robots have the ability to do tasks that humans both do not want to do. In Italy’s case, the politics of picking up trash landed cities with trash pile ups and ultimately a less cleaner area to live. The Trash Robot works by arriving a home, asking for a personal ID number that identifies both the user and then asking if the trash is organic, recyclable or waste. Using this robot both helps make trash clean up efficient but also tracks how much trash is being collected through Italian cities. The Trash Robot takes the trash in its belly to a dump site, where no human would want to travel to. Using technology like the Trash Robot, gives humans the ability to use robots to complete tasks that humans do not want to do and cannot do asefficiently. • In the 21st century, engineers are continuing to develop robots to complete tasks that benefit humans in many ways. These advancements have led robots to become widely used in our communities. • There are many benefits for usingrobots: • They are capable of lifting heavy loads withoutinjury. • They are more precise in theirmovements. • They can produce more products in a shorter amount oftime.
They can work at a constant speed with no breaks. • They can perform tasks that are dangerous tohumans. • They can work in hazardous conditions, such as poor lighting, toxic chemicals, or tight spaces.
Competition with a Purpose! A VEX IQ robot playing the Squared AwayChallenge Speed andControl Each year, students can design and build a robot to play against other teams in a game- based engineering challenge presented by the Robotic Education and Competition (REC) Foundation. Tournaments are held year-round at the regional, state, and national levels leading to the VEX Robotics World Championship eachApril. The VEX IQ Challenge is played on a 4’x8’ rectangular field. Teams program their robots to move around the field grabbing, tossing, and placing game pieces in scoring zones in order to earn the mostpoints. In the 2019-2020 challenge entitled Squared Away, teams will have to move balls in the squares as well as on top of the squares. Like Italy’s Trash Robot, the driver will purposefully move and teams will work together to collect and move the squares into the correct color space at the corners of theboard.
Here are some typical behaviors for a VEXRobot: • Moving forward and backward • Turning left andright • Grabbing a gameobject • Precisely placing a gameobject • Sorting between different gameobjects • Throwing or launching a gameobject • The VEX IQ Squared Away Challengefield • There are two types of challenges the teams will tackle. In the Robotic Skills Challenge, teams try to score as many points as possible with their robotic build in two types of matches. Driving Skills Matches are entirely driver controlled and Programming Skills Matches are autonomous with limited student interaction. The second type of challenge is the Teamwork Challenge, in which two robots compete in the challenge as an alliance in 60 second long matches, working together to score the mostpoints. • VEX Competitions give students the opportunityto: • Demonstrate their driving and programmingskills. • Work together as a team to solveproblems. • Meet new people from their community, state, and even othercountries. • Havefun!
Is there a more efficient way to come to the same conclusion? Take what you’ve learned and try to improveit.
Improve Your Project • Refine YourCode • Remember your code from the Play section? We’re going to play around with that code now, to help refine and revise it to better accomplish your goal. This Rethink activity has 3options: • A Sequencing Challenge—to help you think about the code you created, how it works, and why it might notwork. • A Coding Challenge—to help you practice creating coding sequences that work around additionalobstacles. • An Efficiency Challenge—to help you rethink your code and rewrite it to work with fewer blocks. • After your teacher tells your group which challenge to start with, proceed to the next page and follow the steps for thatchallenge.
For all challenges, the Builder in each group should get the hardware required. The Recorder should get the group’s engineering notebook. The Programmer should open VEXcode IQ Blocks. Hardware/SoftwareRequired: • Before you begin theactivity... • Before you begin the activity, do you have each of these items ready? The Builder should check each of thefollowing: • Are all the motors and sensors plugged into the correctport? • Are the smart cables fully inserted into all of the motors andsensors? • Is the Brain turnedon? • Is the batterycharged?
Refine Your Code SequencingChallenge • Set up—The Builder and Driver should set up your map and robot the way you had it when you finished the Play section. Place the robot at the Start point. The Programmer should open the Recycle Run project in VEXcode IQ Blocks. The Recorder should review the task to make sure that your project is meeting all therequirements. • Review—The Programmer should run the project as is. While the robot is driving, the whole group should watch itcarefully. • Troubleshoot—Is the robot moving the way that you expected it to? If not, where is it different? Are there missed steps? The Recorder should review the list of steps you created aloud with the group. As the recorder reads, the Driver should pick up the robot and move it along the steps; and the Programmer and Builder should check the code sequence to make sure it matches the steps that are being read. When you notice a missed step or incorrect block, pause the process to fixit. • Is that the correct block? • Are the parametersaccurate? • Do you need to add more blocks? • Refine—Each time you fix a portion of the coding sequence, the Driver should return the robot to the start position, the Programmer should rerun the project, and the group should watch the robot to make sure the changes are doing what you expected them to. Repeat steps 3 and 4 until your project meets all of the requirements successfully. Check in with your teacher to share your revised code and robotpath. CodingChallenge • Set up—The Builder and Driver should set up your map and robot the way you had it when you finished the Play section. Place the robot at the Start point. The Programmer should open the Recycle Run project in VEXcode IQ Blocks. The Recorder should add the obstacle block to the map in a central location. Check in with your teacher about your obstacle placement before movingon. • Review—The Programmer should run the existing Recycle Run project. The whole group should watch the robot as it moves, and the Driver should stop the project when/if the robot hits theobstacle. • Revise—Locate the point in the comment block list and the coding sequence when the robot met the obstacle. Use the commentblocks to amend the plan to navigate around the obstacle.
Rewrite—The Programmer should then amend the code sequence accordingly— removing, adding, or editing parameters of blocks to match the new plan. When the code changes are complete, rerun the project and watch the robot to see if it moves the way that you intended it to. If it does not, try to troubleshoot within your group before asking your teacher forhelp. • Troubleshooting—Is the robot moving the way that you expected it to? If not, where is it different? Are there missed steps? The Recorder should review the list of steps you created aloud with the group. For each step, as the recorder reads it, the Driver should pick up the robot and move it along the steps; and the Programmer and Builder should check the code sequence to make sure it matches the steps that are being read. When you notice a missed step or incorrect block, pause the process to fixit. • Is that the correct block? • Are the parametersaccurate? • Do you need to add more blocks? • Check in with your teacher to share your new code and robotpath. EfficiencyChallenge • Set up—The Builder and Driver should set up your map and robot the way you had it when you finished the Play section. Place the robot at the Start point. The Programmer should open the Recycle Run project in VEXcode IQ Blocks. The Recorder should review the task to make sure that your project is meeting all therequirements. • What is codeefficiency? • If you needed to get 3 things from your kitchen, you would probably go get all 3 things in one trip, instead of making 3 separate trips. Why? Because it would be moreefficient. • Efficient means working something out without wasting any time, energy, or materials. So how does that connect toprogramming? • Code efficiency means that a project is written to work well and quickly, using the least amount of work, or steps, properly, while still doing its job. It is important because it reduces the risk of a program not functioning well, and in turn, causing problems for other parts of a program that are running around it. The efficiency of a code can be a measure of quality, and when we write projects in VEXcode IQ block, we are often looking for the most “efficient” project as the preferredsolution. • Basically, code efficiency is a principle that means you want to write a code that accomplishes your goal using the fewest commands, or blocks,possible. • Rethink—With your whole group, look at the path you designed for your robot to travel. Is there a shorter route the robot could take? Is there a different way to meet the requirements more quickly? • Revise—Try to amend your code sequence to use 3 less blocks, while still meeting all the requirements. Use these questions to help you find places torevise:
If we remove this block, what will the robotdo? • Is this block redundant? (Repeating something that doesn’t need to berepeated.) • Is there a single block that can do the work of two or three that are in yoursequence? • Are there any blocks or sequences repeated over and over which could be replaced with a loop/repeatblock? • When the code changes are complete, the Programmer should rerun the project and the group should watch the robot to see if it moves the way that you intended it to. If it does not, try to troubleshoot within your group before asking your teacher forhelp. • Check in with your teacher to share your new code and robotpath. • Troubleshooting—Is the robot moving the way that you expected it to? If not, where is it different? Are there missed steps? The Recorder should review the list of steps you created aloud with the group. For each step, as the recorder reads it, the Driver should pick up the robot and move it along the steps; and the Programmer and Builder should check the code sequence to make sure it matches the steps that are being read. When you notice a missed step or incorrect block, pause the process to fixit. • Is that the correct block? • Are the parametersaccurate? • Do you need to add more blocks?
EvaluateandExplain Reading Code Sequences to Choose a Preferred Solution As your class worked on the Play section, you probably noticed that there were many different solutions to the same problem that was presented. That is something that happens often in the world of programming. While there can be different ways to do something, everyone will have a preferred method or solution, and that could be based on a number of factors. In this activity, your group will look at 3 possible code block solutions to a problem, figure out if they work in the intended fashion, then choose a preferred solution from the group and explain why you choseit. The problem: Create a sequence that, when the robot begins at the Start, will travel into and out of all 3 classrooms (in any order) and return to the End point. The robot must navigate around the stairs, and can go through the doorways marked by the small rectangles on the mapimage. • For each solution below, answer these 3 questions in your engineeringnotebook: • Does this code accomplish the task? Why or whynot? • If it does work, what are the advantages of this code over theothers? • What are the disadvantages of this code over theothers? • Most of the time, programming is evaluated on its efficiency, and the preferred solution is one that accomplishes the goal in the most efficient waypossible.
Solution C(metric) What is CodeEfficiency? If you needed to get 3 things from your kitchen, you would probably go get all 3 things in one trip, instead of making 3 separate trips. Why? Because it would be more efficient. Efficient means “achieving maximum productivity with minimum wasted effort or expense.” So how does that connect toprogramming?
Code efficiency means that a program is written to work well and quickly, using the least amount of work, or steps, properly, while still doing its job. It is important because it reduces the risk of a program not functioning well, and in turn, causing problems for other parts of a program that are running around it. The efficiency of a code can be a measure of quality, and when we write projects in VEXcode IQ block, we are often looking for the most “efficient” project as the preferredsolution. • Basically, code efficiency is a principle that means you want to write a code that accomplishes your goal using the fewest commands, or blocks,possible. • In your Engineering Notebook, answer the followingquestions: • With code efficiency in mind, which is your preferred solution andwhy? • Do you think that is the best solution, why or whynot?
Rethink Questions • Answer the following questions in your engineering notebook after completing theactivities. • What are three things you can check to troubleshoot your project, before asking your teacher forhelp? • Read the following stack of code blocks, and draw and write the path the robot will take when the project is run.
Understand the core conceptsand how to apply them to differentsituations. This review process will fuel motivation tolearn.