Download
1 / 13
130 likes | 280 Vues
A PowerPoint visual is essential for your senior project presentation. It enhances interaction and helps you maintain focus on key points. Your presentation must include your name, topic, research question, and goal, along with more than five slides and multiple images. You can also add videos, timelines, and common misconceptions to enrich your presentation. Use complementary colors and ensure images are appropriately sized. Find images and videos from reliable sources, and utilize custom animations for dynamic content. Make a lasting impression with your visual aids!

E N D
Creating A Power Point Visual for Your Senior Project Presentation All of the following instructions can be found on Youtube or Ehow.com, etc… just saying… This will be shown before your presentation (during the time it takes to set up your presentation materials)
Reasons for Having a Presentation Visual • Though your PowerPoint is not the only visual aspect that you will have for your presentation, it is the only visual aspect that is required. • Visuals allow you to have images that you can refer to during your oral presentation in order to allow your audience to have a greater interaction with your topic. • Visuals will also allow you to keep track of all of the points that you wish to make during your presentation. (Think of it as an extra set of visual notes in addition to you regular note cards.)
Power Point Requirements • Must have your name and your topic. • Must have your topic question and topic goal. • Question is what you researched about your topic • Goal is your self-defined real-world application of your topic • Must have more than one image to represent your chosen understandings about your topic • Must have more than five Power Point slides • Must use text/image/slide movement at least once.
Additional Info to Consider Putting Into Your Presentation • General definitions/ explanations of esoteric phrases. (Please find out what “esoteric” means if you do not know.) • Picture/Video of your topic in action. Preferably, this image should be of yourself engaged in your topic in some way. • Timeline of achieving your topic. • Common misconceptions and corrections. • Textual/Visual representations of the personal/social meaning of your topic.
First Program Steps • Step 1: Find and open Power Point application on computer screen (through start menu) • Step 2: Create a new document. • Step 3: Create additional pages by clicking the “New Slide” button or choosing the Insert “New Slide” menu choice. • Your computer screen should now look like this.
Creating Text in Your Power Point • Click on the Text Box button in the toolbar, • OR • Choose “Insert” from the top menu and then select “Text Box” • Adjust size of the text box by clicking and dragging the corners of the box until it is the size that fits your needs.
Image Size and Color • Larger overarching concepts = bigger • Supporting details of concept = smaller • Example • Consider clutter • Color should be Complimentary not Analogous • Color Wheel • Light on Dark or Dark on Light.
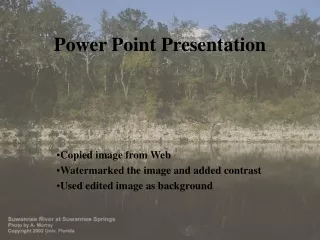
Finding Images and Video • Google Images, Flicker Search, (retain source for crediting). • Video can come from Youtube (via video capture programs) and other sites that have to do with your topic. • Often, Wikipedia will have links to videos concerning your topic at the bottom of the page. • Download images and/or videos to your computer and use “Picture” button or • Insert->Picture…. from top menu. • This is exactly like putting a text box into your page. • Picture Size (aka resolution) • Google Images “Search Tools ->Image Size • Minimum (aprox) 500x400
How to Put Images/Video Into Your Power Point • Click on the Picture Box button in the toolbar, • OR • Choose “Insert” from the top menu and then select ~ “Picture… OR Video…” • Proper File Type: .avi or .wmv • Use file converter to change file type BEFORE inserting • Adjust size of the picture box by clicking and dragging the corners of the box until it is the size that fits your needs.
Saving your Document with Video Embedded • Best Way • “Save As” -> “PowerPoint Show” (you may need to scroll down to find this file type on the save box. • Alternate Way • Put video file onto a USB drive. • AFTER you put the video file on the USB drive, use THAT video file when inserting the video into your slide. • Bring USB Drive to school for presentation.
Making Things Move! • First select the object that you want to have move. (Text, Image, Video, etc) • Choose “Custom Animation” in the formatting Palette: • With your object selected, choose one of the three star choices • Add entrance, exit, or emphasis effect
Your window will now look like this Make any adjustments you want in the drop down windows at the bottom of the window. Start: This allows you to decide if it will happen automatically or when you click the mouse. Property: This will depend upon the effect and will allow you to control the actions of the effect. Speed: This affects speed. Yup.
Power Point Requirements(Again) • Must have your name and your topic. • Must have your topic question and topic goal. • Question is what you researched about your topic • Goal is your self-defined real-world application of your topic • Must have more than one image to represent your chosen understandings about your topic • Must have more than five Power Point slides • Must use text/image/slide movement at least once.