WEAVE ONLINE
WEAVE ONLINE. Guide to: Establishing Assessment Plans and Annual Reports. PURPOSE OF THIS GUIDE. This guide is intended to provide Ramapo College WEAVE online administrative users with clear and simple instructions for completing annual reports and establishing

WEAVE ONLINE
E N D
Presentation Transcript
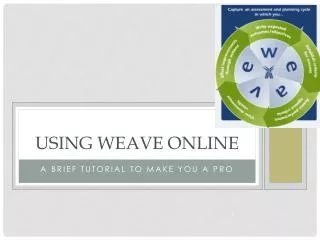
WEAVE ONLINE Guide to: Establishing Assessment Plans and Annual Reports
PURPOSE OF THIS GUIDE This guide is intended to provide Ramapo College WEAVE online administrative users with clear and simple instructions for completing annual reports and establishing assessment plans and records.
WHAT IS WEAVE ONLINE? Write expected outcomes/objectivesEstablish criteria for successAssess performance against criteriaView assessment resultsEffect improvements through actions WEAVE online is a subscription-based software application that lets faculty, staff, and administrators monitor and assess the effectiveness of the institution’s academic and administrative activities. The application supports accreditation, program reviews, strategic plan tracking, and other important quality assurance and quality enhancement activities. It also has a document repository to store evidence and a report printing function.
PLEASE SAVE YOURSELF SOME TIME: WATCH WEAVEONLINE TOURS AND READ WRITTEN INSTRUCTIONS BEFORE BEGINNING
WHAT IS HAPPENING WITH LAST YEAR’S SUBMISSION? All 3-year planning and annual report data that was submitted last year has been entered into WEAVE online for you. Please view the information for your unit and make sure it is entered properly. You may want to shear up your unit goals, objectives, and measures after viewing in the WEAVE format. Please feel free to do so. The information may look slightly different. It was entered to conform to Weave’s model structure. After verifying the 3-year plans submitted for cycle 2008-2009 you will need to complete (for last year’s goals) the Finding &/or Action Plan.
Assessment Plans include statements of mission, goals, outcomes/objectives, measures, and target achievement levels and will be finalized at the beginning or very early in our assessment cycle. September 2008 you submitted your first 3-year plan. You will now be keeping or changing you plans for 2009-2010 and 2010-2011 and adding your new plan for 2011-2012. Four elements of the Assessment Plan: Mission Goals Outcomes/Objectives Measures & Achievement Targets At the conclusion of an assessment cycle, additional information is added to the Assessment Plan – findings, action plans, analyses, annual reports, supporting documentation, etc. The Assessment Plan combined with these end-of cycle additions constitutes and “Assessment Record.” This is the first time you will be submitting the outcomes for your 2009 objectives and creating an assessment record. Threeelements of the Assessment Record: Findings & Action Plans Analyses Supporting Documentation
PLEASE NOTE: LOCAL NEWS – PLEASE CHECK THIS AREA OFTEN FOR IMPORTANT MESSAGES. Local News is located on the “Home” page. EDIT BUTTON – There is an edit button available in all areas so you can go back and make changes. ENTRY STATUS BUTTON– Where you indicate to status of your entries as Draft/in progress or Final. Only indicate Final after your supervisor has approved your plan. EDITING LOG - Use the editing log (500 characters) to provide a track record of minor edits for data that has been set to 'keep active’ and therefore persists through cycles. APPROVED BUTTON – YES or NO Completed by your supervisor For cycle 2008-2009 the “Approval “ button will indicate YES. For the 2009-2010 cycle your supervisor will have to complete. FEEDBACK FROM REVIEWER – Messages re your plan from your supervisor, changes requested, other suggestions, etc.. ENTITY TREE – The Entity Tree shows the hierarchy of the individual organizational units (entities) within WEAVE online. The placement of entities within the tree has an effect on the inheritance of Strategic Plan items and User Roles. You are able to view the administrative structure on this screen. Permission has been granted to view and comment on all entities reporting to you. If you have no areas that reporting to you access to your unit is all you are granted. Black type (Italics): Administrative Entity that can enter data. HELP BUTTON – For online help please click on the blue question mark on the right hand side of the screen ? The “HELP” function is user friendly, quite complete and it is where I found the answers to my questions. OK LET’S BEGIN WITH STEP #1
LOGGING IN – YOUR USER NAME AND PASSWORD • Go to WEAVE log in page • Click on “Reset Password” • Enter your WEAVE online ID Online ID is your Ramapo email address without @ramapo.edu Example: blanni@ramapo.edu Online ID is: blanni • A temporary password will be sent to you be email. • Log in with temporary password and click on “Change Password.” Create your own password for future use.
STEP #1 – MISSION AND PURPOSE STATEMENTS “Mission/Purpose” statements are expressions of the reasons your program exists. To access the site for creating or editing your mission/purpose statement, select the assessment cycle in which you wish to work and the assessment “entity” (your unit). Once the correct cycle and entity appear in the selection boxes, move your cursor to the “Assessments” tab and click on “Mission/Purpose”. PLEASE REMEMBER: When crafting your mission statement try to be clear and brief. Make it easy to remember and easy to communicate yet strong enough to inspire. Try to review your statement at the onset of each assessment cycle in order to be sure the activity of unit is being adequately reflected.
STEP #2 –GOALS To access the remaining elements of an Assessment Plan, again click on the “Assessments” tab in the top menu bar and then click on Goals. PLEASE REMEMBER: Goals brief, broad statement of intent that provide greater focus than mission statements but not as much focus as objectives. Goals provide focus or vision for planning. Goals are warm and fuzzy. They are non-specific, non-measurable, and usually cannot be definitively attained. They exhibit clear relevance to the mission statement, but remain non-specific and non-measurable. Goals are “aspirations.” For example: Ramapo College’s Strategic Planning Goal #1, Enhancing Academic Excellence. This is clearly related to the mission statement, it is non-specific/non-measurable, and it is clearly aspirational.
STEP #3 – OUTCOMES/OBJECTIVES To access the “Outcomes/Objectives” area of your Assessment Plan, click on “Assessments” in the top menu bar. This will forward you to the area for creating Goals, Outcomes/Objectives, Measures and Achievement Targets. PLEASE REMEMBER: Outcomes and Objectives are realistic targets for programs. High quality outcomes are Specific, Measurable, Achievable, Relevant, and Time-Referenced (S.M.A.R.T.) Where have you seen this before? Outcomes and objectivesare written in an active tense and use strong verbs like “plan,” “write,” “conduct” and “produce.” Who is going to do what, when, why (what will be demonstrated or achieved), and to what standard? For example: Ramapo College’s Strategic Planning objective 1.5, The College will increase access and support for underrepresented students.
STEP #4 – MEASURES AND FINDINGS To access the “Measures and Findings” area of your Assessment Plan, click on “Assessment” in the top menu bar. This will forward you to the area for creating Goals, Outcomes/Objectives, Measures, and Achievement Targets. PLEASE REMEMBER: Measures among the most frequently confused data elements in WEAVE. To help clarify what we mean when we refer to measures keep in mind, measures are sources of evidence from which you gain data or information to be used in verifying the extent to which you achieved your objectives. For example: Measures for objective 1.5 might be the number of underrepresented students will increase by 3% per year until the overall percentage reaches 30% of the student body or the number of scholarships for underrepresented students will increase by 10% per year for 5-years, etc.
STEP #5 – ACHIEVEMENT TARGETS The option to establish “Achievement Targets” is presented in the “Measures & Findings” area/ By clicking on the gray arrow beside each measure you have created, you will see an “Add” or “Edit Achievement Target” button for each outcome/objective associated with that measure. PLEASE REMEMBER: AnAchievement Targetis nothing more than a well-crafted Outcome/Objective that may also serve as your Achievement Target. In that case, you may copy and past the appropriate Outcome/Objective in the Achievement Target text area. Otherwise, simply state the outcome that you hope to achieve as verified by the associated measure.
STEP #6 – FINDINGS The option to enter “Findings” is presented in the “Measures & Findings” area. By clicking on the gray arrow beside each Measure you have created, you will see all Outcomes/Objectives and Achievement Targets for which the Measure is used. PLEASE REMEMBER: For each Objective with a Measure, Findings (or results) as evidenced by that Measure must be entered. Your “Findings” should be added in the provided text area, and you must indicated the extent to which you met your Achievement Target. If the Achievement Target was “Not Met” or only “Partially Met,” you will be required to develop an “Action Plan” to improve future results.
STEP #7 – ACTION PLAN The screen for developing the Action Plan for the unmet or partially met Achievement Target will have a “Status” option. This refers to whether the Action Plan is planned, in progress, finished, on hold, or terminated. The “Condensed Description” text refers to a title or label for the Action Plan being created. The “Description” text box is the area in which you provide a full description of the Action Plan being created. Target Date for Full Implementation” refers to the month and year during which the Action Plan improvements will actually begin implementation – or at what point the corrective/improvement effort will be initiated. “Target Date Description” provides you an opportunity to explain the reasoning associated with the timing of your improvement efforts. “Priority” allow you to indicated the relative importance of this improvement activity. Other information required includes the identification of the “Responsible Person/Group,” “Additional Resources Needed” including human, technical or other resources, and “Budget Amount Requested” (THIS IS WHERE SPIF FUNDS ARE REQUESTED) if additional financial resources are required in conjunction with the proposed action. You must complete an “Action Plan” for all “Outcomes/Objectives” that require SPIF funding at the time of the development of your “Assessment Plan.” SPIF funding requests will be collected when you develop your “Assessment Plan” and should not appear in your “Budget Submission.”
STEP #8 – ACHIEVEMENT SUMMARY/ANALYSIS After completing entry of your findings and development of Action Plans for unmet, partially met, or Achievement Targets requiring SPIF funds, the next step is to respond to “analysis questions.” By clicking on the “Assessment” tab, you can proceed to the Achievement Summary/Analysis entry screen. On this screen you will find summary information regarding status (met, partially met, unmet) for all Achievement Targets and “Analysis Questions.” Please respond to the Analysis Questions. These questions are the “Annual Report” questions you answered last year. Please note: minor changes have been made to the questions.
EXTRAS – DOCUMENT REPOSITORY There may wish to upload and store samples of assessment data. To access the document repository, click the “Assessment” tab and select “Document Repository” then click on the “Upload Document” button. The screen will refresh revealing the “document repository” screen. Click on the “Browse” button to locate the file you wish to upload. Enter a name for the file in “Document Name” text are., and provide a description of the file and its purpose in the “Description” text are. Once the file has been uploaded, you will be asked to associate it with the assessment element for which you want to use it as evidence or as a reference material. Click on the “Expand All” button or the gray arrow to open the area(s) containing the assessment element(s) with which you wish to associate the file, then click on all assessment elements to which the file is to be associated – the file may be associated with more than one element.
EXTRAS –PRINTING YOUR REPORT To access the area for printing reports, please click on the “REPORTS” tab. This will take you to the Reporting page. When on this page you must respond to: Select Cycle- (2008-2009) current or (2009-2010) Select Report- Full Assessment Report, etc. Select One or More Entities- Select your unit/area from the entity tree Then click NEXT to move to the next screen. On the next screen you must choose: Reporting Parameter- Goals (in separate section) Goals (with outcomes/objectives) What you want include in report- Analysis Questions and Answers, i.e. Then click RUN
THE END GOOD LUCK TO EVERYONE! Any Problems Please Do Not Hesitate to Contact Babs Varano: email - blanni@ramapo.eduGive call - extension 7028