Download
1 / 7
70 likes | 92 Vues
Learn how to create a paper pyramid by following a set of step-by-step instructions. Write and draw on the pyramid to showcase your research findings. This tutorial also includes guidance on finding and adding relevant images.

E N D
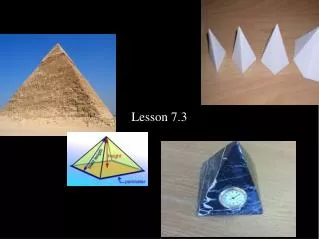
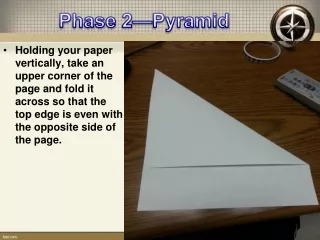
Phase 2—Pyramid • Holding your paper vertically, take an upper corner of the page and fold it across so that the top edge is even with the opposite side of the page.
Phase 2—Pyramid • Take the other top edge that was not folded and fold it across the same way you did the first side.
Phase 2—Pyramid Using scissors (do not try tearing off by hand), cut across the bottom portion of the paper.
Phase 2—Pyramid Unfold the paper and find the one crease out of the four that is creased inward. Cut up toward the middle of the paper, but do not go further than that.
Phase 2—Pyramid Your pyramid is now ready, but do NOT staple until all of your information is written out and traced over with a sharpie and your picture is drawn and colored. Bring your pyramid to me when you are finished and your name is written on the inside. I will staple your pyramid.
Phase 2—Pyramid IMPORTANT: Do NOT staple or tape your pyramid until everything is written, drawn, and colored on your pyramid. • On the three sides of your pyramid, write the following: -Side 1: Write your answers for questions 1-8.* -Side 2: Write your answers for questions 10-15.* -Side 3: Draw your country’s flag and color it. *Only write short answers on your pyramid. • Write your info on the pyramid in PENCIL first, then write over it with SHARPIE. • Once all the above is complete, bring me your pyramid and I will staple it to close out this phase of the assignment.
Phase 2—Pyramid • If, and only if you get done with your research/pyramid today, you can look for pictures to use on your Google Slide that we will start tomorrow. • You will need a picture for each question that reflects your answers on your research paper. • Use Google Images to find a picture: • Right click the picture and select ‘copy’ • Go back to your Google Doc • Right-click and select ‘paste’ to add your image to the Google Doc.