Download
1 / 2
20 likes | 30 Vues
In this PDF we will learn to import QuickBooks data with MS Excel files.

E N D
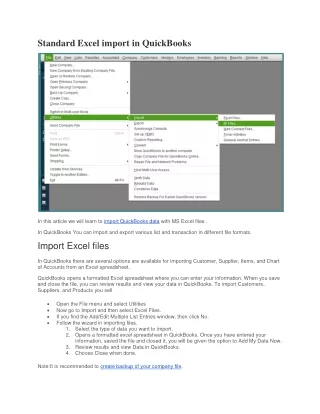
Standard Excel import in QuickBooks In this article we will learn to import QuickBooks data with MS Excel files . In QuickBooks You can import and export various list and transaction in different file formats. Import Excel files In QuickBooks there are several options are available for importing Customer, Supplier, Items, and Chart of Accounts from an Excel spreadsheet. QuickBooks opens a formatted Excel spreadsheet where you can enter your information. When you save and close the file, you can review results and view your data in QuickBooks. To import Customers, Suppliers, and Products you sell Open the File menu and select Utilities Now go to Import and then select Excel Files. If you find the Add/Edit Multiple List Entries window, then click No. Follow the wizard in importing files. 1. Select the type of data you want to import. 2. Opens a formatted excel spreadsheet in QuickBooks. Once you have entered your information, saved the file and closed it, you will be given the option to Add My Data Now. 3. Review results and view Data in QuickBooks. 4. Choose Close when done. Note:It is recommended to create backup of your company file.
To import Chart of Accounts Open the Lists menu, and then choose Chart of Accounts. Select the Account drop-down at the bottom, and then choose Import from Excel. Choose Browse to select the Excel file you want to import. Choose the file, and then choose Open. Select the Excel Sheet where the data you want to import is on. Map your accounts. Mapping your accounts tell QuickBooks how to import the data from your Excel sheet. The column headings in QuickBooks may be different from your Excel, so you’d need to match them. 1. Type in a mapping name. 2. Select Account as Import type. 3. Match the information under QuickBooks with the column headings in your Excel sheet. 4. Select Save. Select Import. If it’s your first time to import, select Yes to confirm the process. Source: https://godzillabukkake.com/standard-excel-import-in-quickbooks/