Best Practices for Pediatric Restraints and Specimen Collection Techniques
This guide covers the essential guidelines for the application of restraints in pediatric patients, emphasizing that restraint should only be a last resort and the least restrictive methods should be used. The document also outlines methods for collecting urine, stool, blood, and respiratory specimens from children, including the importance of minimizing contamination and ensuring cooperation. Medication administration is discussed, including dosage calculations specific to children's physiology. The ultimate goal is to promote safe, effective, and compassionate care for pediatric patients.

Best Practices for Pediatric Restraints and Specimen Collection Techniques
E N D
Presentation Transcript
Selected Caring Interventions Restraining Methods, Specimen Collection, Med Administration Chapter 45
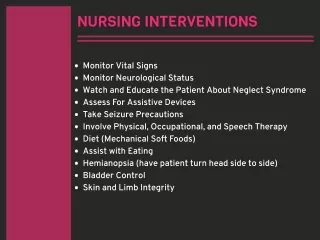
Restraint Guidelines (1265) • Make sure restraining is the last resort and use least restrictive device or method • Often eliciting help of parent can minimize the chances of having to restrain a child • Child in restraint must be checked at least as often as protocol requires—depends on whether it is behavioral or nonbehavioral restraint • If restraint is part of procedure all of the time and for all patients, it does not fall under restraint guidelines.
Nonbehavioral Restraints • Needed to ensure safe care—benefit outweighs risk. Specifically used in cases of: • Risk for interruption of O2 tx or airway patency • Risk of harm from dislodging tubes, wires, sutures • Patient confusion, agitation, unconsciousness • Developmental inability to understand instructions
Behavioral Restraint • Used in situations when there is significant risk of patient harming self or others and where nonphysical methods have not worked. • Order must be obtained within the hour • Child must be continuously observed and reassessed every 15 minutes • If need for restraint lasts less than 30 minutes, therapeutic holding is best
Types of Restraints • Jacket—for chairs or to keep patient flat • Mummy—blanket or papoose • Limb—arm, leg, elbow • Sheets and pillowcases
Therapeutic Holding • Temporary, secure, comfortable holding position • Allows close contact with parent—in some cases parents assist with holding • Can be used with many types of procedures that typically take less than 30” such as IV starts, venipunctures, tube insertion, lumbar punctures. • With some procedures, local anesthesia or oral sedatives can also be used.
Obtaining Urine Specimens (1267) • For regular UA—collection bag for infants, cup or hat for children. Gain cooperation by challenging child to show you color of their urine. • Clean-catch usually reserved for children who can follow directions and are potty-trained • Sterile specimens should be obtained by catheterization (may use feeding tube) or bladder needle aspiration (MD) • 24 hour collection—bags, indwelling caths, or a child who can be depended on
Obtaining Stool Specimens (1270) • Collected for culture, O & P, rotovirus, C-diff, blood, fat, etc. • With infants, apply urine bag to prevent contamination of stool with urine • For children, use bedpan or hat. If child also needs to void, have child do this first if possible to prevent contamination.
Obtaining Blood Specimens (1271) • May be taken from finger, heel, arm • Usually requires therapeutic holding • With venipunctures, make sure elbow is restrained • For fingersticks, give child choice of finger • Allow closeness of parent and sucking sweet pacifier for infants who need heelsticks. Warm heel x 3”; use sides of heel, not middle • Make sure bandage is applied • Have “2 try” policy with most experienced going first
Obtaining Respiratory Specimens (1272) • Includes sputum (TB, RSV), throat (strep), nasopharyngeal (pertussis), and nasal washings (RSV) • Almost always requires therapeutic holding; hands over head method is very effective • Usually need to gag child to get good throat culture • Sputum can be obtained by coughing, gastric washing, or tracheal suction • Different collection devices for different sites
Medication Administration (1273) • Know action, SEs, and safe dosage ranges • Be aware of child’s immature liver and kidneys and less circulating plasma protein that can increase chances of toxicity. • Most dosages are calculated by mg/kg (most common) or BSA (most accurate) • Always check with HCP if dosage is out of range • Be aware of institutional policies re: double-checking of dosages • Make sure to use 2 methods of ID
Oral Administration • Preferred because less invasive; however, is less predictable than injectable routes • Usually use liquid forms rather than solids to reduce aspiration risk. If liquid not available, then crush med unless it is time-released or coated • Syringe is most reliable way to give med; may use nipple for infant
Oral cont’d • Do not put in formula or in essential food • If child is uncooperative, try to find out reason and explain to child if developmentally appropriate. Sometimes parent may give med. • If holding is required, avoid putting child on back (see pic on p. 1275) • See Atraumatic Care for ideas to enhance cooperation
IM Administration • Use TB syringe for volumes less than 1 mL • Use smallest needle (25 to 30g) if needle is no longer than 1”. If longer, use 22-25g to enhance stability. May need 20-22g if med is viscous. • Lengths range from ½ to 1 ½ inches depending on size and age. • Always change needle prior to injection. • Never give injection to sleeping child.
IM cont’d • Use Z-track to lock med and prevent leak into subq; do not use air bubble. • Acceptable amounts for injection depend on size of child, but vary between 0.5 and 2 mL. • Because most children will be uncooperative and to prevent injury, holding will be needed so plan appropriately—parent may or may not want to help • Bunch up or spread, depending on size of child • Use 90 degree angle to minimize trauma and pain • Always aspirate
IM Sites • Vastus lateralis is preferred site for infants • Ventrogluteal is acceptable for all ages and is less painful than vastus • Deltoid can be used beginning at 18 months. • Make sure you know how to measure to locate sites (Table 45-4, p. 1276 and 1277) • What do you do if child wants to see needle?
Subq and Intradermal • Technique very similar to adults • Sites are same as adults • Use 26-30g ½ or 5/8 inch for subq; 3/8 to ½ inch for ID • Inject small volumes up to 0.5 mL • 45 or 90 degree angle for subq; 10-15 degree angle for ID • No need to aspirate
IV Administration • Be sure you know rate, compatibility, and dilution of med to be given • IV rates are slower than adults—usually between 10 and 50 mL/h • Double check IV drugs with another nurse • Always use a pump—its usually a policy
IV Administration cont’d • Angiocath size is usually 22 or 24g • Sites on p. 1286, Figure 45-17 • IV starter should be experienced! Some places have a policy about # of sticks • For emergencies with vascular collapse, intraosseous route may be used in children < 6 years
Other Routes—Rectal, Optic, Otic, Nasal • Biggest problem is gaining cooperation • Rectal—use little finger; hold cheeks together • Optic—same as adults; if clenching lids, put drop in inner corner • Otic—warm drops; pull pinna down and back in children < 3 yrs; up and back > 3 yrs. • Nasal—if drops, hyperextend neck off of bed; with spray, angle away from septum